Started Riveting Right Lower Inboard Wing Skin

August 12, 2012

Prev | Next

Well, we had a great day today. Taylor was coming over for our usual family dinner on Sunday night, and I conned him into coming over at 4pm instead of 6pm.

A few small things on the list before starting to close up the right wing.

First, I had Taylor start on the deburring and dimpling of all the ribs and rear spar.

It’s tedious work, and someone has to do it.

In the meantime, I got the hammer out and continued using the c-frame to finish dimpling the inboard skin.

Nicely dimpled skin.

Taylor and I traded (to help with the boredom of deburring), and I sent him outside to prime.

He got SOME of the primer on the skin. (Just kidding, it looks great!)

Then, I clecoed the flap hinge on the flap brace and countersunk the flap brace. There is absolutely NO guidance here on how to finish the three layers (flap brace, hinge, and lower skin). I followed the same process as I did on the actual flap. Dimple the skin, countersink the flap spar, and don’t touch the hinge. Worked well, here, too.

Also, I marked the hinge for trimming.

Last up, I needed to run some string down my snap bushings for future wiring.

I used a long piece of hinge pin, and taped some string through it.

This worked great for me.

After all three were done.

Finally, with nothing else to do (after thoroughly cleaning and inspecting each bay), we started clecoing on the skin.

We carefully reread the directions to make sure we were going to rivet in the right order.

1) Rivet along the rear spar toward the tip (for one “bay”) and halfway forward along the rib.

2) Start on the second bay in the same manner, then come back and finish the first rib to the front spar.

We only had 5 minutes left until dinnertime, so we got the first 6 rivets of the first (inboard) rib squeezed.

I need to do a lot of blog reading to really feel comforatble proceeding in the right order.

Still, 6 rivets is better than zero.

4.0 hours. 6 rivets.

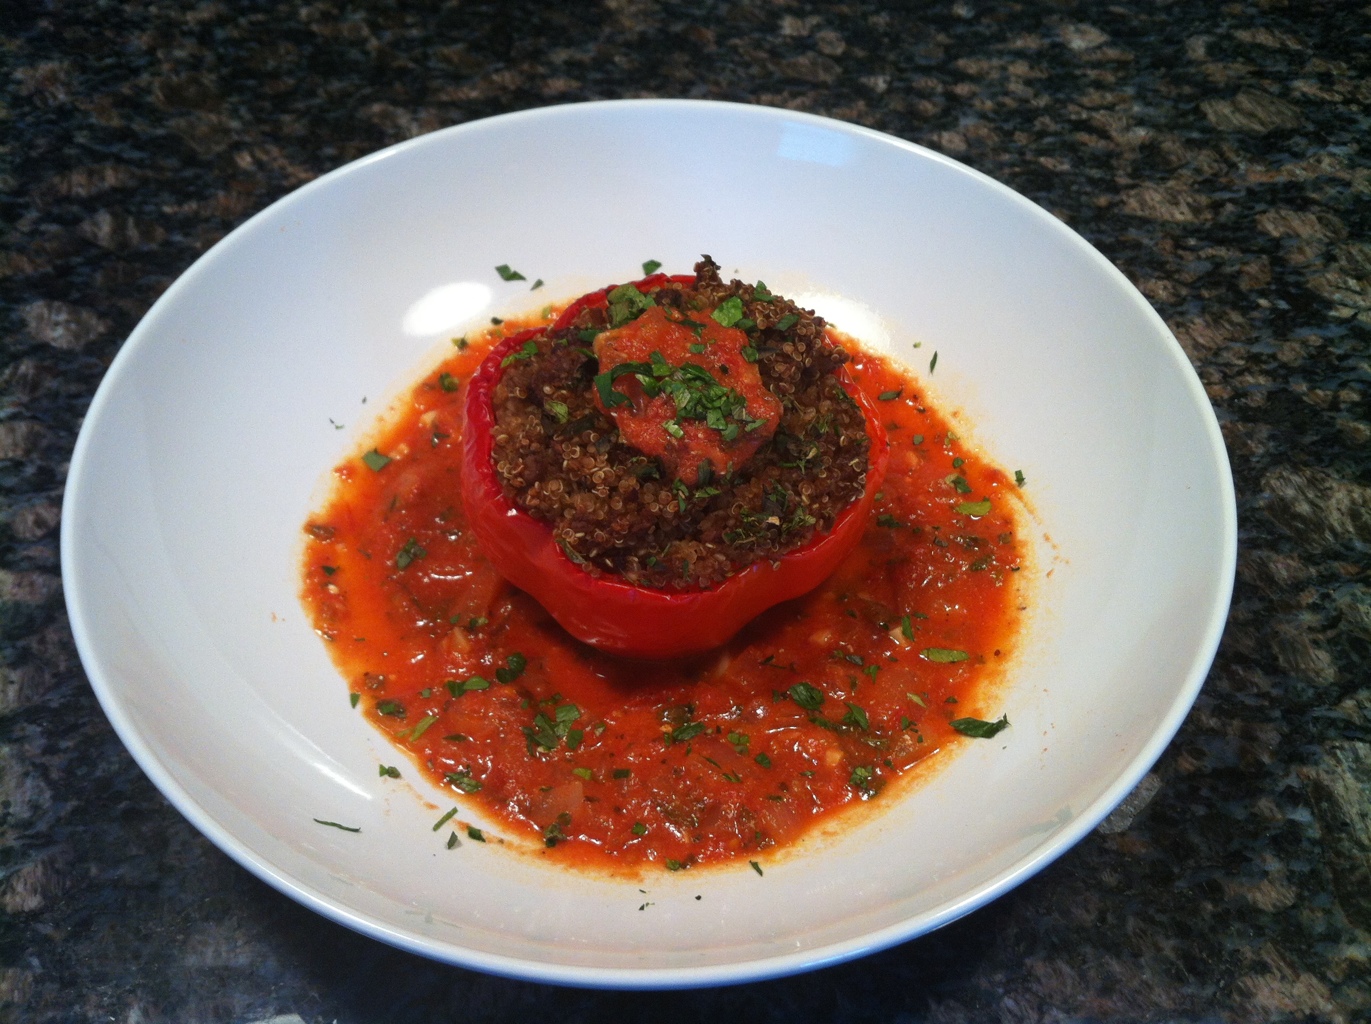
Oh, and then for dinner, these are tomato, spinach, and feta stuffed burgers.

Mmm.

With homemade pasta salad and some grilled asparagus.

So delicious.

Prev | Next


Started Preparing the Right Wing Lower Skins

August 5, 2012

Prev | Next

Well, after a busy morning at the SCBC, I did get an hour in on the lower right inboard skin. I’ve decided to go ahead and close up the right wing before proceeding. A lot of people wait until much later in the project (which the instructions say you CAN do if you want), but everyone who waits says there is no real benefit to waiting, so I’m going to go ahead and get them closed up now.

First, I pulled the skin off the wing, and then got to work. I spent about 30 minutes edge finishing, then another 30 dimpling about half the skin with the c-frame. (No, I didn’t forget to drill or deburr, I had done those previously.

This picture is from after edge finishing, but before dimpling.

After I finish dimpling, I’ll prime the inside surface. Then, I’ll deburr and dimple the wing ribs, and rear spar, but I’ll need to remember to countersink the flap brace.

1.0 hour.

Prev | Next


SCBC in Salisbury, NC 2012 Edition

August 5, 2012

Prev | Next

Just like two years ago, I woke up early this morning and headed down, via car :-( , to the South Carolina Breakfast Club (SCBC) in Salisbury, NC.

Lots of airplanes, and a few RVs scattered here and there. have fun.

Prev | Next


Finished Right Flap!

July 30, 2012

Prev | Next

Well, after approximately 6 months of completely neglecting the airplane, I finally completed another big assembly on the airplane. Here are the gory details.

Yesterday, Taylor and I got all the rib-to-skin rivets set, so today, we finished up the spar rivets and cleaned up a few badly set rivets. Here we are with the every-other method on the lower flap skin (spar) rivets.

Look! no clecos!

Then, we finished getting the two exterior ribs in place. I did make a stupid mistake here, though. The spar rivets are all AN426AD3-4 rivets, and I just continued with that size around the side to the ribs.

Those ribs are SUPPOSED to be AN426AD3-3.5 rivets, so when I went to squeeze the -4s, they all bent over and sheared.

Nastiness here.

Ahh!

After some mild curse words,  some deep breathing, and FIVE drilled out rivets, we realized our mistake and got the correctly-sized rivets in there.

Shiny bottom!

I had Taylor shine up the skins. (By “shine” I really mean “remove all of Andrew’s fingerprints.”)

Shiny bottom skin!

Shiny top skin.

I forgot how much fun it is to finish a big assembly.

It’s a wing!

1.0 hour, counted as 1.5 man-hours. 78 rivets, 5 drilled out.

Prev | Next


Almost Done with the Right Flap

July 29, 2012

Prev | Next

Taylor and I came SO close to finishing the flap today, but my amazing fiance had some chicken parm in the oven, and by the time the clock struck 6pm, we had to head in to get cleaned up.

Sorry, I’m getting ahead of myself. (The chicken parm was SO good.)

Anyway, I started the day off by finishing up some dimpling, cleaning, and priming of the two very small shims that go on the aft two holes of each end rib.

Not very exciting, but here they are.

Then, I clecoed on the top skin.

I”m so excited it’s going together for the final time.

While Taylor worked the cleco pliers to get the flap assembled to “every other hole,” I grabbed the flap side of the hinge from the wing and prepped it.

Deburred, and filed down the stump where there used to be an extra “eye.” Yes, that’s Dentyne in the background.

Gotta have fresh breath while building.

Here’s Taylor putting some rivets with tape in every other hole.

Nice action shot. I don’t get many of those when I’m building solo.

After blazing through the lower skin and ribs (goes really fast when one person is doing the clecoing and rivet-placing).

I love this part of building.

I did run into a small problem though. On the left flap, I waited to rivet the nutplate on the backside of the inboard rib. On this flap, I did it early, but then got stuck with one of the rivets. not enough room for a bucking bar, so I reverted to a blind rivet.

That one right in the middle. No big deal.

After flipping over the flap and getting all the top side rivets done (including getting the spar blind riveted into the ribs and the top skin rivets to the spar…

Oh man, we’re so close!

We don’t have that many more rivets to do. (Most of the outboard rib rivets, then the hinge-spar-lower skin rivets. That’s it.

1.5 hours today, but Taylor was so productive, I’m counting all his hours, too.

3.0 hours on the clock, 179 rivets.

PROGRESS!!!!!

Prev | Next


Dimpled Right Flap Top Skin

July 28, 2012

Prev | Next

After mowing the yard today, I was all hot and sweaty, so I decided to put in a half our on the right flap. (If I had gone inside to shower, then come back out, I would have gotten hot again, and ultimately decided not to work on the airplane at all, so I’m calling this a win.)

Anyway, the upper right flap skin was already deburred, so all I had to do was get the c-frame out and get some dimples hammered out.

After a few minutes…a freshly dimpled skin.

A more normal picture.

Half hour. But very close to starting to finish the final assembly.

Prev | Next


More Right Flap Work

July 25, 2012

Prev | Next

Alright, another night in the workshop. And, tonight was a super-night. Not because I’m super-rv7-builder (I am), but because my cousin Taylor came over to learn about the airplane.

After a little talking, I put him to work.

First task, empty out the LP4-3s that just arrived from Van’s (my first airplane package in awhile) into one of my empty yellow bins.

Not off to a great start, Taylor.

He quickly started exceeding my expectations though. To get going on this flap, the next few steps are tedious, but the two of us working helped to lessen the pain.

We focused our attention on prepping the right flap lower skin deburring, dimpling, priming, etc.

Here’s the right flap lower skin. Not a really helpful picture. Oh well.

After showing him each of those “d” activities, We stuck the skin outside and proceeded with my new non-psycho masking prime job.

(If you remember from a few posts (months) back, I’m only going to do the straight-line vinyl trick with areas where someone can see. Parts that are closed off will get this treatment.)

Priming along the rivet lines.

Next up, the same trick on the interior ribs.

Deburr, dimple, scuff, clean, and prime.

It started to get dark out, and I needed the flash. Sorry.

Then, so we could end on a high note, we studied the plans a little, read the instructions (a novelty!) and started clecoing everything together to get a sense of how we should assemble this flap.

Here, the ribs and spar are clecoed to the lower skin to lock everything together.

It’s starting to look like an airplane!

Flipped over for some more clecoing.

We decided we could start by grabbing the four AN470AD4-4 rivets at the aft end of each interior rib.

Beautiful! (Stefan, look! another shop head!)

One of Taylor’s (damn, looks better than mine!)

Just to prove he was there, I took a picture of his toes. (And an airplane part.)

Since he was so productive and really saved me some time, I’m going to count his hours as straight hours.

2.0 hours (but logged as 4.0). 4 rivets.

I know 4 hours per week won’t be super speedy, but it’s a hell of a lot better than I did between January and July of this year.

Prev | Next


Vertical Stabilizer Fiberglass Tip

July 24, 2012

Prev | Next

So the other day, one of the people in my household (I’ll let you guess if it was me or not) decided that we better clean out the guest closet before my cousin comes to visit for a little.

“What was in the closet?” you ask…

Well, a whole bunch of airplane parts, including some empennage tips.

So, we shuffled some things around, and cleaned up a little. BUT, I started thinking about where to store these things. It gets pretty hot in the garage, so I told myself that I really only wanted them out there if they were actually installed on the empennage.

Okay, that’s as good of an excuse to do some airplane work as any, so I got to it.

First step, get the VS down from the wall.

Check.

Next step: located VS-909.

Check.

There really isn’t any science to getting this thing drilled. It pretty much fits snugly in one orientation.

As a side note, the front edge of the VS isn’t perfectly aligned with the edge of the front of the tip, but I am a fiberglass master (by “master” I really mean “worked for a sailboat shop when I was a teenager, so I’m not afraid of a little shaping.”) I’d rather install the tip along the ridge meant for the top of the VS and adjust the front of the tip than the other way around.

After a few #40 holes:

It’s attached.

Then, I started digging back through my hardware bins (and this blog) to remember how I was going to attach these.

It all came flooding back. Yes, I’m going to attach them with #6 screws. (Insert long never-ending discussion about whether to make them removable.) I like the idea of eventually putting a camera in the VS tip, so here I go…)

I marked up a few .025″ strips of aluminum sheet, and cut them out.

This is from the “trim bundle.”

Then, clamped them in place.

Cleco clamps in action.

Some holes drilled, along with a #6 nutplate to help drill the attach holes.

I drilled the middle hole, clecoed in the nutplate, drilled one of the leg holes, stuck a rivet in there to hold its orientation, then drilled the other leg’s hole.

(Removed the cleco for the sake of the picture.)

After that was complete, I realized that I really wanted to sand off the gelcoat before priming etc, and that I better wait to rivet in the nutplates until that’s done as well.

For now, I turned my attention back to the VS, where I needed to enlarge the attach holes to make room for the #6 dimple die.

A quick search on the iphone…

Thanks Reiley.

I went searching through my hardware bins…

It feels good to have these open again.

…found a #28 drill, then drilled, deburred, and dimpled the four holes on each side of the VS top.

Without starting some sanding and countersinking, I think I’m stuck for a little.

Just some sanding and countersinking before I can screw these in temporarily and hang it back up on the wall.

Good night, and within a week of the previous entry. Sweet!

1.0 hour.

Prev | Next


Lemon Adobo Chicken

July 23, 2012

20120723-194635.jpg

No recipe for this one. Apparently she got it from some old recipe and it only exists in her head.

“But honey, how will all the airplane builders reading these posts get the sustenance to keep building?”

[No response yet.]


Lebanese stuffed peppers

July 21, 2012

20120721-193437.jpg

Ingredients

• 4 medium red bell peppers
• 1 teaspoon black pepper, divided
• 1/2 cup beef broth, divided (We used this new vegetarian meat stuff from Morningstar. Very delicious. And yes, a little part of me died inside. Here’s one of my man cards).
• 1 cup cooked long-grain white rice, cooled
• 1/2 teaspoon ground allspice
• 1/2 teaspoon salt
• 1/4 teaspoon ground cinnamon
• 3/4 pound ground sirloin
• 2 cups water
• 1/2 cup chopped fresh parsley, divided
• 2 teaspoons olive oil
• 3/4 cup chopped onion
• 1 teaspoon minced garlic
• 1 cup canned crushed tomatoes
• 1/4 cup water
• 1/4 teaspoon sugar
• 1/4 teaspoon dried oregano
• 1/8 tsp crushed red pepper
• 2 tbsp plain Greek yogurt
• 4 lemon wedges

Preparation
1. Preheat oven to 400°.
2. Cut tops off bell peppers; reserve (We threw them away). Discard seeds. Place peppers in a microwave-safe baking dish; cover with damp paper towel. Microwave at HIGH 6 minutes. Let stand 5 minutes. (DO NOT TOUCH THE HOT PEPPERS WITH YOUR BARE HANDS. Ask me how I know.)
3. Combine 1/2 teaspoon black pepper, 1/4 cup broth, and next 5 ingredients. Divide beef mixture among peppers; top with tops. Pour 2 cups water into dish; cover. Bake at 400° for 45 minutes. Sprinkle peppers with 1/4 cup parsley.

This last step is for some sauce. The original recipe didn’t say what to do with it, so we just spread it around the peppers. Delicioso.

4. Heat a medium skillet over medium-high heat. Add oil to pan. Add onion; sauté for 8 minutes, stirring occasionally. Add garlic; sauté for 30 seconds. Add 1/2 teaspoon black pepper, 1/4 cup broth, tomatoes, and the next 4 ingredients; bring to a boil. Reduce heat; simmer 30 minutes. Stir in 1/4 cup parsley and yogurt. Serve with lemons.