More Right Flap Work

July 25, 2012

Prev | Next

Alright, another night in the workshop. And, tonight was a super-night. Not because I’m super-rv7-builder (I am), but because my cousin Taylor came over to learn about the airplane.

After a little talking, I put him to work.

First task, empty out the LP4-3s that just arrived from Van’s (my first airplane package in awhile) into one of my empty yellow bins.

Not off to a great start, Taylor.

He quickly started exceeding my expectations though. To get going on this flap, the next few steps are tedious, but the two of us working helped to lessen the pain.

We focused our attention on prepping the right flap lower skin deburring, dimpling, priming, etc.

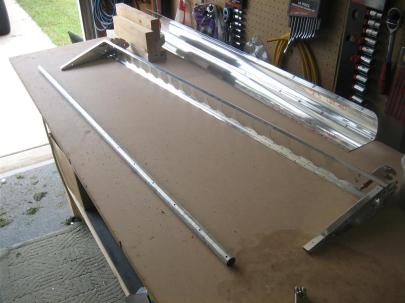
Here’s the right flap lower skin. Not a really helpful picture. Oh well.

After showing him each of those “d” activities, We stuck the skin outside and proceeded with my new non-psycho masking prime job.

(If you remember from a few posts (months) back, I’m only going to do the straight-line vinyl trick with areas where someone can see. Parts that are closed off will get this treatment.)

Priming along the rivet lines.

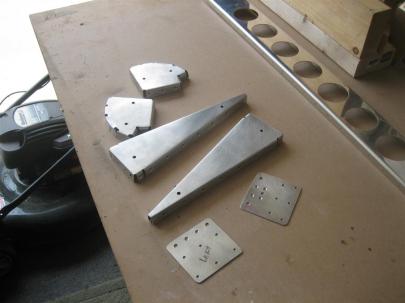
Next up, the same trick on the interior ribs.

Deburr, dimple, scuff, clean, and prime.

It started to get dark out, and I needed the flash. Sorry.

Then, so we could end on a high note, we studied the plans a little, read the instructions (a novelty!) and started clecoing everything together to get a sense of how we should assemble this flap.

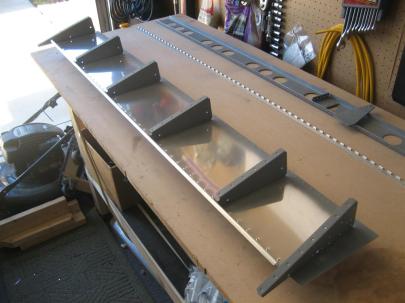
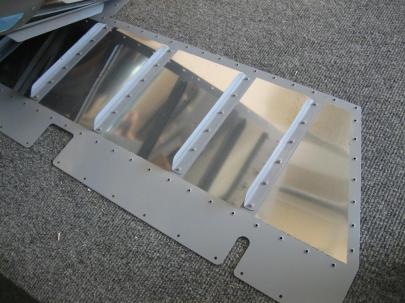
Here, the ribs and spar are clecoed to the lower skin to lock everything together.

It’s starting to look like an airplane!

Flipped over for some more clecoing.

We decided we could start by grabbing the four AN470AD4-4 rivets at the aft end of each interior rib.

Beautiful! (Stefan, look! another shop head!)

One of Taylor’s (damn, looks better than mine!)

Just to prove he was there, I took a picture of his toes. (And an airplane part.)

Since he was so productive and really saved me some time, I’m going to count his hours as straight hours.

2.0 hours (but logged as 4.0). 4 rivets.

I know 4 hours per week won’t be super speedy, but it’s a hell of a lot better than I did between January and July of this year.

Prev | Next


Riveted Left Flap Lower Skin

November 25, 2011

Prev | Next

Whoa, Andrew’s building again. I realize that if I make that explanation every time I post, then someone clicking through the posts without seeing the date stamps is going to be a little confused. Anyway, I got a fair amount done today, and I’m feeling pretty motivated to keep some progress going.

Let’s get to the pictures.

First up, I have a whole bunch of primed parts, and I felt like clecoing some together (always helps the motivation to see assemblies rather than parts).

Here’s the left lower flap skin along with the ribs. I was very careful to review the plans to make sure I got all of the flanges pointing the correct way.

And yes, the flap is upside down here.

Here it is right side up. The plans or instructions don’t really give you a lot of hints on when to set which rivets, so you kind of have to think ahead. More on that later.

It's starting to look like a flap.

Next up, let’s get the top skin ready. First thing, I removed the blue vinyl and deburred all the holes on this side (I may have de-blued last time, I can’t remember).

Deburred and edge finished. Piece of boring cake.

Next, I started to de-blue the top of the skin, but I wanted to put some clecoes in the aft portion of the skin so the skin wasn’t resting on the workbench. This worked out pretty well for me.

Scuffed and ready to flip for more deburring.

I'm about halfway through pulling off this blue vinyl. It was cold out (so why do you have the garage door open?) and the vinyl adhesive was extra sticky.

After more deburring, I broke out the hand squeezer and put some new blue tape on my dies.

Ready for action.

Of course, I didn’t get any pictures…I’m out of practice…

I did take the skin outside after some more prep and get a coat of primer on it. While that was drying, I turned my attention back to the ribs and the bottom skin built-in spar.

I set 4 of these AN47AD4-4 rivets. Pretty simple here to squeeze these.

Then, I riveted on the nutplate on the left side of this picture, and riveted each of the AD4- rivets shown.

Great manufactured heads.

Great shop heads.

Then, I backed up a few steps and riveted the other angle bracket onto the inboard half of the spar. The instructions have you do this pretty early, but I waited until everything was primed.

Same thing. Good manufactured heads here.

And good shop heads here.

Once the top skin was dry, I brought it back inside and got everything 50% clecoed.

This part is exciting, there's riveting coming soon!

After putting some of the AN426AD3-3.5 rivets in, I put tape over each of the heads, and riveted.

Ready to rivet.

Then, I took out the remaining clecos, put more rivets in, moved the tape to the unriveted heads, riveted, then removed all the tape.

(Also, I cleaned up the skin before taking this picture, because I want it to look good for you guys.)

Wuhoo! 100 rivets.

I followed the directions mostly, except I was able to buck the 3rd rivet up on the left side. The plans allow you to use blind rivets there if you want.

Blind rivets in the aft two holes.

Wuhoo. 2.5 hours, 100 rivets. I’m back at it!

Prev | Next


Primed Some Left Flap Parts

November 6, 2011

Prev | Next

Well, another week later, and I managed to get out in the garage just once. I guess it’s better than nothing.

I decided to get some of the parts finished up and primed. I always like priming parts, because that’s usually what happens just before final assembly.

I started with the spar, spending quite a bit of time deburring, edge finishing, dimpling the upper flange (remember, the lower flange was countersunk to accomodate the skin, but not intrude into the hinge), and finally, some scuffing.


You only get a picture of the scuffing. Sorry.

Then, I started in on the prep for the ribs, and I noticed that the aft flange of the interior ribs are only drilled to #40. As part of my normal prep work, I reread the plans to make sure I know which type and size of rivet goes in each hole. Apparantly, this one is supposed to be drilled to #30 for an AN470AD4- rivet.

WRONG SIZE HOLE!

So, to make some extra work for myself, I clecoed the ribs and spar back onto the lower skin (which has the “rear spar” built into it), and…

Clecoed back together.

Drilled the holes to final, #30, size.

I haven't deburred yet, so don't mind the burrs.

Finally, I spent another chunk of time prepping the rest of the ribs, and getting them cleaned up to take outside for priming.

It was a beautiful day for airplane building today.

Too bad I couldn’t put in more time….just 1.5 hours today. Blah.

Prev | Next


Prepped Left Aileron Parts

September 29, 2011

Prev | Next

Well, the guilt of not working on the airplane very much recently finally got to me and I had to do something.

As it turns out, I got the rest of the left aileron completely deburred, dimpled, edge finished, and scuffed, which means next session will be prep for priming and final assembly after that.

Here’s a shot of the aileron main skin, after deburring, scuffing, and dimpling.

Nice dimples, right?

Not sure why I took this shot, but I had to break into my next pack of maroon scotchbrite. I cut them up into ~3 inch squares to work with.

This is good stuff. I wonder how much I've bought so far.

Then, I repeated the process on the spar, and finally the leading edge skin. In addition to the fingerprints, I also used my edge-forming tool to make a slight bend in the edge.

This helps the skin lay (lie?) flat against the other skin. You’ll see.

Sorry for the bad picture, but it's hard to get a good angle where you can actually see the bend.

Here’s the edge forming tool.

It might be time for new wheels. I think these are worn out.

After the edge was formed, I put the leading edge skin up on my bending brace because it is a good place to hold it, and went down the row with the hand squeezer with some dimple dies.

Action shot!

Halfway through, I noticed my blue-tape-on-the-die was wearing out, so I removed it.

Of course, I tried a few dimples again without replacing the tape, and I got circles.

Duh.

So, I replaced the tape, and got nice dimples again.

Circles on the left, no circles on the right.

Here's a new piece of tape. No more circles.

1.5 hours. Next up: cleaning, priming, and final assembly!

Prev | Next


Some Left Aileron Deburring

September 25, 2011

Prev | Next

Well, I’ve definitely learned something about myself this weekend. After I pass the initial excitement of a completed assembly, I have a hard time repeating all of those little boring steps to get the second one done.

I’m pretty sure I experienced this on the second elevator, I’ve definitely experienced this on the left/right wings, and right now, I’m having trouble motivating enough to get finished up on this left aileron.

BUT.

The other half of this airplane isn’t going to finish itself, so let’s get to it.

A few weeks ago, I left off on the left aileron after having matchdrilled everything, so today, I got it all disassembled, and started in on the tedious crap.

Here are most of the parts (except the skin) after disassembly. Let's start prepping.

The nice thing on this second aileron is that I’ve already done everything once.

No sweat here countersinking the counterbalance pipe.

A little deeper than flush, as usual, to make plenty of room for the skin.

Oh yeah, I had forgotten to flute the nose rib between the two x’s, so I marked them with…well…x’s, so I wouldn’t forget to flute, then drill them as I was taking everything apart.

I clearly went a little overboard on the flute there. I "unfluted" a little before matchdrilling.

Then ( I guess I was bad at taking pictures today), I clecoed the skin back onto the counterbalance pipe, balanced the assembly on a 2×4 (which was part of my bending brake I had attached to my workbench), and dimpled using the die from my borrowed c-frame.

They all turned out great, like the ones on the right aileron.

Then, I got to deburring and dimpling. I worked on the ribs and reinforcement plates, leaving the spar and skins until another boring day.

asdf

One kind-of-boring hour tonight. Maybe the next few sessions will pick up.

Prev | Next


Deburred and Scuffed Aileron Stiffener Holes

August 29, 2011

Prev | Next

Umm, this is a pretty boring update, but I had to do something outside tonight. I grabbed an oversize drill bit and a scotchbrite square and did some duburring and scuffing of the stiffener holes in both aileron skins.

Tools of the trade.

I told you it was boring. 0.5 hour.

Prev | Next


Finished Drilling Right Top Skins, Started Deburring

July 25, 2011

Prev | Next

So, while today is probably kind of boring for you…it’s exciting for me.

Why is it exciting for me? you ask…

Because I’m starting on the wing skins, and that means that coming up is some wing skin riveting, and that means that pretty soon, I’m going to have WINGS in my garage.

(Oh, also, I tricked the girlfriend into putting in some manual labor on the airplane. Ha. I’m so sneaky.)

First thing’s first. I ordered two new camera batteries. The one in the camera taking the picture says “12/09.” (Thanks, sister! Still one of the most used Christmas presents of all time! The one that replaced was the original from my Aunt Jan way back in 2002. Whoa.)

Now I'll never be out of camera go-juice.

Okay, let’s get on with it. A few days ago, I was clecoing on the top skins and realized that I hadn’t finished matchdrilling them. I think I only got half of them done. (I’ll go check my entries from then…)

So, back to 50% clecoed, and out came the air drill.

Okay, let's get to drilling.

After a loud 30 minutes of match drilling (“making loud noises”), I brought the wingwalk doubler and inboard top skin into the kitchen for some deburring and scuffing.

In the middle of deburring and scuffing the right wingwalk doubler.

After mucho mucho more cramping fingers minutes, I had some deburred and scuffed inboard wing skins.

Interior side...

...and exterior side.

Next up for these will be to dimple, then prime, then rivet to the wing (after prepping the corresponding ribs).

Before that, though, let’s get the outboard top skin done.

1.0 hour.

Prev | Next


Prepped and Primed Left Elevator Skin

July 11, 2010

Prev | Next

Well, after an exiting morning with the South Carolina Breakfast Club, I was fraught with motivation. (I don’t know if I am using “fraught” correctly…)

Next thing on my long laundry list of things to do on the left elevator is to prep the skin for riveting to the skeleton. First thing, I got out the soldering iron and pulled off some more of the blue vinyl. While I was at it, I pulled off the blue painter’s tape I had been using to protect the back-riveted stiffener rivet lines.

All that shiny aluminum really makes me happy.

Then, on to deburring. I deburred both exterior sides of the skins, and then moved on to deburring the interior of the skins. I follow very closely with my maroon scotchbrite pad to help me remember where I have deburred (you can easily tell the difference between a deburred hole and one that has yet to be deburred…I am more using the scotchbrite pad as an excuse to give my fingers a rest…it is hard spinning that drill bit over and over and over).

The background holes are #40 (3/32") and the foreground holes are #30 (1/8"). I drilled these holes to #30 now because I don't want to wait until after the skin bending (at which point I won't be able to deburr them). Also, having the holes to final size will help with the annoying pop rivets that go in them.

Next up, dimpling the skin-to-skeleton holes. I scuff the interior of the skins before dimpling, because it is easier to scuff without dimples getting in the way.

I use my masking tape trick on the male dimple die, and I get ZERO circles around the dimples. So nice.

All holes dimpled.

Time to move on to edge-finishing. This little 90° corner is a tough one, but I think this ended up nice.

Edge-finishing.

After edge-finishing, I cleaned up, wiped everything down with MEK, and primed. Fast forward 30 minutes later, and now I get to pull the vinyl out of the skins (I’m trying to remind myself constantly to not forget the RTV in the trailing edge of the elevator bend before riveting.)

I probably add some time to the project by masking all of this stuff off and priming just the contacting surfaces, but I think it looks great (no one will ever see it) and I think I'm saving weight. Maybe not, but I sleep better because I do this.

It looks so good. I love this part of a subassembly, I'm getting close to riveting!

Last, but not least for the day was to prep and prime the two outboard ribs. These fit back to back and support the counterbalance and counterbalance skin.

On the priming table after getting a light coat of self-etching primer.

3.5 hours today on the project, but I’m only logging 3.0 here. See here for the other 30 minutes.

Prev | Next


Bent Left Elevator Trailing Edge

June 2, 2010

Prev | Next

Sick again today, but I did get a little work done.

First, I spent a considerable amount of time looking at the 4 horizonal holes below. The plans show them as blind rivets, but there has to be a way to get solid rivets in there.

After much deliberation, I think if I drill them to #40 now (gasp, without matchrilling!?) Then I can deburr, scuff, and dimple the area now. I’ll do the same to the equivalent holes in the trim spar, and then attach (at a minimum) the top skin to trim spar holes with solid rivets. I think I will be able to get both sides, as I am planning on cutting off the “bent tabs” from both the elevator and trim tab.

First, drill to #40.

Then, deburr interior and exterior, and scuff the interior only.

I got the c-frame out again and dimpled the holes.

I should be able to make that work out for me, but more on the bent tab cutting later on.

Next up is bending the trailing edge. After inserting and taping a 1/8" dowel in the trailing edge, I bent it in my bending brake. This picture is about halfway bent.

Then, I removed the dowel, bent it the rest of the way, and did the same with the trim tab since I was in the bending mood. (Side note, the trailing edge on the elevator looked great, but was not constant radius…it was larger radius toward the tip. I grabbed the hand seamers and gently squeezed the areas so they were all the nice crisp radius that the inboard trailing edge was.)

Trim tab bent.

Also, I way overbent the trim tab. There are no stiffeners in there to stop you, so you can basically flatten the thing, even with the dowel rod in there. I opened it back up a little by hand, but it’s not perfect. If I can’t get it back to perfect, I’m going to order another one. I think I can work with this one, though.

This is a radius shot of both the elevator only.

Here's one with the tab held in place. Looks good to me.

Another sickly hour today. Can’t complain.

Prev | Next


Primed the rest of the Left Elevator Stiffeners

May 31, 2010

Prev | Next

Tonight, I moved on with the left elevator by matchdrilling the upper stiffeners.

Here are the upper left elevator stiffeners, after trimming, being matchdrilled to the skin. First, I drilled and clecoed the forwardmost hole.

The three forwardmost holes clecoed.

After finishing, I traced the stiffener outlines on the inside and outside of the skin.

These will help me devinyl later.

You can see I have already done the lower surface of the elevator (it's upside-down on the table).

And, of course, since I forgot to add RTV to the right elevator (still trying to figure out a way to get some RTV in there), I wrote a little reminder on the inside of the left elevator.

Hopefully I'll see this as I pull out the last of the blue vinyl just before assembly.

Next, devinyl along the traced lines and then deburr and scuff.

Left elevator skin interior after devinyling, deburring, and scuffing.

Next up, I deburred and scuffed the remaining stiffeners. (I don’t have any pictures, but after this, they got dimpled and then primed.)

Because the upper surface doesn't have the trim reinforcement plate, there are 4 (instead of 3) of the short stiffeners.

Next up, devinyl and deburr the outside of the skin.

Skin devinyling.

A small tip here. I decided that at the aft end of the elevator, i would leave a little blue vinyl instead of connecting the upper and lower surface bare spots. This way, If I need to rest the elevator on its trailing edge, I won't be damaging the finish on the trailing edge.

Because it was late, I couldn’t use the c-frame.

Instead, I grabbed the hand squeezers and dimpled anything I could reach.

Just for kicks, I held up the trim reinforcement plate (and cover, still covered in blue vinyl) which will be riveted underneath the skin to the right.

Here are the other sides of the upper stiffeners getting primed.

I toook these inside for a good washing with Dawn before drying them, wiping with MEK, drying some more, and then shooting with primer.

I had a few more minutes, so I started match-drilling the skeleton. Here is one of the spar reinforcement plates being drilled to the spar.

I used my 12" #30 bit due to cleco-clearance issues.

Finally, before heading in, I shot a coat of primer on the other side of the upper left elevator stiffeners.

Nighty-night.

Prev | Next