Prepped Left Aileron Parts

September 29, 2011

Prev | Next

Well, the guilt of not working on the airplane very much recently finally got to me and I had to do something.

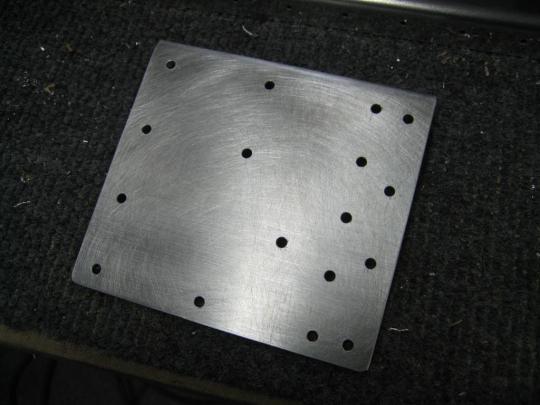
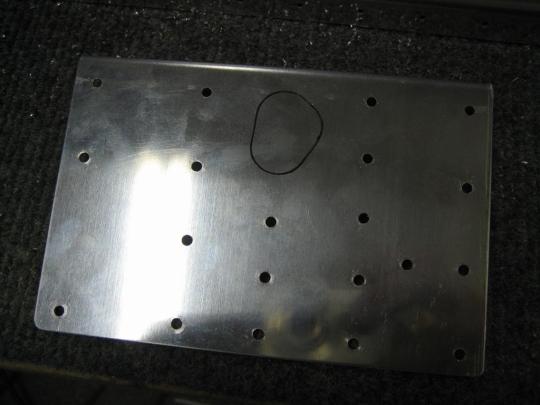
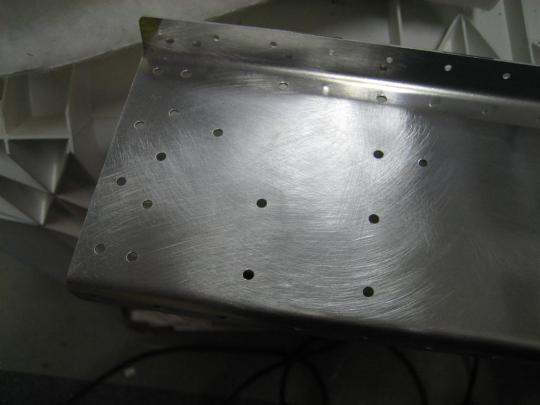
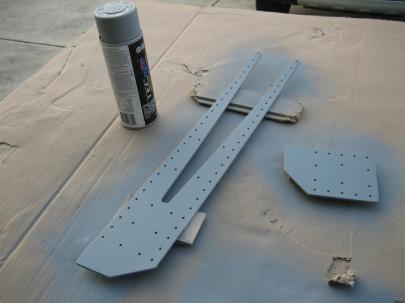
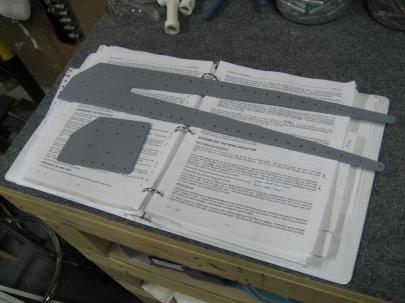
As it turns out, I got the rest of the left aileron completely deburred, dimpled, edge finished, and scuffed, which means next session will be prep for priming and final assembly after that.

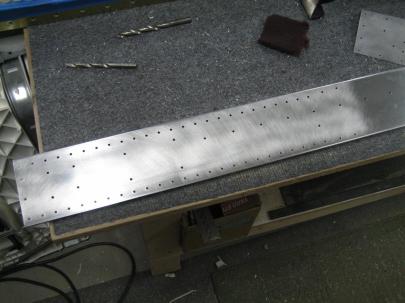
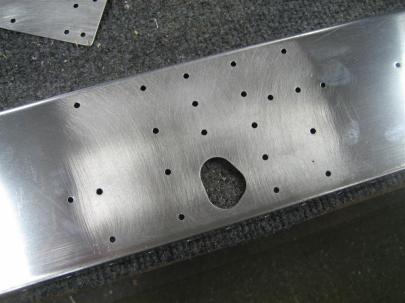
Here’s a shot of the aileron main skin, after deburring, scuffing, and dimpling.

Nice dimples, right?

Not sure why I took this shot, but I had to break into my next pack of maroon scotchbrite. I cut them up into ~3 inch squares to work with.

This is good stuff. I wonder how much I've bought so far.

Then, I repeated the process on the spar, and finally the leading edge skin. In addition to the fingerprints, I also used my edge-forming tool to make a slight bend in the edge.

This helps the skin lay (lie?) flat against the other skin. You’ll see.

Sorry for the bad picture, but it's hard to get a good angle where you can actually see the bend.

Here’s the edge forming tool.

It might be time for new wheels. I think these are worn out.

After the edge was formed, I put the leading edge skin up on my bending brace because it is a good place to hold it, and went down the row with the hand squeezer with some dimple dies.

Action shot!

Halfway through, I noticed my blue-tape-on-the-die was wearing out, so I removed it.

Of course, I tried a few dimples again without replacing the tape, and I got circles.

Duh.

So, I replaced the tape, and got nice dimples again.

Circles on the left, no circles on the right.

Here's a new piece of tape. No more circles.

1.5 hours. Next up: cleaning, priming, and final assembly!

Prev | Next


Right Tank Rib Prep

June 14, 2011

Prev | Next

Not much today, but here goes anyway.

I had approximately half a syringe full of proseal in the freezer from Saturday (I think), and it was going to go past its 4 days of freezer goodness, so I pulled it out and made my rivet encapsulationĀ dollopsĀ (umm, spelling?) a little bigger.

I still have good pathways for water, but just wanted to be sure I sealed those puppies well.

Same thing on the cap flange, except these don't look as pretty.

Then, I spent some time deburring and dimpling tank ribs.

Two done.

Dinner time!!!

For extra credit, this picture has Jack and Ginger, too!

After some more rib prep, I have 6 of the 7 ribs clecoed in place.

(Still working on the inboard rib.)

My gameplan from here onwards will be to finish up the first rib, then work on the outboard rib (there’s a reinforcement plate I have to drill), then pull one (or two) ribs out at a time, clean judiciously, put sealant on the flanges, 100% cleco in place, then rivet.

Then, make fillets, do some rivet encapsulation, and celebrate with beer.

I’m planning on one rib per night, but might get in two. Just a few more nights of miscellaneous work, then I can get started.

1.0 hour.

Prev | Next


Primed Three More Leading Edge Ribs

May 12, 2011

Prev | Next

Well, having primed leading edge ribs R4 through R6, I decided I better get them primed.

Before I could get going on the fifth and sixth ribs, I needed to crack open the leading edge landing light instructions again.

I want to make sure I get the holes for the light bracket nutplates done first.

Okay, looks like I need to go find the 10-32 nutplates.

K1000-3 nutplates...

Found them, then got the #30 to enlarge the center hole, put a cleco in, drilled one of the ears to #40, put another cleco in, and drilled the last ear.

Not many pictures with both sizes of clecos in them.

After doing all 4.

Guess what size drill I had to go find.

Yup. A 3/16″ drill…

...for the center hole.

After getting those ribs washed and the first coat of primer on them, I moved my attention back to the leading edge light holes. I forgot to drill the lens attach holes before. I held up the template, marked some holes, and fired the #40 through there.

I should have used my drill stop. Looks like I left little circles.

Same on the bottom side.

Finally, the ribs dried enough for me to bring them in the garage.

Nice ribs.

Maybe this weekend I’ll get to set some more rivets.

0.5 hours.

Prev | Next


Started Prepping Right Leading Edge

March 25, 2011

Prev | Next

Jeesh, I can’t seem to get a minute away from our third puppy to head outside and do any work on the airplane.

Tonight, finally, during halftime (go UNC!) and just after the game (wuhoo UNC!), I managed to go outside and do a couple things.

I didn’t want to do anything major; I really just wanted to go out there and get back up to speed. I’m kind of in the middle of rib prep on the leading edge, so I disassembled a few of the leading edge ribs and worked on what I labelled R3, or the third rib from the inboard side.

After deburring (back up, looks like I forgot to matchdrill some of the holes….sigh). Okay, after drilling, deburring, edge finishing, and scuffing, I now I have two right leading edge ribs ready for primer.

R2 and R3 (my numbering) ready for primer.

After pulling out the rest of the ribs (including the two outboard-ish ribs shown below), I went ahead and drilled pilot holes for the nutplate holes that are needed for the leading edge landing light installations. I had previously marked these while they were assembled with the leading edge using the provided template.

The two outboard ribs, now with pilot holes drilled for the bracket (the two small holes just above the lightening hole).

So here’s my thought. I really hate rib prep, so I’m basically going to do one at a time, then get it installed in the leading edge. To do that, I’ll need to prep (deburr, dimple) and prime the appropriate parts of the leading edge, and prep one additional rib. Generally, you want the surrounding structure in place for whatever you are riveting. Hence the need for the “next” rib to be clecoed in place while you are riveting a particular rib. If you don’t have the next one in place (have everything perfectly aligned), then the final structure may not be aligned. Make sense? No? Oh well.

So, I put the leading edge in my cradles and got to work with deburring. I got all the exterior holes deburred, did some edge-finishing with my permagrit block and my edge deburring tool and a scotchbrite pad, then started deburring the interior before my hand got tired.

Leading edge during some prep.

Oh, and out of laziness, I screwed the right tank loosely into position instead of taking it back upstairs. I think it’s going to be awhile before I get back to working on it.

It kind of has a funny shape with no ribs in it.

It was a short night, but got me back into the mood, so I’ll call it a success.

1 hour.

Prev | Next


Finished Prepping and Priming Right Wing Main Ribs

January 18, 2011

Prev | Next

Well, not much tonight, other than me getting the rest of the right wing mainĀ ribs prepped and primed. Oh, and the Tar Heels pulled out a win against Clemson. Good game.

3 of the 7 that were left.

The other 4 of 7.

1.5 hours. I think with the right main ribs done, I may get them riveted to the spars and start working on some skins before returning to the hell that is rib prep for the left main ribs.

We’ll see.

Prev | Next


Primed 3 More Main Ribs, Now 7 Done

January 8, 2011

Prev | Next

Today, I worked on ribs R5, R6, and R7. (Remember, this isn’t Vans’ number scheme, this is mine.)

First, I negotiated a larger cleco holder from the girlfriend. Ā I used to have two containers the size of the left one. Now, I have plenty of room for my clecos. (Until, of course, I have to order 200 more…)

I could fill the one on the right up if I didn't have all my clecoes in the leading edges.

Okay, back to the ribs.

The extra two on the right side needed a little touch-up from some water contamination prior to the first round of priming. Gotta let those suckers dry before spraying.

One hour to prep and prime those 3 ribs. I’m halfway done with the ribs on the right wing. I think I may start riveting the ribs to the main spar as I go to break up the monotony. We’ll see.

Prev | Next


Prepped and Primed First Wing Rib

January 6, 2011

Prev | Next

Well, since my tool order fromĀ ClevelandĀ finally showed up, I decided it was time to jump into rib prep full speed ahead. Because I have already finished most of the edges, fluted and bent the flanges to 90Ā°, I really just needed to prep the lightening holes (which I couldn’t get to with the 6″ scotchbrite wheel) and use someĀ emeryĀ cloth to get the smaller crevices.

Here’s the tool order. Along with 75 1/8″ clecos, I got 100 more 3/32″ clecos, a 2″ scothbrite wheel, the mandrel for that wheel, and some #41 and #19 drill bits.

I love new, shiny clecos.

I put a washer on the top of the mandrel and then screwed down the wheel.

Crap, not enough threads.

Took it apart, removed the upper washer, then assembled it again.

I'm showing one thread, but that's okay.

In order to start taking apart the wing to get at the ribs for prepping and priming, I needed to unjack the rear spar, which means I have to remove the leading edges, which are clecoed to the main spar before allowing the weight of the wing to bend everything.

Here are the leading edges on the workbench.

I guess I snapped a picture of my 320 grit emery cloth. (This isn’t really cloth, it’s more of belt-sanding sandpaper. It works, though.)

320 grit from NAPA.

I chucked the 2″ wheel in the drill press and started cutting grooves in it (with the ribs I was deburring).

That groove is from one rib's lightening holes. I'm going to need more scotchbrite wheels.

After completely edge-finishing the rib, including flossing the little crevices with the emory cloth, I dimpled the one hole in the rib that is underneath the rear spar flange, which also needs to be dimpled to accept a dimple in the skin. Here’s the right rear spar, lower flange hole that I dimpled.

Dimple!

Then, I primed the rib.

Still wet from primer...

The next morning, it was dry, and I snapped another picture.

Nice...

This took me about an hour, but I spent a good 20 minutes getting organized first. I won’t prime each rib individually, but I’ll probably do them in groups of 5 or so to break up the monotany. Tthere are 28 total main ribs…I’m not even going to think about the leading edge and tank ribs yet).

That one rib looks good, though. I need to think about ordering some snap-bushings for the holes in the forward edge.

Prev | Next


Fluting and Straightening Left Wing Ribs

January 1, 2011

Prev | Next

Well, today was kind of boring. Between installing the toilet back into the powder room and sitting on my butt watching football, I managed to motivate enough to go do some fluting and flange-straightening on the left wing ribs.

I didn’t hang the outboard rib yet (still have to attach a 5″ piece of angle to help support the outboard edge), but here are the first 4 (of 14) ribs done.

I'm really liking this stand.

7 of 14 ribs done and hung.

All done.

Next up is matchdrilling the main ribs, then getting the leading edge ribs prepped, assembled on the spars, and matchdrilled. Then (because I’m working a little out of order), I’ll take all the ribs off and prep them for priming before starting to rivet the skeleton together.

A boring, but important hour of work today.

Prev | Next


Prepping and Priming Some Rear Spar Components

November 20, 2010

Prev | Next

Oh man, I’m furious. I just spent some time doing a huge writeup for this post, and when I clicked, “Post”, it deleted all of my text.

Grrr.

I’ll try to rewrite it, but it is going to have a little bit of an annoying tone.

Anyway, I managed to get out in the shop today for a little. I had previously gotten all of the doubler plates and reinforcement forks matchdrilled to the spar, so today was all about prepping and priming.

Here’s W-707F, which sits on the back side of the left spar. I’ve deburred and scuffed it; all I need to do now is dimpled the outboard holes in preparation for attaching it to the spar and outboardmost rib.

I love scuffed parts. They hide my fingerprints.

Here’s W-707E, which is the doubler plate that sits on the aft side of the rear spar, right in the middle. I’ve marked the cutout for the aileron push tube. Where’s that step drill?

Yup, here you can see my fingerprints.

I started looking around for my stepdrill. I spent good money on that stepdrill, but I couldn’t find it anywhere. On the workbench, under the workbench, on the floor, in some other shelves. I thought maybe I put it in some other tool’s case, so I got out the dremel tool, multifunction tool, jig saw, circular saw, etc. Nothing.

I even accused the girlfriend of selling it on the black market to fund an bottle of Opus One. She insisted that while she thought about it, she didn’t.

I remember putting it in this old small cabinet of drawers (that my dad gave me when I graduated college…thanks, dad!). I spent about 30 minutes just pulling out each one of these drawers, looking for my step-drill. Grrr.

After continuing to work on the airplane (angrily) for another 30 minutes, I finally found it when I came back to the drawers and opened them with my other hand. Apparently my sausage fingers (they’re not, I promise…I’m just mad) blocked my view of the stepdrill, which was right behind the lip of the VERY FIRST DRAWER.

Ugh.

Anyway. Back to the rear spar. This is the forward side of the left spar, outboard end. I’ve deburred the edges of the whole spar, and now I’m deburring all of the holes I drilled.

I always scuff the areas where there are holes I've drilled and deburred. Helps me keep the "did I do this already" time to a minimum.

Oh yeah, I managed to get a couple parts primed today. Like riveting, I always feel like it is a productive day if I can prime some things.

You can also see my primer of choice, Napa 7220.

Here’s the other side of those pieces (after plenty of drying time).

I like priming.

Back to the spar, more deburring holes and scuffing.

I'll finish scuffing the whole spar when I get closer to priming.

This is the middle of the rear spar, around the aileron pushtube hole. More deburring and scuffing.

Jeesh, there are fingerprints everywhere.

Finally, I brought the two primed parts back inside.

Primed parts on the workbench always means we're getting close to riveting. Wuhoo!

After this was about when I finally found my step-drill. I was too angry at myself to keep going, so I headed inside to some grilled chicken, jasmine rice, and creamed corn. Mmmm.

1.5 hours

Prev | Next


Started working on the Elevator Tab

June 20, 2010

Prev | Next

After some more days of not doing anything, I managed to make it out to the Pilots N Paws fly-in today. It was good motivation for working on the airplane.

Anyway, I’ve drilled the left elevator skin to the skeleton, and the next step is really to take everything apart, deburr, dimple, countersink, prep, prime and assemble…

BUT…

I have some things that need to be done first. Mostly, the directions want you to bend the elevator tab “ears.” Well, I don’t think I want to go theĀ bent route. Here’s what I am worried about. I don’t think anyone would really notice, but I don’t love the way this looks.

Bent trim tab ears. I think I'm going to cut mine off and make little ribs.

I think with some work, I could make them look like this, but given how finished these surfaces are, I don’t know if they started as bent ears or riblets.

WHOA! This is awesome. This guy really finished this joint up nicely. Everybody be jealous.

Finally, I found a really nice riblets version. I like this, and this is what I am going to be aiming for (although I am going to try to use solid rivets.

Great finish on the cut-instead-of-bend tab ears. I'm going to strive to make mine like this.

Anyway, I also think cutting the ears off (not bent down in the way) will allow me to use solid rivets in the blind-rivet locations on the top and bottom of the elevator (outboard trim spar rivets). We’ll see.

First step is to get the skeleton re-clecoed in the skin.

The trim spar and the inboard rib.

Van’s wants you to countersink either piece for flush rivets (not for any real flush reason…I think they need to be #40 size holes, and they don’t give you any universal head AN470AD3 rivets). Anyway, per standard practice, I dimpled both.

Dimpled instead of countersunk.

After clecoing together the skin, I am ready to start the headscratching with the tab. Let’s find the tab spar.

There it is.

Let’s go ahead and cut off these tabs. After careful measuring and marking, I’m ready to put blade to metal.

Inboard side. I'm nervous about chopping these off.

Outboard. (see how I lined up the line parallel to the flat portion near the top and to the left of the relief hole near the bottom? This doesn't work. Read on to find out why.

After a quick snip (not too close to my final line) I removed the vinyl from the interior of the skin in preparation for using a file and scotchbrite pad to clean everything up.

Devinling before finishing those cuts.

After working carefully with a file and edge finisher…

Looks good.

Before I really finalize things, I’d like to get my tab placement set up. First, I tried using this extra piece of rudder stiffener.

It worked okay, but I later switched to something a little longer.

After some moving around and fiddling, I re-read the directions, which tell you to bend the elevator ears down along a bend line that is perpendicular to the hinge line. Well, that means that the cut lines should be perpendicular, too. Of course, like I mentioned before, my original outboard line wasn’t perpendicular. All that file work for nothing.

I drew new lines (one on top of the other, ignoring the needed clearance).

Drawing new, perpendicular lines.

Then, I made a “pretty close” cut with the snips. I’ll need to really clean this up, as well as move the line to the left for clearance purposes (I’ll wait until the hinges are drilled to really see what I need. (The instructions call for 3/32″, but that is for the blind rivet head clearance that I won’t have to worry about.)

Pretty close, but still needs trimming and finishing.

Next, I moved back to the tab. Here’s my new line.

I'm bummed because the upper part of the tab, factory provided, is not perpendicular to the hinge line. That means there will be a slight angle there. Bummer.

After getting those refinished, I got the tab mocked up. I kind of worked backward. I want to use the inboard edge and the trailing edge to get placement, then verify I have adequate clearance on the outboard edge and between the tab and elevator for the hinge (there are some hinge dimensions on the plans). I think I’ll have plenty of room.

This looks good, but I'll have to keep trimming that outboard edge.

Here's a closeup. You can see the edge near the top of the tab is angled a little left. This is how it comes from the factory. The marker line and aft portion of the tab are both perfectly perpendicular to the hinge line (line through the center of the rivet holes).
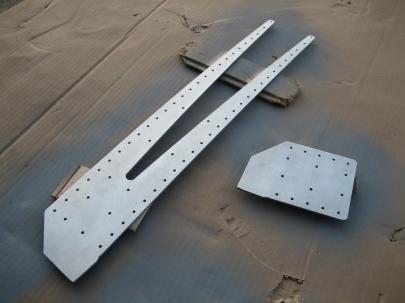
Later this week, I’ll work on getting this perfect, then tackling the riblets that need to be constructed before doing any more work with finishing the skin.

Prev | Next