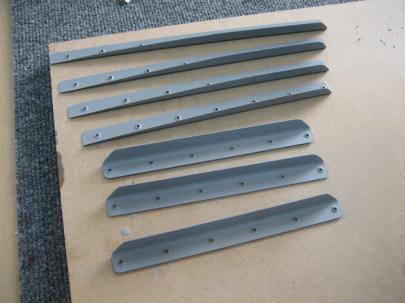
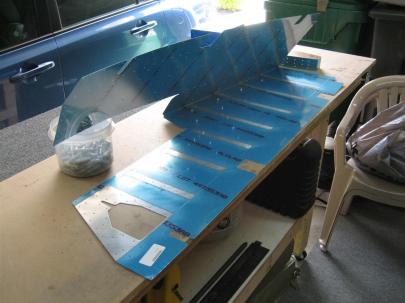
I Hate Dimpling Stiffeners

August 24, 2011

Prev | Next

Well, can you guess what the airplane-building activity was? Maybe from the title?

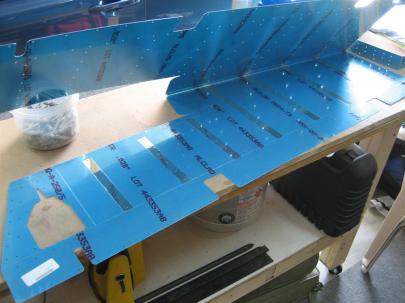
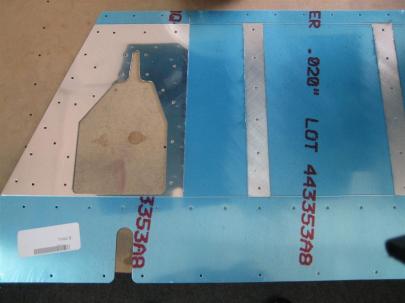
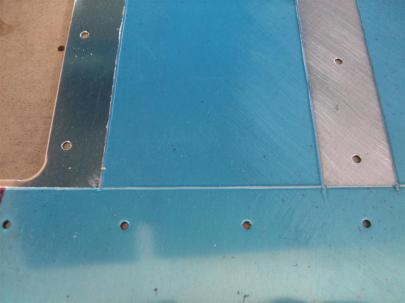
Yup, you guessed right. Deburring and Dimpling stiffeners.

Here are the tools of the trade. An oversize drill bit, spun in the fingers to deburr. And, my normal dimple dies in my economy squeezer.

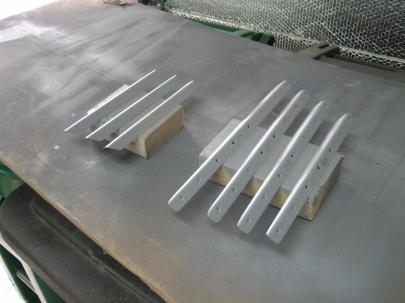
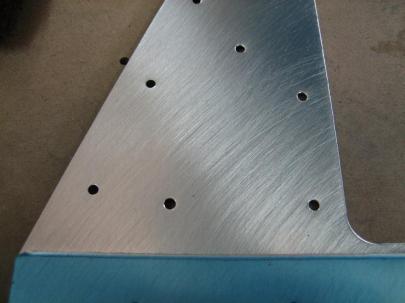
After one stiffener...

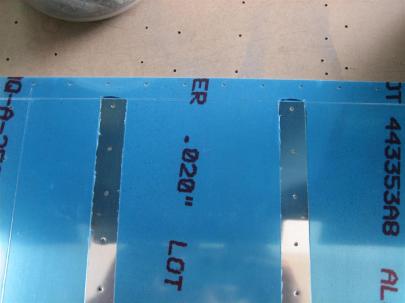
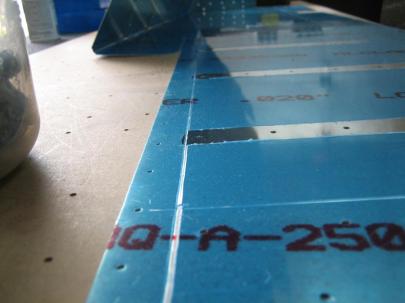
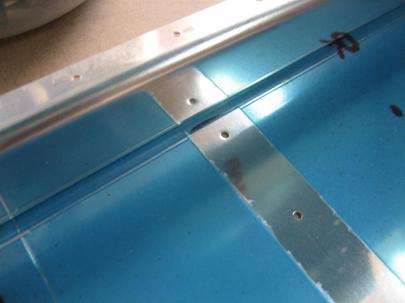
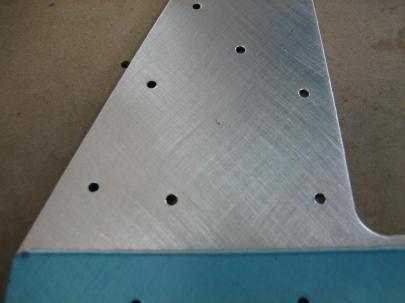
After 32 stiffeners.

For some excitment tonight (since otherwise, it would be a little lacking), let’s break out the calculator.

2 ailerons, 2 sides per aileron = 4 aileron sides.

4 aileron sides, 8 stiffeners per side = 32 stiffeners.

32 stiffeners, 7 holes per stiffener = 224 holes dimpled.

224 holes dimpled, 2 sides per hole = 448 deburred hole sides

448 deburred hole sides, 2 spins per hole = 896 spins of the drill bit.

My thumb and fore-finger hurt.

0.5 hour.

Prev | Next


I Hate Drilling Stiffeners

August 15, 2011

Prev | Next

I’m still trying to nail down a good time for continued wing skin riveting, so in the mean time, more ailerons.

But first, a little taste of how I like to walk the dogs. Or rather, how they walk me.

In the same vein as last night, I’m not really a big fan of drilling stiffeners. Maybe it’s because I’ve done it on the rudder and both elevators, but it’s just kind of boring.

You can tell it’s boring by my lame pictures tonight.

After drilling some stiffeners, a boring picture.

Halfway through the 32 total stiffeners, one of my #40 drill bits broke. Boring picture.

I labelled each stiffener with the aileron (right or left), side (upper or lower), and then 1 through 8 from inboard to outboard.

After about 45 minutes of that, I decided a nice small (15 minute) task would be to knock out the edge finishing.

Did anything assist me in that decision? Yes.

A pretty bad cut on my knuckle from dragging it across a skin edge. Ouch. (So far, this project has cost some blood and sweat. I’m sure the tears are on there way…)

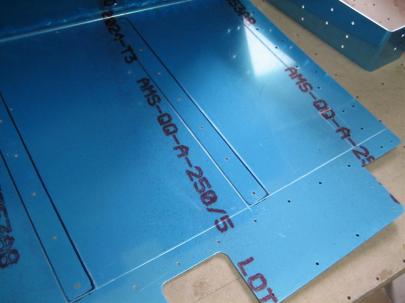
All the edges edge-finished, and some nice round corners.

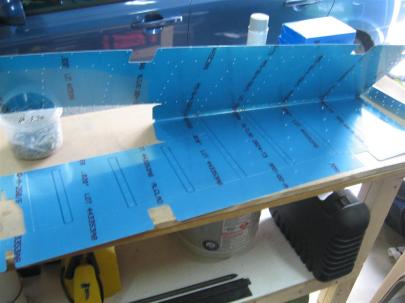
Here are both aileron skins and the four piles of stiffeners, all matchdrilled.

I may be done with drilling stiffeners. Who knows.

1.0 Hours. I bet tomorrow’s post is called “I Hate Deburring and Dimpling Stiffeners.”

(Actually I don’t hate deburring and dimpling stiffeners. I can do it inside, where the A/C is nice and chilly.)

Prev | Next


I Hate Making Stiffeners

August 14, 2011

Prev | Next

After last night’s bummer of a screw up (mis-drilling the aileron spar reinforcement plates), I woke up in a cold sweat.

I thought I was going to have to order four more little plates, just to pay some ungodly amount of shipping from Van’s to here.

Then I rememberered the “Trim Bundle” than Van’s sends you. I think there may be some 0.040″ in there.

Sure enough (after measuring, finding some 0.045″, then taking the blue plastic off, and seeing that it was really 0.040″), I had something to continue working on the ailerons.

I went ahead and marked some 0.032" that I found, as well.

After some measuring, marking, and trimming, I have 4 new pieces.

Old and new.

Instead of clamping these to the spar, I decided to just use the old pieces to matchdrill the new ones.

I've clamped the new pieces under the old ones, but in the OTHER orientation.

After some drilling, scuffing, edge-finishing, and marking, I had four new reinforcement plates.

Like new.

I clamped them to the spar, and marked the appropriate holes for countersinking.

There are two holes on the outboard end of each spar, too.

After that, I looked around, and figured there was nothing else to do except start some stiffener fabrication.

I hate making stiffeners (see title of post for emphasis). It takes forever, there are pieces of aluminum flying everywhere, your hands get cut up, but, it’s necessary.

After about an hour of cutting, filing, snipping, edge finishing, and scuffing, I have 32 beatiful stiffeners to go into the aileron skins.

8 on each of the upper and lower surfaces of each aileron.

That sucked, but as long as I can salvage the rudder stiffeners, I think those were my last stiffeners!

2.0 hours.

Prev | Next


Riveted Right Tank Stiffeners

June 8, 2011

Prev | Next

Well, tonight was the big night. I finally got started sealing up the right tank.

The general order is as follows:

  1. Backrivet stiffeners
  2. Rivet drain flange and fuel cap flange (don’t forget the vent clip!)
  3. Cleco all ribs into tank (to maintain assembly straightness)
  4. Starting with second-to outboardmost rib (the smallest area to work for bucking), seal and rivet each inboard rib. Assuming 7 ribs, from inboard to outboard, my order will be 6,3,5,2,4,7,1. That way, there’s always ribs on either side of the one I’m working on. This may be a waste of time, but it will make me feel better.
  5. Oh, before the inboardmost rib, I need to make sure I get the vent line in there, with the AN fitting, before bending and flaring the tubing to fit over the AN male fitting in the inboard rib.
  6. Install anti-hangup brackets, trap door, float sender (have to move this to 2nd bay) and flop tubes.
  7. Close tank.
  8. Have beer in celebration.

Oops, looks like number 8 will occur after each step (but only at the end of each night.)

Okay, let’s get to the pictures. I got out my new kitchen scale, the small and large popsicle sticks, rubber gloves (snap!), MEK, electrical tape, and paper towels out. Let’s see, what am I forgetting?

Oh YEAH, the Proseal. I guess it’s really called FlameMaster tank sealant, but I’m going to continue to call it proseal.

Also, I have 900 or so solo cups from my earlier partying days, and I thought those would be great for mixing proseal. (Caveat: when the directions tell you to swirl some rivets in MEK to remove the manufacturing oils, don’t use solo cups, the MEK burns through the white coating and the whole mixture becomes milky. Ask me how I know…at least I did a test before throwing in some rivets.)

First thing, I laid the stiffeners in place without rivets just to see where I needed to protect the rib lines with electrical tape.

Okay, let's start getting messy.

Anyway, I got some rivets soaked in MEK and then dumped them out on the paper towel.

asdf

I did a THOROUGH cleaning of both the skin and the stiffeners, then said a little prayer and got to proseal mixing.

I started with 2 oz. of white stuff and then added 0.2 oz of black stuff. (The picture reads 2.3 because I kept the popsicle stick.)

Oh, and I barely caught myself before using the white-stuff-soaked stick to scoop out some black stuff. That was close.

Anyway, I did my first batch in a solo cup, and I’ve decided to immediately switch to something wider and lower-lipped. In mixing the proseal, you basically push all the proseal up on the walls of the cup, and now you really only have an ounce or so to work with, because you’ve done a great job of sealing your cup. I feel like I wasted a whole bunch of proseal tonight having left most of it on the walls of the cup. Grrr.)

My first batch was the messiest because while stirring, all my gloved knuckles kept hitting the walls of the cup and gathering proseal.

Moving on, I grabbed a….CRAP…I don’t have anything to dab proseal into the dimples of the skin! Umm….Umm…

This cable tie will work! (It actually worked great, very similar to a toothpick that others use.)

Just to test out the process, I dabbed 4 holes of one of the outboard stiffeners, put some rivets in, spread sealant on the stiffener, laid it in place, and backriveted the heck out of it!

Looks okay, but why didn't you clean up the skin (you'll find out later).

Oh man, this stuff is MESSY. After reading a ton of build sites (Bullock’s, Oliver’s, Beaver’s), I was convinced I would make mine really neat compared to their’s.

By the end of the night, I felt like I was “arbitrarily slopped all over the place as a sort of voodoo talisman employed to ward off leak demons.” (Quote from Rick Galati.)

Anyway, I flipped the skin back over, put a dab of sealant in the rest of the dimples, taped over them all, flipped the skin back over, laid the stiffeners in place and got to backriveting.

Taped, ready to backrivet.

You can see how messy the outside of the skin is going to be.

It went well. The worst part is that by wet setting the rivets (sealant in dimple before inserting rivet), there is proseal all over the rivet on the other side. That means the proseal gets all over your rivet set, and therefore my hands as I steady the set during shooting (watch for my fingerprints later).

After getting all the rivets set, I grabbed more sealant and created fillets around each of the stiffeners.

Yikes, this is not very pretty.

Finally, I filled a little 20cc syringe I got from Target with sealant and encapsulated each rivet. This part worked REALLY well.

Tomorrow, the encapsulations look even better.

See my fingerprints?

As a final note, I followed Bill Repucci’s advice and resisted ALL TEMPTATION to wipe off the skin of the tank with MEK after backriveting. Apparently, some MEK might soak under the rivet head and work its way into a leak path. (No Leaks!). I’ll try the razor blade trick later, but just so you know, that’s why these skins don’t look as pretty as Bullock’s and Oliver’s.

Bill suggests using a razor blade to clean after a week or so.

In the end, it was about 2 hours and 78 rivets. not bad for a day’s work. It was wicked hot in the garage, and I was in desparate need of some refreshment once inside.

That'll do the trick.

Prev | Next


Right Tank Stiffener Prep

May 30, 2011

Prev | Next

So, among other horrible things that happened to me today (leaky toilet, Sopranos DVD that kept skipping, ground turkey burgers, which were delicious, except it was actually chicken), and dogs that are freaking out at the neighborhood fireworks, I managed to drop my ONLY set of cleco pliers behind my workbenches.

“But Andrew, you have both your workbenches on wheels,” you say?

Yes, except I still have the spar box, and it’s lengthwise under both workbenches, so I really can’t move either.

After a few minutes of maneuvering, I gathered up a few things I found under the workbenches.

I was wondering where my first-aid kit went.

Anyway, I spent about 30 minutes at the scotchbrite wheel edge-finishing my stiffeners.

After that, I got them clecoed into the skins (yes, I know I’m not doing them the same way as the elevators, I don’t think I need to drill them into wood this time).

I labeled them before continuing so I could get them back to the same spot when ready for final assembly.

Here, you can see 6A (aft) and 6F (forward).

5A anf 5F.

1A and 1F. I only show these because Van's cautions everyone to have enough room to the left of these stiffeners for water (contamination) to flow to the drain to the lower left. I think I've got plenty of room.

Then, I got to drilling. I went a little different route and drilled from the outside-in.

Lot's of clecos.

After drilling, I spent the last 30 minutes of my work session tonight deburring the holes, then scuffing just the bottom side (becuase that’s where the pro-seal will go), and finally dimpling the holes in the stiffeners using my tank dimple dies from Avery.

1st one done.

Wash. Rinse. Repeat.

All 12 complete.

All that’s left before actually breaking out the pro-seal is:

1) Cleaning these stiffeners up (along with the drain flange and filler cap)

2) Deburring, scuffing, dimpling, and cleaning the skin.

At that point, I can rivet the stiffeners, drain, and cap in. Then I’ll start into the ribs, but I’ll need to do a whole whole bunch of finishing on the ribs, too.

1.5 glorious hours of edge-finishing, drilling, deburirng, and dimpling.

Prev | Next


Right Tank Stiffeners, Z-Brackets, and Countersinking

May 27, 2011

Prev | Next

First thing, I have to give some mad props to Van’s.

If you remember from yesterday, I put in a web order with Van’s for some stuff. At the top of my list was that leading edge rib I messed up a few posts ago, and I FORGOT TO ORDER THE RIB!!!

Anyway, here’s how a short interaction with Van’s (e-mail):

Me: Good morning, Barb…[snip]…Is there any way you can add an item to my order? I need one of the following, copied from “the list”: W-408-1R, NOTCHED NOSE RIB 032, $23.80. If not, I understand…it was my error. But if so, thank you so much!

Within an hour (and definitely before normal business hours in OR):

Barb: Andrew, I have forwarded this on to our parts department who will download
the web orders this morning and get it added to your order.  Barb

Then, after about another hour:

Dear Andrew,

The part was added to your order as you requested.  I just caught it
prior to being shipped this morning.

Pam
Van’s order dept.

Oh man, Van’s is awesome. Also, I figured out from the charge that shipping (UPS ground) and handling from Van’s was about $15. Not bad.

Anyway, being a Friday, I was looking for something relatively painless to do tonight. I pulled out the T-711 bundle and started in on the stiffeners.

Here's the bundle.

I ended up getting all of the stiffeners ready, for both tanks. I’ll put the ones for the left tank away until I’m ready to do that tank.

Below you can see 3 of the four sizes of stiffeners. The fourth size is pretty small, and I left them out of the picture.

Three sets of long, one set of kinda long, one set of kinda short.

Lastly, I took off all of the vinyl. If I were smarter, I would have pulled the vinyl off before cutting them. It would have been a lot easier.

Pile-o'-vinyl.

It was a little late to fire up the scotchbrite wheel, so I pulled out the right z-brackets and clecoed them to the spar. I spent a good five minutes staring at the plans to make sure I had them in the right orientation.

I'm doing this because I never matchdrilled the rear flanges of the interior ribs. The z-brackets and baffle are full-size holes, so I just need to run the drill through them with the flanges in place.

Drilling some holes.

Moved the clecos, drilled the other three.

Then, since I wasn’t too tired yet, I broke out the microstop countersink and started countersinking the skin-to-baffle holes. You do this so the baffle is easy to slide in place with the all pro-seal flying around. If it were dimpled, it would be harder.

Countersinking a skin this thin definitely leaves a knife-edge, but that’s what Van’s calls for here.

I’m planning on using the thicker tank dimple dies everywhere else, which should leave a little extra room for proseal underneath the rivet head, but I couldn’t bring myself to deepen these countersinks at all. We’ll see if it works out.

Looks good to me.

Much countersinking ensued...

A closeup, for those of you who are interested.

Anyway, it as a nice night in the garage. 1 hour, and getting closer to the black death.

Prev | Next


Bent Left Elevator Trailing Edge

June 2, 2010

Prev | Next

Sick again today, but I did get a little work done.

First, I spent a considerable amount of time looking at the 4 horizonal holes below. The plans show them as blind rivets, but there has to be a way to get solid rivets in there.

After much deliberation, I think if I drill them to #40 now (gasp, without matchrilling!?) Then I can deburr, scuff, and dimple the area now. I’ll do the same to the equivalent holes in the trim spar, and then attach (at a minimum) the top skin to trim spar holes with solid rivets. I think I will be able to get both sides, as I am planning on cutting off the “bent tabs” from both the elevator and trim tab.

First, drill to #40.

Then, deburr interior and exterior, and scuff the interior only.

I got the c-frame out again and dimpled the holes.

I should be able to make that work out for me, but more on the bent tab cutting later on.

Next up is bending the trailing edge. After inserting and taping a 1/8" dowel in the trailing edge, I bent it in my bending brake. This picture is about halfway bent.

Then, I removed the dowel, bent it the rest of the way, and did the same with the trim tab since I was in the bending mood. (Side note, the trailing edge on the elevator looked great, but was not constant radius…it was larger radius toward the tip. I grabbed the hand seamers and gently squeezed the areas so they were all the nice crisp radius that the inboard trailing edge was.)

Trim tab bent.

Also, I way overbent the trim tab. There are no stiffeners in there to stop you, so you can basically flatten the thing, even with the dowel rod in there. I opened it back up a little by hand, but it’s not perfect. If I can’t get it back to perfect, I’m going to order another one. I think I can work with this one, though.

This is a radius shot of both the elevator only.

Here's one with the tab held in place. Looks good to me.

Another sickly hour today. Can’t complain.

Prev | Next


Backriveted Left Elevator Stiffeners

June 1, 2010

Prev | Next

I wasn’t feeling well today (sore throat, could harldy swallow), but after a nice long sleep-in and a nap in the afternoon, I went out to the garage partly because I wanted to sweat out some of the demons. I didn’t take a ton of pictures, but I managed a few.

I broke out the c-frame and dimpled the skins.

First up, skin dimpling.

I did much better on the trailing edge dimples than last time (see this post).

This is the worst one, but it still looks great, and is hardly noticeable unless you are really looking for it.

After dimpling, I wiped down all of the scuffed areas with MEK to rid them of fingerprints (oils) aluminum dust, moisture, etc., and then primed.

Primed interior. Notice how I leave a lot of the blue vinyl on the skins? This helps keep weight down (although undoubtedly adds to build time while I painstakingly trace around the stiffeners with a marker and use those lines to devinyl.

Moving back to the skeleton, I mounted a one-leg 1/4″ nutplate in the forward tooling hole of the counterbalance and tip ribs. This will hold any future weight I need to balance the elevator with paint.

I used an undersized countersunk screw in the tooling hole to help locate the nutplate, then drilled one hole and clecoed from the back.

Both holes drilled, and the main hole enlarged to something a little larger than 1/4"...I can't remember...maybe 5/32"?

Next, I moved back to the spar. I have read where a few people have added a hole in the lightening hole area of the elevator control horn/spar area. The right hole is for manual trim or for the (what I’ll call “retracted”) jack screw and wiring runs for the electric trim motor. I, like others, don’t like the idea of the wires and jack screw sharing the same hole, so I drilled another hole, in which I will add a 3/8″ snap bushing.

Pilot hole eye-balled.

Crap, I didn't even get a picture of the final size hole. (I drilled it to 3/8".)

After completed the extra hole, I noticed the skin was dry. Nothing to stop me from backriveting, now.

Rivets place in, and taped to, the first stiffener row.

Same thing with the trim reinforcement area.

After backriveting the trim reinforcement. Man, this makes me happy.

The next couple rows, done.

The bottom half went smoothly. The top half now has rivets taped in place.

Where are those stiffeners?

This isn't a very exciting picture, but they are all riveted.

Here's the inside.

I love this picture. This is the trim reinforcement plate area.

So nice. (That scratch at the top is very superficial. It'll buff right out, I promise.)

Biggest lesson today was about the aft-most rivet in the stiffeners. When bending the skin out of the way to reach that rivet, everything twists out of alignment. If you start with that rivet, it is easier to make sure everything is flush than if you rivet the forward ones first. Start from the back and move forward. You will get better results.

Prev | Next


Primed the rest of the Left Elevator Stiffeners

May 31, 2010

Prev | Next

Tonight, I moved on with the left elevator by matchdrilling the upper stiffeners.

Here are the upper left elevator stiffeners, after trimming, being matchdrilled to the skin. First, I drilled and clecoed the forwardmost hole.

The three forwardmost holes clecoed.

After finishing, I traced the stiffener outlines on the inside and outside of the skin.

These will help me devinyl later.

You can see I have already done the lower surface of the elevator (it's upside-down on the table).

And, of course, since I forgot to add RTV to the right elevator (still trying to figure out a way to get some RTV in there), I wrote a little reminder on the inside of the left elevator.

Hopefully I'll see this as I pull out the last of the blue vinyl just before assembly.

Next, devinyl along the traced lines and then deburr and scuff.

Left elevator skin interior after devinyling, deburring, and scuffing.

Next up, I deburred and scuffed the remaining stiffeners. (I don’t have any pictures, but after this, they got dimpled and then primed.)

Because the upper surface doesn't have the trim reinforcement plate, there are 4 (instead of 3) of the short stiffeners.

Next up, devinyl and deburr the outside of the skin.

Skin devinyling.

A small tip here. I decided that at the aft end of the elevator, i would leave a little blue vinyl instead of connecting the upper and lower surface bare spots. This way, If I need to rest the elevator on its trailing edge, I won't be damaging the finish on the trailing edge.

Because it was late, I couldn’t use the c-frame.

Instead, I grabbed the hand squeezers and dimpled anything I could reach.

Just for kicks, I held up the trim reinforcement plate (and cover, still covered in blue vinyl) which will be riveted underneath the skin to the right.

Here are the other sides of the upper stiffeners getting primed.

I toook these inside for a good washing with Dawn before drying them, wiping with MEK, drying some more, and then shooting with primer.

I had a few more minutes, so I started match-drilling the skeleton. Here is one of the spar reinforcement plates being drilled to the spar.

I used my 12" #30 bit due to cleco-clearance issues.

Finally, before heading in, I shot a coat of primer on the other side of the upper left elevator stiffeners.

Nighty-night.

Prev | Next


Primed Some Left Elevator Stiffeners

May 29, 2010

Prev | Next

Not too much today. I got the lower left elevator stiffeners deburred, dimpled and primed.

Here are some of the stiffeners on the priming table.

Then, I turned my attention back to the skin to start devinyling.

Left elevator, ready to be devinyled.

Here are a couple lines showing my devinlying process. These are made with a soldering gun held against a wooden straight-edge.

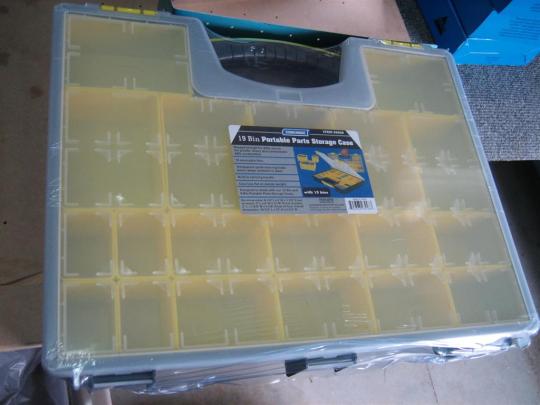
Oh yeah, almost forgot. I stumbled across another Harbor Freight coupon. I bought this ~$10 storage container for wing hardware.

I have two already, one for rivets, and one for Empennage hardware. I assume I'll need a third for wing hardware (I'll combine the rivets from wing and emp if need be).

Okay, back to the project. I’ve pulled off some of the vinly strips.

Pulled off some of the vinyl strips.

Here, my devinyl line overlaps the tracing a little.

Another angle here.

So I put the trim spar in position, and realized I could move the line back a little, so that's what I did.

Next, I deburred and scuffed the skin in preparation for dimpling. (It’s easier to scuff before dimpling.)

The lines to the right have been scuffed, the trim spar reinforcement area has not.

A closeup of scuffed versus not-scuffed.

To scuff an area (in preparation for priming), I scuff in one 45° direction…

45° to the right.

Then, 90° from that.

All done. You can sort of see the two directions.

Finally, some dry stiffeners, ready to be backriveted to the skins.

Pretty stiffeners.

I always like to take a big picture shot at the end of the day.

Left skin, ready for dimpling.

Tomorrow, maybe a little skin dimpling, priming, and backriveting stiffeners.

One hour.

Prev | Next