Riveted Nutplates On Right Wing Z-Brackets

February 22, 2011

Prev | Next

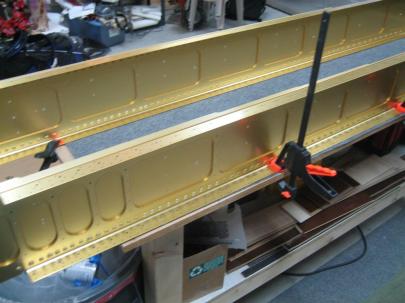
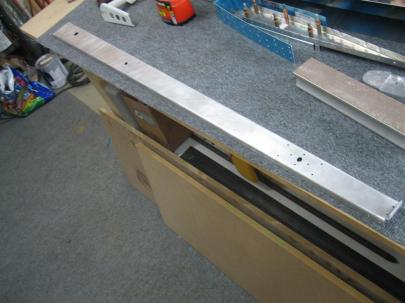
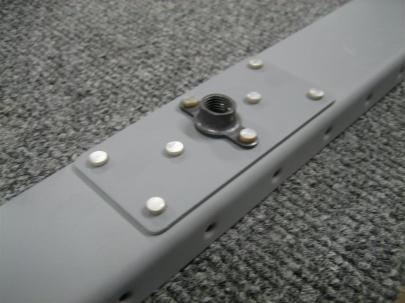
Well, nothing too exciting, except I got to bang* on some rivets.

* By “bang” I mean “squeeze.”

After the other night, I have 7 z-brackets that are matchdrilled to the spar. Six of those seven need nutplates on them.

I grabbed a cleco, a (sacrifical) nutplate, an AN3-4A bolt, and a handful of washers (so I don’t engage the locking portion of the nutplate).

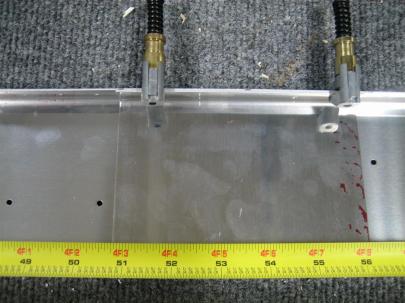
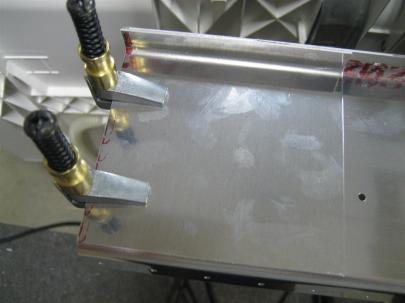
Bolt with washers goes in the hole, nutplate on top, hand tighten in a reasonably aligned orientation, and drill one of the holes for the nutplate ears through the angle.

Then, add a cleco and drill the other side.

Easy as PIE.

See? Easy!

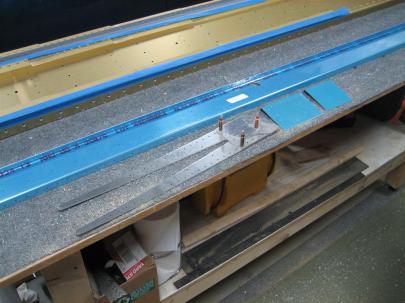
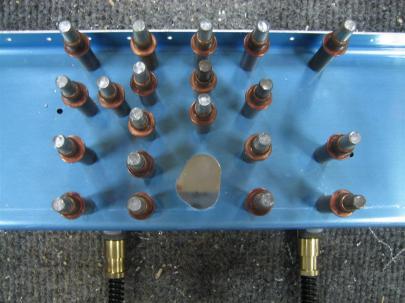
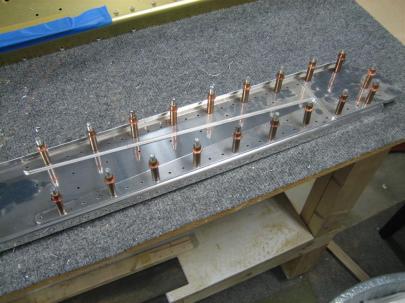
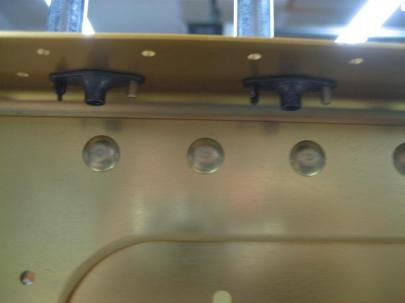
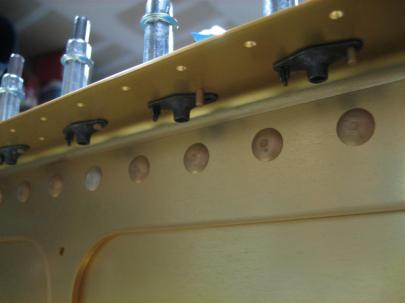
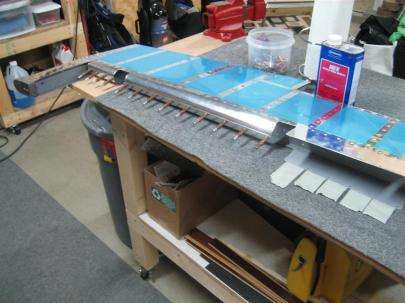
After completing the first three sets, I snapped this picture.

3 down, many to go.

I think it was…[thinking]…6 angles, three bolts each, 2 holes for each bolt…36 holes?.

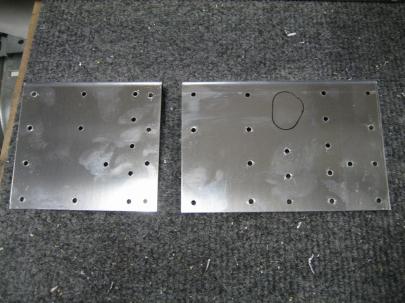
After all was said and done, the sacrifical nutplate had been thoroughly abused.

I almost threw it away, but then decided to keep him in his own little container. I can't just throw away a nutplate that has served me that well!

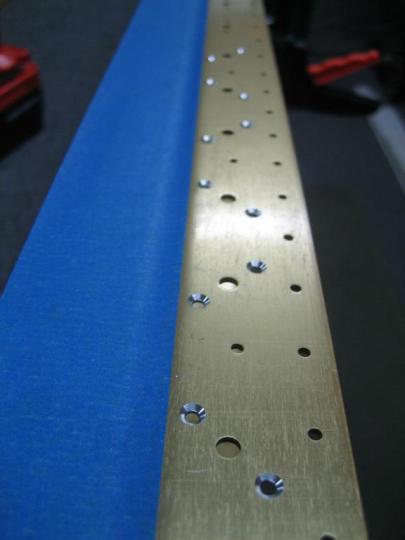
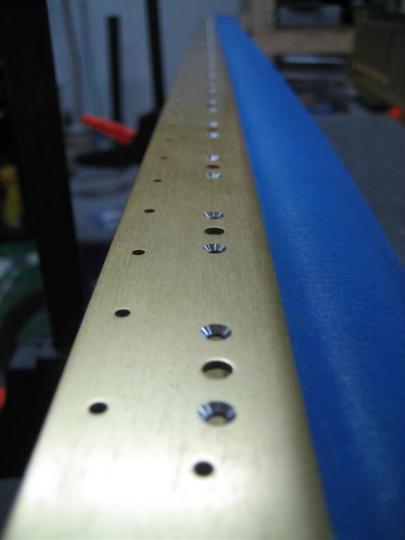
I deburred the holes that won’t be countersunk, and moved on to countersinking. I thought about using oops rivets, but since this material is so thick, I went ahead and countersunk for a full-depth AN426AD3-4 rivet.

Guess what I found when I picked up my countersink cage?

IT WAS ALREADY SET FOR THE PROPER DEPTH! WUHOOOOO!

(It’s the little things in life that really matter.)

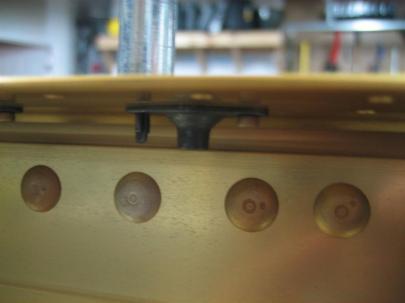
Anyway, here’s one hole done.

Looks okay here...let's try a rivet.

Perfect depth.

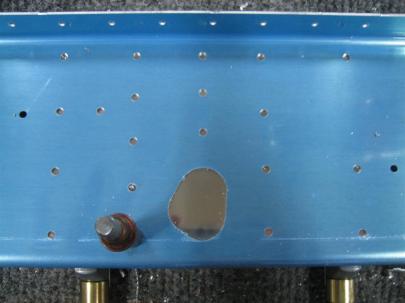
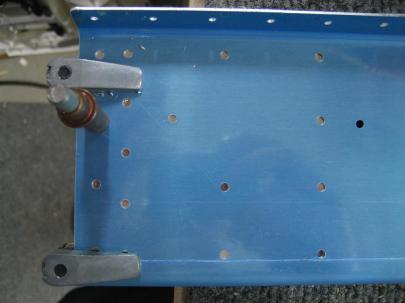
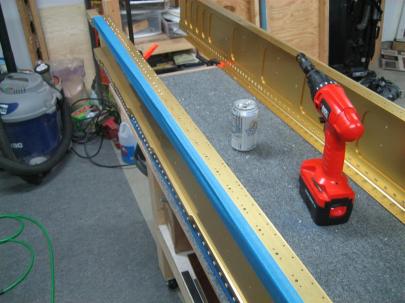
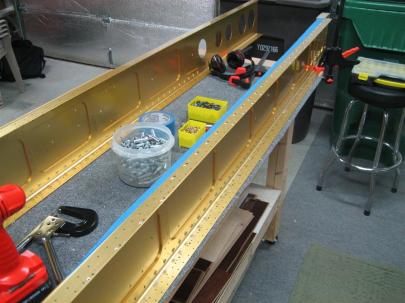
While I was countersinking, I went ahead and did the FRONT side of the spar, too. (The nutplates go on the back of the spar, the bolts for the inboard z-brackets are fed in from the front.)

The countersink on the far left isn't perfect, I need to revisit this before riveting. The cage prevented me from getting a good angle on it.

Then, back to the z-brackets for some riveting.

First one done.

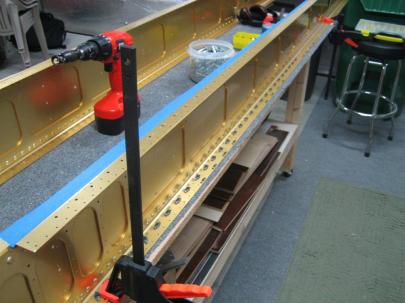
Then, onto the rest. All clecoed up, ready for rivets (in the background).

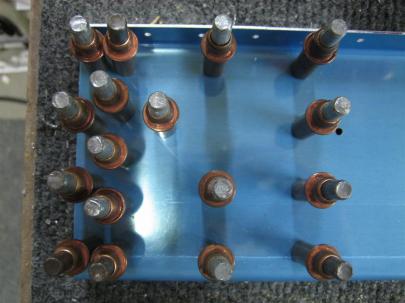
R3-R7 read to go.

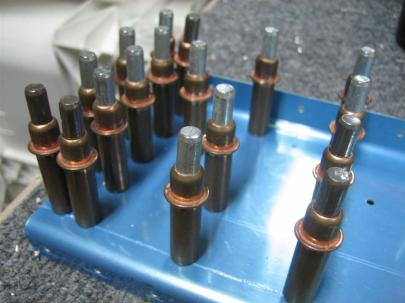
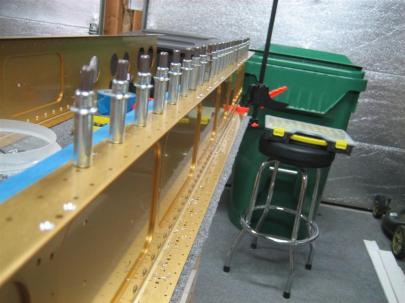
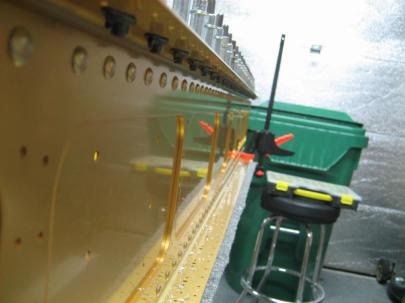
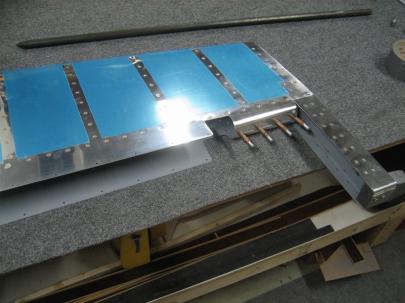
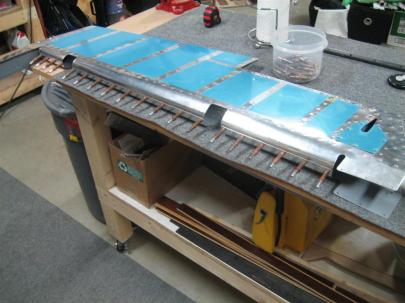
Then, after setting 36 rivets, I set them all back up on the spar. No bolts yet, though. I’ll save that for tomorrow.

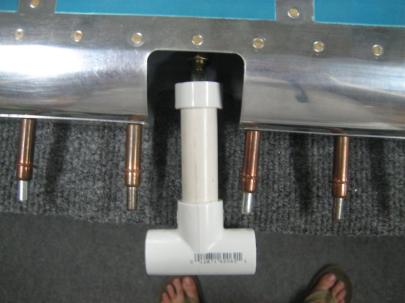
You can see R1 (which fell over) through R6 here. R7 is hiding behind the leading edge.

It’s late, and I need to get inside to bed.

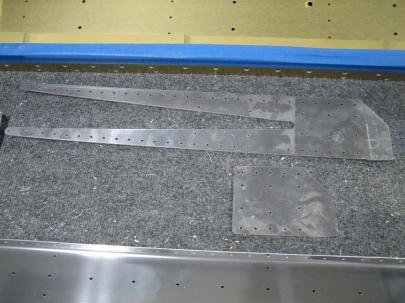
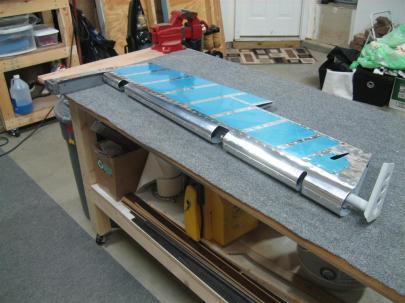
But first, I grabbed all the tank parts for the right tank and quickly mocked them up with no clecos in my cradles. That’s the baffle leaning up against the cradles in the foreground.

I'm actually looking forward to the tank. Kind of.

It was just over an hour, but not quite an hour and a half. I think I rounded down last time, so this time, I’m going to call it an hour and a half.

Oh, and I almost forgot, I had to drill one rivet out. Just plain old messed it up.

Until next time…

Prev | Next


50% Clecoed Right Wing Skins

February 7, 2011

Prev | Next

Well, my order of clecos showed up. It was in a pretty small box on the front step, but that little tiny box was deceptively heavy.

After unpacking the box, I noticed that this bag is a bag of 500 clecos.

They actually opened the bag and removed 100 clecos to get to my order of 400. I wish I had known, I would have ordered another 100 just to save them the trouble of counting them all out.

Bag o' clecos!

Anyway, I emptied them into my (now empty) silver cleco bin (an old tupperware container).

I even left the automatic flash on so they would shine a little extra for you.

These things are brand-spanking new. And made in the USA.

U.S.A!

Some people on the forums were pointinng out that I got a heck of a good deal at $0.35 each, and they suspected they were not going to be the new, USA-made clecos.

Well, these are new.

This next picture shows a few of my different kinds of clecos. From left to right:

1) Clekolok USA, new today (from Innovative Tool Supply)
2) Kwik lok USA, purchased about a year ago (from the Yard)
3) Kwik lok USA, purchased about a year ago (from the Yard’s used bulk area)
4) Unknown, purchased about a year ago (from the Yard’s used bulk area)

New to old, they all work the same. I haven't noticed any degradation of holding power.

Anyway, I then spent the next half hour sticking these new clecos into my right wing.

Based on a conversation with Bill Repucci, I’ve decided to mitigate all of my alignment concerns by just 50% clecoing the wing. (50% meaning every other hole, as opposed to 25%, which would be the Van’s suggested everth fourth hole.)

I have to admit, that thing is rock solid now.

The right top skins with a cleco in every other hole.

I looked at my new cleco stash and realized I was about halfway through them already.

Crap... those went fast.

After another half hour of every other hole clecoing the right bottom skins, I reached in my cleco bucket and only had two clecoes left.

Uh oh.

Darnit.

I almost made it with 600 clecos.

There are a few missing clecos along the rear spar (towards the bottom of the picture).

When I get to that area during matchdrilling. I’ll just move some of my clecos from other areas.

1 hour of clecoing fun.

Contrary to what other builders have to say, my hand isn’t that tired, and I therefore don’t intend on spending $200 for a pneumatic cleco runner. Take that!
Prev | Next


Clecoed Bottom Skins and Leading Edge on Right Wing

January 31, 2011

Prev | Next

Oh man, what a great day!!

After some good advice to stop worrying about the wing twist too much (“you’ve got a pre-punched kit, it’ll work out”), I got started on some of the next tasks on the right wing. First, I clecoed on the right top skins, and then grabbed the right leading edge and sat it on the main spar.

Looks like a wing!

Oh wait. One of the next steps is to trace some lines on the lower skins (forgot those) that intersect at the tiedown hole so I can transfer those lines to the leading edge so I can verify that the leading edge prepunched hole for the tiedown is correct. I haven’t attached the tiedowns yet, so I went searching for the hardware.

Apparently you need an AN3-7A bolt, a couple AN960-10 (and L) washers, and an AN365-1032 nut.

I couldn’t figure out which washer (skinny or fat) goes on which side of the spar, so I looked at the tiedown area of one of the drawings (can’t remember which one.)

First, though, I have to finally sort out which washer …-10 or …-10L is the skinny one. Turns out, I should remember that “L” means “lean” (not really, but that’s how I’ll remember it.

AN960 Flat Washers
Bolt Size OD Thickness Part No.
#10 0.438″ 0.063″ AN960-10
#10 0.437″ 0.032″ AN960-10L

Anyway, I hope that having looked that up now, I’ll remember which is which.

Okay. Looks like the -10L washers go on the bolt head side of the AN3-7A bolts.

Then, I realized that I don’t really need to tighten these things up. I’ve got some work to do in the future on the bellcrank brackets and bushings, etc., so I really just need to set these in place.

After putting the four bolts through the tiedown and clecoing on the bottom skins, I've got this.

Next, they want you to draw a few lines on the bottom skin that intersect at the tiedown hole.

You can just barely see my lines on either side of the access hole.

Next, I slapped the leading edge into place (but first had to notch my angles…bummer).

I only had to notch very slightly. Still very annoying to me.

After starting (pronounced “attempting”) to cleco on the leading edge, I realized I am going to need some mechanical advantage to snug everything up so I don’t have to use the clecos to pry things into place (a big no-no).

I got out a few 2x4 scraps and placed them against the rear spar. (This is so the straps don't put any pressure on the aft end of the skins.)

Strapped! (Not very much, just enough to act as a third hand while clecoing.)

After a good  30 minutes of the most difficult clecoing on the project, I had the leading edge nice and secured to the right wing.

Notice the amount (lots) of clecos on the aft part of the leading edge.

I think this is just a picture of the bottom side of the right wing.

Then, I extended my lines back onto the leading edge.

The intersection of the lines is sooooooo close.

I didn’t really believe I was off a little (although this is normal), so I grabbed this picture from the inside. (Depending on how precisely you place the tiedowns when you measure and drill them to the spars, you’re hole may be off here.)

That little tiny light is so close to the center of the tiedown hole, I'm going to start there, and file a little bit in one direction if I have to adjust.

Anyway, I decided I don’t want to start on drilling the skins to the skeleton until I do some more clecoing. I’m going to break down and just order like 400 more clecos before drilling. It can’t hurt to cleco every other hole (Van’s suggests every 4th hole before drilling)…things will only be lined up better, and since I’m already worried about twist, this will help me sleep at night.

A quick survey of tool joints yields the following for 3/32″ spring cleco prices.

3/32″ Spring Cleco Prices
Source Price per Cleco
Aircraft Spruce $0.43, plus shipping
Avery Tools $0.42, free shipping >$95
Brown Tools $0.44, 0.42 if >100, free shipping >$95
Cleveland Tools Website is not working…
Vans Aircraft $0.40, plus shipping
The Yard Store $0.40, free shipping >$100.
PlaneTools.com $0.79…WHAT?!!
Aircraft Tool Supply $0.49, plus shipping.
Innovative Tooling Services $0.35, free shipping >$100

UPDATE: Just found Innovative Tooling. The picture on the page for 3/32″ doesn’t show a silver cleco, but I’m assuming they just used the same picture. Just placed my order, we’ll see how they are when they arrive.

OLD: Looks like the yard store wins…they used to have bulk used clecos in 3/32″ size, but I called today and they are out. I’ll have to order new clecos, but bummer they are still $0.40 each. (By the way, who gets off selling clecos for $0.79 each?)

Anyway, I”ll order some tomorrow. One last picture of the WING! that’s in my garage tonight.

This makes me happy.

1.5 GLORIOUS, PRODUCTIVE hours. Night’s like tonight make all the other crappy nights worth it.

Prev | Next


Countersunk Left Main Spar, Drilled Left Rear Spar

November 13, 2010

Prev | Next

Well, I managed to motivate myself out into the garage a little this weekend.

I only have a few more steps on the left main spar, and the the left rear spar, before I really need to get my butt in gear with the rib deburring and finally build a wing stand.

Today, I focused on countersinking the screw holes for the tank attachment.

Reading back over my own old post (in which I reference some other builders), I found this table. I’ll copy it here, too.

Countersink Widths for Numbered Screws
Screw Size Width [in]
#6 <0.3125
#8 0.365-0.375

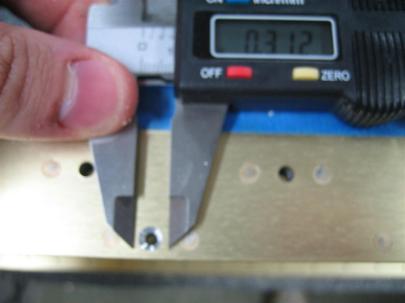
So, I broke out my trusty digital calipers, zeroed them out, and dialed in .312.”

Sorry for the blurry picture.

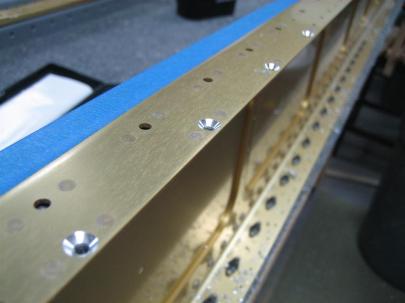
So, with microstop countersink cage on the front of my drill, I got to work. Here are the smaller countersinks for the #6 inspection plate attach screws on the bottom flange of the left spar.

Pretty countersinks.

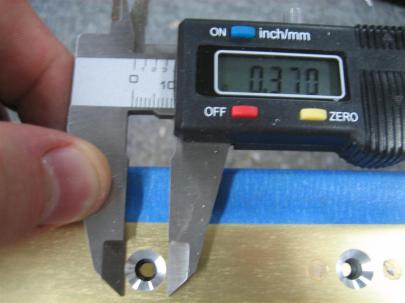
Then, I moved up to the 0.370″ countersinks for the larger #8 tank attach holes.

Looking good.

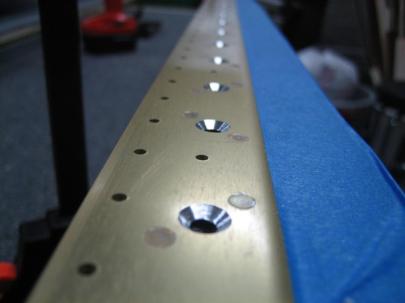
Somewhere in here I flipped the spar over and finished all the countersinking on the upper flange of the left spar.

Sweet.

After the countersinking, I scrounged up the left rear spar and corresponding doubler plates.

Left Rear Spar, reinforcement fork, and doublers.

Per the plans, I grabbed the W-707E and aligned it 50 3/4″ from the outboard edge of the rear spar.

I promise it is right at 50 3/4". I think the paralax make it look off.

W-707F is laterally aligned with the outboard edge of the rear spar channel.

W-707F is clamped and ready to matchdrill.

Here’s W-707E, ready to drill.

After drilling one #30 hole.

All done.

Then, I moved outboard to W-707F.

Before matchdrilling.

All done.

I call this the forest of clecos.

I moved inboard and matchdrilled all of the reinforcement fork holes.

A lot of drilling.

I pulled the doubler plates and reinforcement fork off and set them aside.

I still need to drill out the aileron pushtube bracket hole.

Reinforcement fork pulled off.

Next up, deburr all parts, along with finishing any last minute tasks like dimpling where I can’t reach later, then prep for priming, prime, and rivet the rear spar together.

1.5 hours.

Prev | Next


Drilled Right Wing Ribs to Main and Rear Spars

September 29, 2010

Prev | Next

Tonight, I drilled all of the right wing main ribs to both spars. Not a lot of commentary, so I’ll just get to the pictures.

After drilling the middle two rear spar holes for each rib, I moved the clecos into those holes and matchdrilled the upper and lower holes.

Rear spar, looking forward.

Same with the front (although the clecos are in front of the main spar here).

You can just barely see the clecos in the 2nd and 3rd holes of each rib.

Also, I have a question about some of the flange-to-flange holes. Here’s what I wrote on the forums:

Hello everyone.

I was working on drilling my main ribs to the main and rear spar last night, and the instructions say “drill all of the rib to spar attach holes.”

Then, they have you take everything apart, deburr, prime, and then rivet the ribs to the spars.

What should I do for the flange to flange holes? (Circled in green below, but there is one more on the ribs for the lower rear spar flange).

If I leave them as is now, I’ll be match-drilling them with the skins later, but then I won’t be able to deburr the holes (because the ribs are now riveted to the spars).

I could run a #40 bit through all of these holes and deburr before assembly. (I could also dimple the rear spar ones, since they will eventually be dimpled to accept the skin dimples.

Any thoughts?

Thanks in advance.

Here's the same picture, but smaller, with green circles.

We’ll see what they say.

Here's a better angle.

Then, I pulled off the rear spar.

(What a sad moment. I have had this clecoed together for a week or so, and every time I go in the garage, there’s a wing! How cool is that? Now, I’m back to rib deburring (or catching up on the left wing). Not as exciting as a wing skeleton.)

After taking the rear spar off.

Everything taken apart for the night.

I can’t believe that took me an hour.

Prev | Next


Right Spar Countersinking and Nutplates

August 22, 2010

Prev | Next

Well, today was the first official wing construction day. While Van’s is trying to figure out what to do with my damaged left spar, I figured I should get started on the right spar.

First thing…yup…a plans change picture!

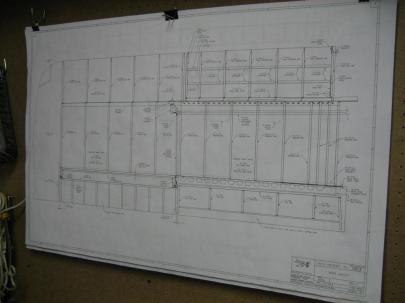
The plans for the wing are a little different. There are about 4 separate sheets of different views for the wing. You guys get to see just the general layout one.

Wuhoo! A wing!

Now, let’s get to work. First thing, I very carefully put my beautiful right spar on the edge of the workbench and clamped the flange down very lightly. The spar will tip over onto the table (away from the camera) if the clamps let go, so I’m not too worried about clamping them down too much.

Every builder that has a website makes a comment here about how the construction manual really holds your hand and steps you through the process on the empennage, but then kind of just makes general statements for the wing. For example, the only real construction step on the first page of the wing section says:

“To begin wing construction, rivet the tank skin attach platenuts to the spar as show in DWG 16A, Detail A. Machine countersink the platenut attach holes in the W-706A spar flange.”

Wait. What? That is like 1000 steps, condensed into one statement. It ended up taking me 3.5 hours to do that one step (I admit, I also delved a little into a step a few steps down):

“Attach the K1000-06 platenuts for the W-822 access plate to the W-706A flange. See DWG 12.”

Fine. I see how it’s going to be.

Let’s get started.

Where is my countersink?

A lot of builders start out thinking they should make a nutplate jig and countersink the screw holes before riveting the nutplates (sorry Van, I call them nutplates) on so they can use the jig as a guide for the c/s pilot to avoid chatter. Van’s suggests using the installed nutplates as the pilot guide. After those builders spend some time making those jigs, they eventually abandon the idea and fall back to the Van’s method. I’m going to do something I don’t normally do and FOLLOW THE INSTRUCTIONS. Sometimes, I try to get cute with extra ideas and fancy engineering solutions, when really I should just do things by the book.

So I grabbed my countersink with a #40 c/s bit, tested in some scrap, and positioned the countersink cage over one of the nutplate  attach holes.

The c/s pilot didn’t fit. What?!

You mean I am going to have to drill all of these holes out to #40 first? Ugh!

After drilling every one of the attach holes out to #40, I finally got the countersink and cage loaded back into my cordless drill (slower and more trigger feathering ability than the air-drill) and got to it. Here are my first 10 countersinks.

The blue tape is to prevent metal shavings from getting lodged in between the spar cap bars and the spar web.

Anyway, I continued down the row, being very careful to slow myself down and not to fall into too much of a routine. I could feel this was going to be one of those areas where I would be going through the motions and mess something up. (I did make a mistake while drilling out all the holes to #40. I accidentally drilled out a skin attach hole, too. No biggie, but a perfect example of moving too quickly in a habitual way.)

I stopped about every 6 countersinks and retested my countersink depth using a AN426AD3-4 rivet. They are all perfect. Here is the end of the row, looking back toward the “diagonal” wing-walk attach holes.

Pretty, pretty.

Then, I flipped the spar over and did the bottom flange. Also, there are some access panel nutplate that get attached now, too. I went ahead and countersunk for those attach rivets, also.)

Bottom flange, sobriety-maintaining Sprite-zero, and the girlfriend's cordless drill I'm borrowing (pronounced "you can have it back when you pry it from my cold, dead hands"). Thanks girlfriend!

Phew, that was a lot of countersinking. (I think I counted 144 total countersinks for just the nutplate attach holes. There’s another 72 for the screw holes (in the middle of each set of three holes) I’ll have to do later.)

Next, I grabbed some K1100-08 nutplates, some silver 3/32″ clecos, and some AN426AD3-4 rivets and started getting ready. My plan is to cleco the nutplate to the spar, insert one rivet, then after riveting that one, take the cleco out and rivet the other side.

Cleco in one side, unset rivet in the other.

Down the line, everything ready to rivet.

Redundant picture.

Ahh, this slower, more thoughtful approach is paying off. Can you see the error that I almost made?

Which one of these is not like the other?

Here's an example nutplate before I take the cleco out and put the other rivet in.

I can’t remember why I took this picture. I think I just took out all the clecos, and I thought it looked cool.

Ready to set the second half of the rivets.

No pictures of the second rivets, but here’s one of the other (now top) flange.

You can see all of the nutplates on the lower flange.

Anyway, I set all the nutplate attach rivets on the upper flange, and then called it a day. So I got to cross off the two statements in the construction manual I highlighted above, and next up is to use the installed nutplates as c/s pilot guides for countersinking the screw holes.

Oh, and then I get to repeat on the other spar.

3.5 hours of countersinking and riveting today. 144 rivets, 1 drilled out (the rivet split in two!). Good times.

Prev | Next


Rolled Left Elevator Leading Edge

July 24, 2010

Prev | Next

Well, today was just a barrel of rainbows and puppy dogs. Lucky me, I got to mangle the project per the directions.

It’s funny. The directions say “roll and rivet the leading edges.”

Hmm.

Sounds easy.

If I were writing the directions, it would go something more like this:

“1. After spending 50 man-hours carefully protecting all of the aircraft-grade aluminum from dents, scratches, and general mistreatment, duct-tape a steel rod to the inside of the leading edges and use ALL OF YOUR MIGHT to roll that sucker around. You won’t be able to make the roll anywhere close to acceptable the first time around, so be prepared to curse and fight your way by hand squeezing the two edges together to get clecos into the holes that have been so generously provided for you.  Then, rivet the two surfaces together, but only after realizing that the clamping force of the clecoes was helping everything line up, so pray that as you set the blind rivet, it will pull everything back to alignment.

2. After riveting, stand back and realize that on one of the sections, you forgot to edge-roll one edge, so there is a slight puckering between two of the rivets, but don’t worry yourself about it too much, because although it will keep you up at night, no one else will see it once the elevators are mounted to the horizontal stabilizer.

3. Stab yourself in the eye with a cleco, and then try not to bleed into the adult beverage of choice that you have now earned.”

There. Wasn’t that fun?

The outboard-most section, rolled and clecoed.

Middle section rolled. You can see how bad my roll is on the rightmost edge. (You can also see how I tape the skin to the steel bar.)

3 of 4 sections clecoed.

I took a break from rolling and installed my rod-end bearings. This tool works great. (I could have made it a lot shorter, though.)

Finally, all the leading edge rivets installed. Time for a drink.

2 stinking hours for this? 22 rivets, one (actually painless) blind rivet needed to be drilled out.

Prev | Next


Drilled E-701 (Left Elevator Skin) to Skeleton

June 17, 2010

Prev | Next

Wow, it’s been a week since I’ve worked on the airplane.

I have an excuse, though. I’ve been installing wood floors. Here’s the living room, almost done.

Anyway, if you remember from the last post, I had the left elevator skin clecoed to the skeleton. I went ahead and match-drilled the skin to the skeleton. Instead of using my cordless drill (because it’s quieter), I broke out the air drill and went to town. I love the way that thing sounds.

Forgot to charge the camera battery, so it charged while I drilled.

After matchdrilling both sides, this picture is me in the middle of removing all of the clecos.

Then, because I felt like I would be short-changing you if I didn’t have two pictures for you, here’s another one.

After disassembly.

Here’s the catch, though. I have a lot of thinking and pondering to do about some things.

First of all, I am planning on cutting off the elevator tab (and elevator) bent ears and just making a rib out of them. Jason Beaver did it pretty successfully here and here, so I’m basically going to copy him.

The question is whether to prep and rivet the left elevator now, the cut off the “ears” after riveting, then try to fabricate a rib, matchdrill, dimple, prep again, etc., or should I re-cleco everything together and do all of that fabrication now.

Many people use blind rivets for the extra tab fabrication, but I think I am going to try to use solid rivets. I have had some success in the past with solid rivets in tight spaces using a special bucking bar (namely, the end of a BFS (“big-freakin-screwdriver”). The question will be about dimpling.

Also, I can probably cut the ears off, but leave a little extra material. I need to make sure I line up the cuts on the elevator and tab to minimize the gab between the two, and I don’t want to cut to much off of either side. Maybe I’ll mock them up, cut one side to where I think it should be, and make sure the other side can be cut more precisely to match the first cut.

Also, many people use blind rivets for the four trim spar rivets on both sides (per the plans), but I think I can assemble in an order that allows me to use solid rivets, especially since I’m going to cut the elevator bent tab ears off; I should be able to reach in there with a bucking bar.

See how much thinking I have to do?

Prev | Next


Riveted Right Elevator Skeleton

May 13, 2010

Prev | Next

Well, I’d been waiting for a couple days for an order from Aircraft Spruce to come in. I ordered a whole bunch (~60) #6 screws and nutplates to use to attach the emp tips, and added a couple 1/4″ nutplates to attach to the elevator counterbalance spars so I can add more weight later for fine elevator balancing.

Here’s the deal. When you initially balance the control surfaces (without paint), you can either leave them a little heavy (which some do), or balance them exactly. Given that I might leave my empennage polished, I thought I would go ahead and balance them perfectly for first flight, then rebalance (pronounced “add weight”) after paint. While the forward tooling hole in the counterbalance ribs would work for a straight up bolt and nut, I’d prefer a nutplate. Also, since the two counterbalance ribs are butted against eachother, I’d prefer to drill for the nutplate now, so I can deburr both sides of both surfaces.

(I wonder how people deburr holes drilled through two permanently attached skins. Maybe just the inside and outside of the two skins and not the middle two surfaces?)

Anyway, here’s the order.

screws and nutplates.

Both size #6 screws in their new home.

I'll definitely be able to tell the difference between the two sizes.

Here are the 1/4″ nutplates. I bought one-lug because I thought the second lug might interfere with the An509 screw and nut used to attach the elevator counterweight. I’ll point it out again later.

MK2000-4 nuplates.

Then, some of the smaller MK2000-06 nutplates. I bought these for some of the tight locations on the emp tips.

I forgot to take a picture of the 60-odd 2 leg nutplates.

Okay, now on to real work. Here I am trying to figure out how to get this thing in a place where I can drill it. I don’t have any 1/4″ clecos, so I had to just eyeball it. That was a bad idea.

After one of the #40 holes drilled.

Here's the second hole drilled. You can see I had to enlarge the tooling hole to much bigger than 1/4" because I am lame and didn't have a 1/4" cleco to located the two attach holes. Lame me.

After taking those apart and deburring the holes, I scuffed everything up, leaving only the four rear-most holes on the E-703 End Rib. Again, I use the rivet in the hole into the countersunk steel bar trick.

Ready to flush rivet to form this dimple.

I have a 5/8" flush set, which comes in handy in some places.

Both done.

After cleaning those two ribs, I set them aside to dry before priming. Then, I moved on to the WD-605-R-1 Elevator Horn.

Let's see. AN470AD4-4 rivets. I might have some of those.

A small smiley on the lower left rivet, but according to the diagrams, it is okay.

6 nice rivets. The shop heads are very nice.

See? Told you.

Then I shot the six on the other side of the horn.

I love this new tungsten bucking bar.

6 more down.

Back to the paint booth.

E-703 End Rib and E-704 Counterbalance Rib being primed.

And now, a big pictures shot of the elevator horn on the skeleton.

It's starting to look like an airplane.

Then, I deviated from the plans (like many builders here.) It is easier to attach the E-704 Counterbalance rib to the spar if you don’t rivet it to the E-703 End rib first. I managed to massacre the left head, and the flange on E-704 didn’t sit flat against the skin on the other side.

Whoa. Take it easy, Andrew.

I don't like how the flange isn't flush with the spar web here.

Time to get the drill out.

Drilled first with #40, then #30 through the head only.

Pop the heads off.

Then re-set. This is a little better.

But not perfect. I think it's going to be good enough. I'd rather see them sitting perfectly flat, but the area around the rivet is sitting where it should be. It's just around the edges of the flange that are standing off a little.

Here are the new manufactured heads. Much better.

There we go. What's next?

Okay, now I need to attach the E-704 to E-703. Wait a minute! There is no rivet callout for these.

I see one for E-703 to E-702 and for E-704 to E-702. Where is the E-704 to E-703 callout? Well, I guess I'll just use AN470AD4-4 rivets.

Yikes.

The three upper middle rivets are all horrible. I can't figure out why the gun is jumping around so much.

Anyway, before drilling those out, I wanted to get that nutplate riveted on. Same deal here, though. I couldn’t figure out how to cleco it on for riveting.

Here are the two NAS1097 rivets ready to go.

I ended up shooting both of these at once. (How cool is that?)

NAS1097-4 (I think they are -4s)

I held the bucking bar on the other side and used my finger to hold the nutplate firmly against the web of the rib.

Is this a good method? No. Did it work? Yes.

Anyway, in the above picture, you can see one of the three rivets that I botched. After drilling all three out, I reset 2 successfully, but messed up this one again.

Grrr. It didn't really bend over, but it kind of shifted to one side.

Drilled it out, then did the exact same thing. This is the third time I’ve drilled out a rivet on this hole.

Grrr.

I figured out that during the first try, I had bent the rib web a little, so the rivet was pre-inclined to lean. I took my tungsten bucking bar and my 5/8″ flush set (without a rivet) and got everything flattened out again. Next try, the rivet set well.

Top middle rivet. Much better.

Finally, an upside down picture of the right elevator skeleton.

Tomorrow, I'll get back to work on the skin. Maybe this weekend I'll have an elevator!

2 hours, 26 rivets. 5 drilled out (3 of those was one hole!)

Prev | Next


I Love Tungsten (Started Riveting Right Elevator)

May 8, 2010

Prev | Next

Well, this morning, the girlfriend ran some errands, and I got my house chores done early, so I headed out to the garage to make some loud noises. Recently, I’ve been taking one component at a time from drilled through primed. It make my work sessions less boring (not a full day of deburring lots of parts, but rather one day of drilling, deburring, scuffing, dimpling, cleaning, and priming one part).

Anyway, today, it was the right elevator spar’s turn.

First, deburring. There's my oversize drill bit spun in my fingers.

Then I put a nice scuff on all sides and edges.

Scuffed and edge finished.

Then, I broke out the tank dies to do some dimpling.

I love these dies. Such high quality.

I know you guys have seen tons of dimples from me, but I still take pictures.

The male side.

And the female side. Apparently I have not edge-finished yet.

After finished dimpling, I grabbed this shot down the length of the spar.

Right elevator spar, dimpled.

I forgot to take a picture of the countersinking I had to do on the front (flanged) side of the spar. The spar needs to be countersunk to hold the flush rivets attaching the E-709 Root Rib Right. The elevator control horn fits over them.

Then, inside for cleaning and back outside to the paint booth.

One side primed.

While I was waiting for the back side of the spar to dry, I went ahead and pulled the vinyl off both sides of the E-713 counterbalance skin.

The vinyl comes off a lot more easily when it is warm out.

Then, I got the other side of the spar primed, and prepped for some riveting. I had already prepped and primed the two reinforcement plates that get riveted to the back of the spar.

There's my new tungsten bucking bar.

Here’s my setup for spar riveting.

You can't see the reinforcement plate, but those clecos are holding it on.


After 8 rivets, all I can say is…WOW. I love this tungsten bucking bar. 8 perfect rivets. With the older, and smaller, bar I was using before, things were always bouncing around, and my hand was vibrating, etc. With this bar, it is so easy to rivet. I should have bought this at the beginning of the project.

Wow, these are amazing shop heads.

Here's the other side.

I spent about 2 minutes just staring at the bar. Amazing.

I thought I would show you my grip.

8 more, also perfect.

Wuhoo, this bucking bar is great!

And, the other side of those.

I wanted to buck these, but I thought it would be better to squeeze them.

The spar to E-709 rivets.

These are the flush rivets I was talking about earlier. Of course, when the primer is only 30 minutes old, and you try to clean up some smudges with MEK, the primer will rub off. Duh.

I re-shot some primer over this right after this picture.

What a great day. I got to make loud noises, and I’m in love (sorry girlfriend) with my new tungsten bucking bar.

20 rivets in 1.5 hours. Good day.

Prev | Next