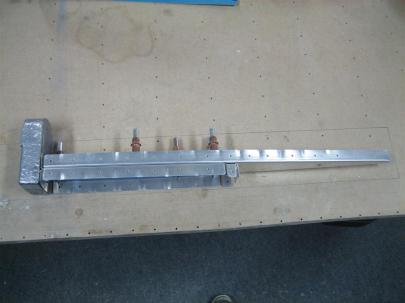
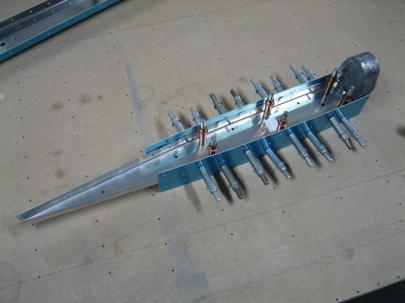
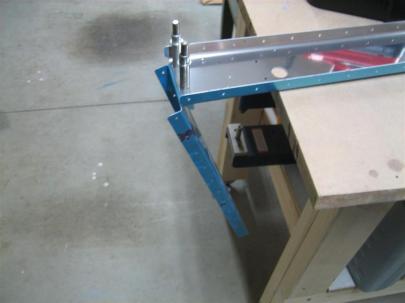
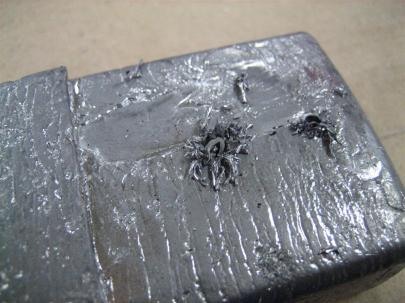
Prepped and Clecoed Right Tank Ribs to Tank Skin

May 25, 2011

Prev | Next

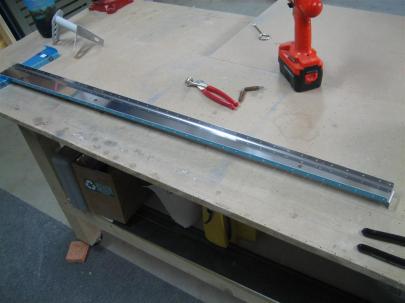
Well, tonight was fairly interesting. I pulled the right tank skin off of the spar (where I had been storing it using a few screws) and set it in the cradle.

Then, I fished out the right tank ribs from under my workbench and started fluting and edge-straightening them. (Luckily, I had remembered to edge-finish them on the scotchbrite wheel with the others a long time ago.)

Anyway, after fluting ribs 1 and 2 (the two inboardmost ribs)…

Not too exciting. 5 more to go.

While I was working, I kept thinking, “I should stop to take a picture…no…they’ll be okay with only a final picture.”

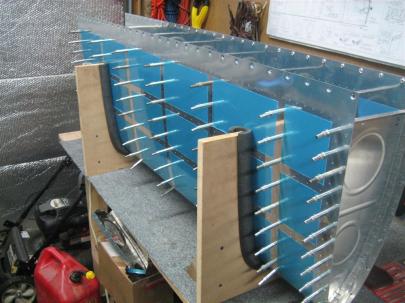
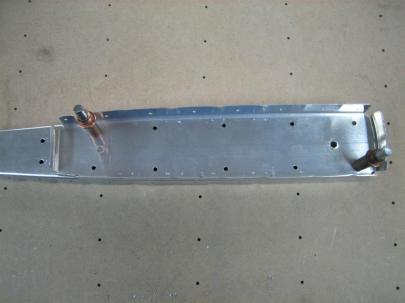
All 7 ribs ready to be matchdrilled.

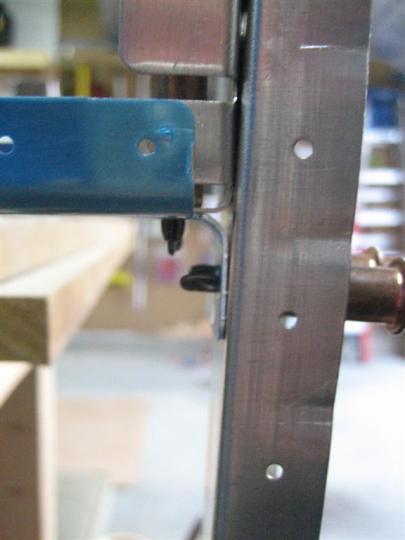
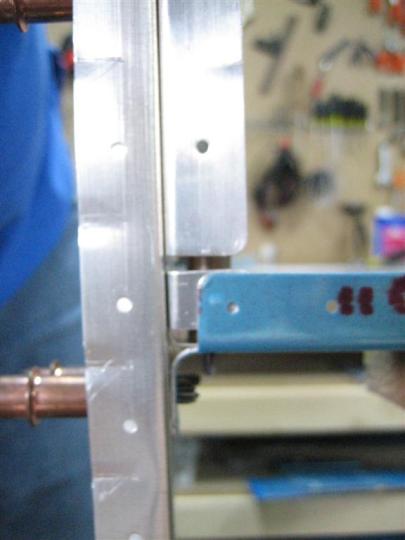
Another shot.

50% clecoed.

Tomorrow, I’ll try to get this thing matchdrilled.

Prev | Next


Prepared Right Leading Edge Rib Number 4

April 28, 2011

Prev | Next

(sarcasm)Whoa, what an exciting night!(/sarcasm)

I managed about 26 minutes in the garage tonight.

The picture below tells the short story. I grabbed leading edge rib #4, and deburred it, then redid some of my fluting, made sure the flanges were 90°, then went ahead and scuffed it with a maroon scotchbrite pad.

Maybe this weekend I’ll get the 5th and 6th ribs done, then get them primed and riveted to the leading edge rib.

From left to right: Deburring, Fluting, Straightening, and Scuffing.

Rounded up to 0.5 hours.

Prev | Next


Leading Edge Rib-to-Spar Drilling

January 2, 2011

Prev | Next

Well, after a quick run to Lowe’s to pick up a few more pieces of shoe molding for the family room (see my first floor wood floors page and today’s update here), I finished the family room and then headed out to the garage for an awesome two hours worth of building.

Why awesome?

First of all, I picked up these awesome tools for the project. I needed some good 3″ clamps for the spars (where they will attach to the wing stands) and a couple of plumb bobs to help measure twist. Also, I’ve been using my plastic triangle from 7th grade geometry as a square…it’s about time I got a real square.

Tools! Tools! Tools!

Then, I got out the jigsaw with a medium metal cutting blade and cut a couple 5″ pieces of 1.5″ angle. I attached these angles to the outboard ribs, which will allow the ribs to be attached to the wing stands.

I used 1/4" bolts instead of 3/16". I hope I don't die. (Also, don't pay attention to my edge distances...)

Here’s a good shot of what I’m trying to accomplish. The skins will overhang (to the right in this picture) the spar by about an inch from the last set of holes in the spar. I used the 1.5″ angle so I have adequate spacing (don’t have to notch my support angle to accommodate the skins).

This will work great.

Okay, next up, rib preparation. Here are 10 of the 12 leading edge ribs (these 10 have the prepunched holes).

Leading edge ribs.

After spending about an hour deburring edges with the scotchbrite wheel, straightening the flanges to 90° and then fluting between holes to make sure the holes are straight, I numbered the ribs for each of the wings and then got to match-drilling.

The only difficult parts here are that a couple of the W-709 ribs have holes where they don’t need them and don’t have holes where they do need them. The picture below illustrates.

Ignore the row of holes that has a cleco in it already; these are the main rib attach holes. See how the three middle holes leading edge rib lines up nicely with the prepunched holes in the spar? Those are easy to matchdrill to final size.

The outer two holes on the rib get "abandoned" while the two outer holes in the spar are used to backdrill new holes into the rib.

Here, I am using the holes in the spar to drill the new holes in the rib.

Matchdrilling using the spar.

I threw a couple clecos into the new holes. Now there are 5 attach holes, and 2 abandoned holes (you can see them on the outside).

There are 4 total leading edge ribs that get this treatment. It's easy to tell which ones need it as you assemble the leading edge.

Then, I spent another half hour making sure all of the rib-to-main-spar holes were drilled. Now, they are ready for disassembly, deburring, prep for priming, priming, and assembly.

Oh wait. I still have to drill all the rib to rear-spar holes. I’ll do that tomorrow.

Before shutting down for the night, I snapped a picture of the two wings in the stands.

It's awesome to be at a point where I can see two big wings in the garage.

A half hour of attaching the outboard ribs to the wing stands, then 1 hour straightening and fluting rib flanges, then another half hour drilling ribs to the main spar.

I’m waiting on a 2-inch scotchbrite wheel from Cleveland Tools, so tomorrow I’ll drill all the main ribs to the rear spar and then I’ll find something else to do.

2.0 hours of big skeleton work.

Oh, and we shot this video the other day of the pups howling at a fire engine. I won’t ever not find this hilarious.

Prev | Next


Fluting and Straightening Left Wing Ribs

January 1, 2011

Prev | Next

Well, today was kind of boring. Between installing the toilet back into the powder room and sitting on my butt watching football, I managed to motivate enough to go do some fluting and flange-straightening on the left wing ribs.

I didn’t hang the outboard rib yet (still have to attach a 5″ piece of angle to help support the outboard edge), but here are the first 4 (of 14) ribs done.

I'm really liking this stand.

7 of 14 ribs done and hung.

All done.

Next up is matchdrilling the main ribs, then getting the leading edge ribs prepped, assembled on the spars, and matchdrilled. Then (because I’m working a little out of order), I’ll take all the ribs off and prep them for priming before starting to rivet the skeleton together.

A boring, but important hour of work today.

Prev | Next


Prepped Right Wing Main Ribs, Clecoed Skeleton

September 18, 2010

Prev | Next

I’ve been at a little bit of dilemmna the last few days trying to figure out what direction to take with the project.

I still have the left rear spar to work on (until the left main spar shows up from Van’s…shipped yesterday…should be here Wednesday), or, I could move ahead with some rib prep on the right wing.

For the sake of  seeing something cool at the end of the day, I think I’ll move ahead with the right wing, and hopefully I’ll be able to get it onto a wing stand (yet to be designed) by the time I can get the left spar caught up to this point.

With rib prep, I’ve decided not to follow the suggestion to do all the ribs at once. I’m going to do them a few at a time to save my sanity.

First thing, let’s find some ribs.

I've pointed out to you before that I am at a little bit of a disadvantage building the right wing first, from the plans that only show the left wing.

Notice here that of the three different kinds of main wing ribs, there are both left and right versions in each of the wings. From what I can tell, the flanges face left or right based on what will be easiest/accessible to rivet.

So here are some main ribs (I count 11 in the picture, there are really 14 main ribs in each wing).

My goal today was to get the ribs clecoed to the spars, so I’m only going to finish what I have to (out of efficiency, not laziness). This means I’m going to edge finish most of each rib, then move on to fluting and flange straightening.

The edge finishing (except the little crevices) only took about 30 minutes on the sanity-saving scotchbrite wheel.

The fluting and flange straightening took 2 more hours, though. Ugh.

I took all 14 right main ribs inside and watched the UNC-GT and the Vandy-Ole Miss games.

Here's a rib, halfway fluted.

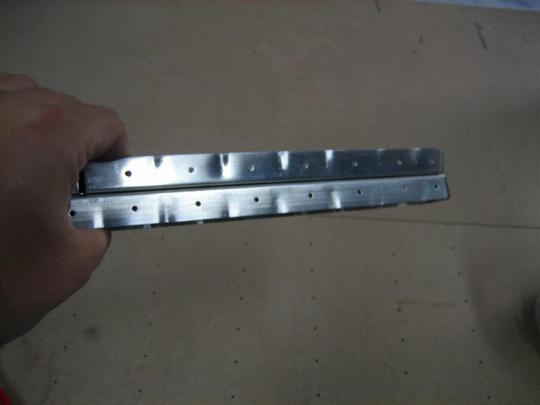
After fluting (holes are straight), but before finishing up the flange-straightening (to 90° from the web).

After a little while, my hands were hurting from all the fluting, so I took a picture of what I have done so far.

Looks like 5 done, 9 to go.

My "to go" pile. {sigh}

And after another couple of hours, I had the main ribs edge-finished, fluted, and flange-straightened enough to cleco them to the spars.

I really didn’t think I’d get this far tonight. (I have to keep in mind there is still a lot more prep on the ribs before I can actually prime them and get them riveted to the spars.

Pretty. (Pretty big!)

And of course, here is the obligatory “down the lightening” holes shot.

Every other builder on the plant has taken this picture.

But that’s not all! I have variations on a theme.

It's Ginger!!!

And Jack!!! (I promise he is there, just hard to see.)

After sending the dogs back inside for their Saturday afternoon nap, I just stared at this thing for awhile.

It just looks so cool!

3.0 hours today.

Prev | Next


Right Elevator Skeleton and Stiffeners

April 9, 2010

Prev | Next

Sorry for the tardiness on the commentary. Here it is.

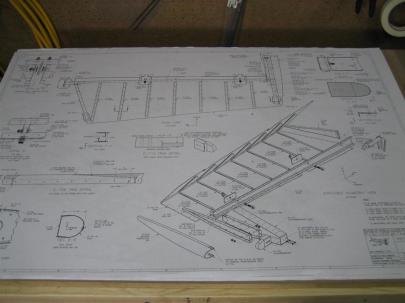
I decided after riveting the trim reinforcement plate that I will stick with the right elevator for now. Of course, here is the obligatory plans picture.

On to the right elevator.

Instead of following the directions to start in on the stiffeners, I sorted through my lower workbench shelves and pulled out the parts for the right elevator skeleton. I just laid them on the (very dirty) workbench and grabbed this picture.

Right elevator skeleton, ready to rivet. Just kidding.

First up, prepare the two end ribs (edge finish, then flute).

Here they are (E-703 and E-704), sitting nice and flat with each other.

I can’t remember why I took this picture. Maybe after I removed the blue vinyl?

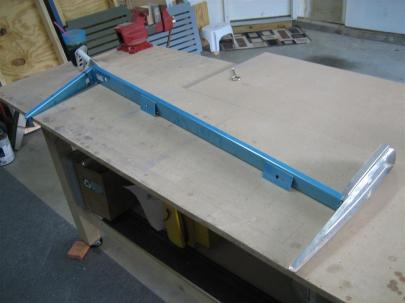
right elevator spar.

Then, it’s time to match-drill the two end ribs together.

The two end ribs clecoed together for match-drilling.

After that, they want you to cleco the two end ribs onto the rear spar. You can see some misalignment here.

See the spar flange hole and how it doesn't line up with the counterbalance rib?

Here's the other side, still not aligned very well.

After some manipulation via fluting and flange straightening, I managed to get everything lined up and match-drilled.

Here's my 12" bit, doing what it does best.

Here’s the outboard assembly after match-drilling.

Ready for disassembly.

Next, they want you to cleco in the counterbalance skin with the counterweight.

There's the right elevator counterweight.

I read on some other builders’ sites that it was difficult to cleco the counterbalance skin on the rib assembly. I didn’t have too much trouble, but it was definitely easier to work front to back.

Counterweight clecoed in.

Next (before going back to the counterweight for drilling), I clecoed on the inboard rib. These are matchrileld to #40, then dimpled and set with flush rivets on the front web of the spar. The reason? The elevator horn must sit flush on this surface. You’ll see later.

E-709 Root rib clecoed on.

Now back to the counterweight. Van’s wants you to matchdrill these to #12. I started with a #40 and worked my way up, blatantly ignoring the advice to use drill lubrication. Of course, I broke 3 bits before I subdued my own stubbornness and moved on to something else.

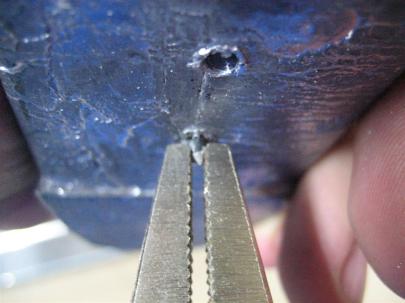
Broken bit, I need to get some Boelube.

I managed to get some locking needle-nose pliers around the bit and back it out slowly.

Anyway. I moved on to the skeleton.

Here's the skeleton clecoed together and match-drilled. You can see where the elevator horn will sit flush on the spar web necessitating the flush rivets between the spar and the root rib.

Then, I spent a little time inside on the stiffeners. I just rough cut them with snips to the general size.

These are for both elevators, some of these will be cut down further for the smaller required stiffeners between the trim spar and main spar on the left elevator.

2.0 hours today.

Prev | Next


VS Assembly and Matchdrilling

January 24, 2010

Prev | Next

First thing after breakfast, I snagged the two VS spars and the spar reinforcement and headed into the kitchen to finish some surface prep. After about an hour, I had all three pieces scuffed up, cleaned, and back outside. Here is a shot during scuffing. You can see the top half has been scotchbrited and the bottom half is the raw part after removing the blue vinyl.

You can even see my hand and the camera in the bottom half.

Here’s the spar reinforcement before finishing.

Rear spar reinforcement.

All three after scuffing. (Along with the ribs from last night.)

Looking good.

Then, I bent the rib flanges to exactly 90 degrees using my new hand seamers, and fluted the ribs.
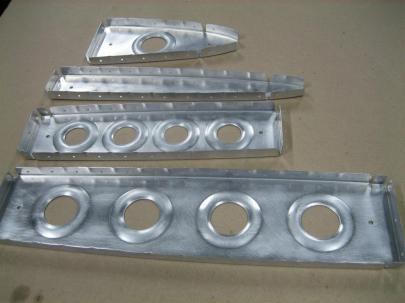
Fluted, ready for assembly.

I started clecoing the rear spar doubler to the rear spar, and then realized they want you to put the hinge brackets in now. I quickly located VS-410PP, VS-411PP, and VS-412PP, and got the Goo Gone out to help pull these stickers off.

These part number stickers are a pain in the butt to get off cleanly.

While I waited for the Goo Gone to do its magic, I decided to start clecoing the front spar and ribs together. You can also see the rear spar and rear spar reinforcement in the upper left corner of this picture.

Tip rib attached.

Then, I clecoed in the rear spar. Here, you can also see the hinge brackets waiting for the Goo Gone.

Middle rib attached.

Finally, I clecoed in the root ribs (fore and aft).

Root ribs attached.

Then, I cleaned off the hinge brackets, got them clecoed to the rear spar, and clecoed the rear spar to the front spar and ribs.

Looks like an airplane again.

I followed Mike Bullock’s advice and clamped the rear spar to a couple of 2x4s. This let me matchdrill the rear spar vertically, which helps a lot with getting a perfectly straight hole.

Rudimentary VS jig for matcdrilling the rear spar.

Here’s my process. Cleco every other hole, match drill, mark the drilled hole with a dry-erase dot, move the clecos, repeat. Here, you can see my dots.

Dry-erase dots help me know which holes I've drilled.

After finishing up the ones you can reach from the aft side of the rear spar, I flipped the whole assembly over and match-drilled the two remaining holes (that aren’t drilled in the upper half of the lower set of hinge brackets).

12" bit doing its thing...

Next, we get to cleco on the skin, wuhoo!

It looks like another airplane part.

Then, time to matchdrill the skin to the spars and ribs. Same process here. Cleco every other hole, drill, mark dots, move clecos, repeat.

Match-drilling the skin.

Here, you can see that I am in the middle of moving clecos. The one in the center of the picture gets moved one left (into the marked, already drilled hole), then the one to the left of that gets moved one left, and so on.

Example of brand new cleco on the left, and two used clecos in the middle. Eh, they work just fine, they're just not as pretty.

I got the left side of the vertical match-drilled, then flipped it over, took this picture, and then headed inside.

Ready for the second side of match-drilling. Maybe later tonight or tomorrow.

3.0 solid hours today. Good work all around.

Prev | Next


More tools before starting

December 11, 2009

Prev | Next

Ordered some more tools today.  The Yard has graciously offered to send me the following after taking some of my money:

  • Fluting Pliers
  • Microstop New
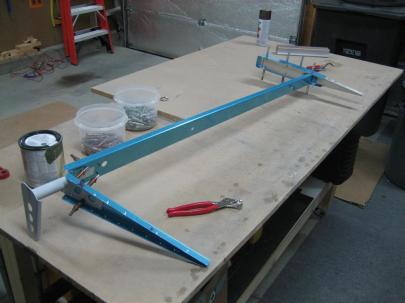
  • 5-Piece Set 100 degree Countersinks
  • 4  Side-Grip Clecos Clamps 1/2″
  • 4    Side-Grip Clecos Clamps 1″
  • 25   K Series Spring Cleco 1/8″
  • 50   K Series Spring Cleco 3/16″
  • 2    #21 Cobalt Jobber Bit – 135 degree
  • 2    #12 Cobalt Jobber Bit – 135 degree

They should arrive sometime next week. I’ll update the post when the come in with some pictures.

Tools arrived!

Dec 25th update:

I bet some of you noticed I ordered 3/16″ clecos instead of 3/32″ When the box arrived, I was sure that the Yard had made a mistake, but I quickly realized the mistake was mine. After some research, I figured out I won’t need that many 3/16″ clecos, so it owuld be best if I could exchange them. Luckily, I was headed to Wichita the very next day for a wedding, and the Yard is conveniently located in Wichita.

Note: It is possible to bring a bag of 50 3/16″ clecos in a carry-on through airport security. Be prepared: the TSA will ask you why you are trying to bring bullets on the airplane. Ask me how I know.
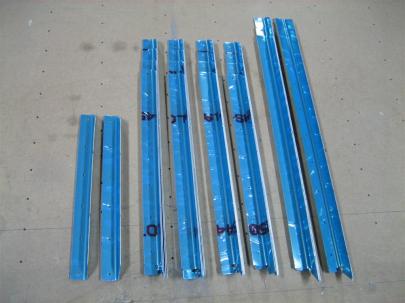
When I was able to sneak away from the wedding festivities and make it to the Yard, the guy behind the counter didn’t have any problem with me exchanging for the right size. He even pointed out that I might want to go with used. Skeptically, I inspected a bag of 100 used 3/32″ clecos, and was satisfied with their quality. (Only saw a few with pro-seal on them.) at $0.25 a piece, I saved a bunch of money. Ha.

January update: Later, I saw that some of the clecos are stubby clecos, and some are unusable. I’ve gone through every one and thrown out about 10% of them.  I will probably stick with new clecos from now on. If nothing else, they look better in the pictures for you guys.

Anyway, let me get back to my Christmas. Oh, and Merry Christmas.

Prev | Next