Started the Right Flap

December 29, 2011

Prev | Next

So I’m writing this a few days in the future, so bear with me if I can’t recall everything in detail.

Today, Joe came over to assist in some airplane building, and I figured it would be a good time to start in on the right flap.

First, though, I spent a little time with the aileron bellcrank and pushrod. I adjusted the rod ends to equal length on the screw ends, then turned each a turn at a time until I got the aileron perfectly aligned with my “alignment stick.” (BTW, “alignment stick” reminds me of a disciplinary tool used by catholic school nuns…shudder.)

Here's the large view.

And a closeup. Can't get much better than that.

Oh, and with the rearrangement of the exercise room and guest room upstairs, I’ve been…”strongly encouraged” to get the airplane parts out of the living spaces.

Notice she waited until after I put a ring on it to tell me to get my airplane crap out into the garage. Just kidding, she’s wonderful, and I’ve been meaning to get things hung up in the garage for awhile.

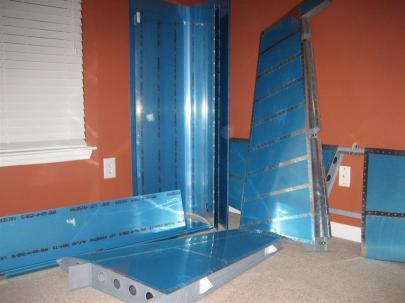
Here’s the horizontal stabilizer hung (very securely) with some red hooks through the pegboard and into some 2x4s.

That's the largest piece that was upstairs.

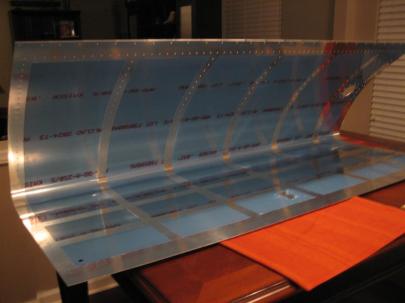
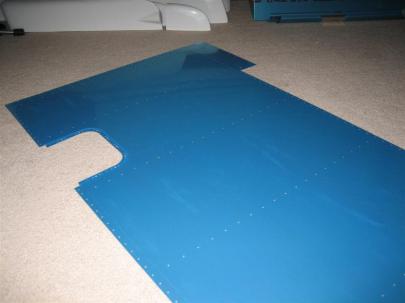
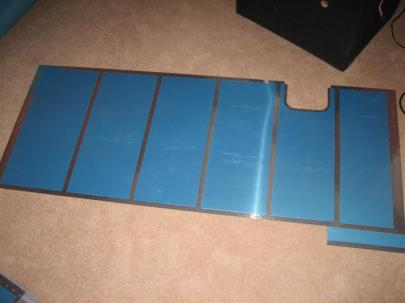
Joe showed up, so we started gathering the left flap parts. Here are the skins, the spar, and some of the ribs.

We pulled the blue vinyl off everything instead of worrying about doing lines with the soldering iron. I think I've given up on that for good.

We followed the directions carefully (except for the part where they want you to edge finish first. I like to do it before final prep) and started clecoing parts together and matchdrilling.

Here's an action shot of Joe working the cleco pliers. (I'll need a second pair if he's going to come over and help a lot.)

When we started working on the interior ribs, all hell broke loose. I had been carefully explaining that we’re building the right flap, so everything is reversed from the plans. All of the flanges on the left flap pointed left, so we assumed the all the flanges on the right side faced right. Well, the holes weren’t lining up correctly. We sat for a few minutes and finally figured out that maybe I built the left flap with the right flap’s interior ribs, and that I could probably swap them here, too. I made a mental note to confirm this with Van’s support after the holidays when Joe noticed this note RIGHT IN THE MIDDLE OF THE FLAP DRAWING.

Whew. That explains it. Glad I didn’t mess this up, too. We flipped the flanges over (so they faced the left) and all the holes magically lined up again. Build on!

A big note, right under my nose.

After matchdrilling the ribs and skins to the spar, we moved on to the hinge.

Picture below is the same procedure I used on the left flap, carefully constraining the flap to make sure there was perfect alignment.

I used the four clamps in between each hole to maintain perfect alignment. After a few holes, we'd remove the clamps and verify we had good hinge movement.

As we progressed down the flap, we got a little braver, and stopped using the sideclamps. I had C clamps about every 10 holes, and drilled a hole next to the previously drilled and clecoed hole. We maintained perfect alignment the whole time, and it saved a ton of time not having to remove 4 clamps, check movement, add 4 clamps, drill 4 holes, cleco 4 holes, and then remove the 4 clamps.

In no time, we had the right hinge drilled.

We're moving right along.

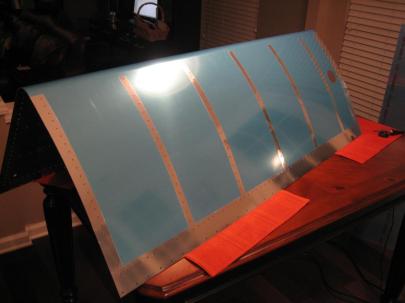
Finally, we stuck the top skin on and Joe got busy matchdrilling.

Nice shiny top skin.

While he was busy doing that, I started fabrication on the flap angles (I forgot the part numbers, sorry).

I didn't make the final cut on the angle yet, I'll do that later.

After a little marking and bending…

Marked and bent. (Aiming for 6.3° is silly. It's much easier to bend it a little, then check fit against the flap.)

The first try, I overbent it a little.

See the wedge-shaped gap there?

After a few more tweaks, it was perfect, so we started matchdrilling the angles to the ribs/spar.

I don't remember the significance of this picture. Must be the matchdrilling...

Then, we positioned and drilled the holes for the K1000-4 nutplate.

Nicely done, Joe.

Then, we disassembled everything and THOUGHT about started preparation for priming.

Want to start the tedious prep work?

No way, it’s lunchtime, and Joe had to go meet his better half.

3.0 hours with Joe today. Since we really didn’t work simultaneously on anything, I’m going to count it as straight time. I’ll count his time as double when we aren’t watching each other work. See you guys next year!

Prev | Next


Devinyled Left Tank

November 30, 2010

Prev | Next

Well, I was kind of on a roll with the whole devinyling thing, and I needed some more mindless airplane work.

I got to work on the left tank’s skin today.

Here's the bottom of the left tank after devinyling.

Here's an in-progress shot of the top side.

The inside, devinyled.

Finally, the top of the left tank, completed.

One more hour of devinyling fun.

Prev | Next


Devinyled Right Tank

November 28, 2010

Prev | Next

Well, after spending 10 or so hours in and out of the (very cold) garage finishing the wood floors today, I felt like working on the airplane, but I felt like being WARM, so I thought some devinyling was in order.

I grabbed the next big part in the airplane parts room, and got to work on the kitchen table (sorry girlfriend!).

Because of all the rivet and screw holes and all the cris-crossing patterns, it took me an hour for this whole skin (not the usual 30 minutes per wing skin…those were easy).

Also, I know that the instructions say to just pull out all the vinyl from the insides of the tank, but I figure I’ll let the vinyl act as tape lines for the proseal I’ll be using to seal the ribs to the skin on the inside.

Here's the inside of the right tank after devinyling.

The top side.

And the bottom.

1.0 hour of devinyling fun tonight.

Prev | Next


Devinyled Two More Wing Skins

October 6, 2010

Prev | Next

Well, I manage to put in another “inside” night tonight on the airplane.

I’m not sure why I took this picture. I think I was waiting for the soldering iron to heat up.

Some of the airplane parts in the corner. I need to get back to drilling out the rudder skins one of these days.

Anyway, I finished up the right lower outboard wing skin, and then moved on to one of the upper outboard wing skins (they are identical, so it isn’t a left or right).

Here's the right lower outboard wing skin before devinyling.

And after.

I totally forgot to take any pictures of the upper outboard wing skin I got done.

One hour tonight (30 minutes per skin). One more short session, and all my skins should be devinlyed.

Prev | Next


Devinyled Left Lower Outboard Wing Skin

October 4, 2010

Prev | Next

Not much work tonight, but I did manage to escape to the workout room (after a workout!) and devinyl the left lower outboard wing skin. I can’t think of anything funny or insightful to say about it.

Sorry.


Upper (towards the wing skeleton) side.


Lower (towards the bottom of the wing) side.


Half an hour of vinyl-removing fun.

Prev | Next


Devinyled Left Lower Inboard Wing Skin

September 22, 2010

Prev | Next

Well.

Today was pretty much an exact copy of yesterday. Except I did the LEFT lower inboard wing skin.

There is something satisfying about these stripes.

To keep you mildly interested during these boring times, I’ve included a picture of some shrimp and asparagus risotto. Thanks girlfriend!

Mmmm.

Another 0.5 hours today.

Prev | Next


Primed the rest of the Left Elevator Stiffeners

May 31, 2010

Prev | Next

Tonight, I moved on with the left elevator by matchdrilling the upper stiffeners.

Here are the upper left elevator stiffeners, after trimming, being matchdrilled to the skin. First, I drilled and clecoed the forwardmost hole.

The three forwardmost holes clecoed.

After finishing, I traced the stiffener outlines on the inside and outside of the skin.

These will help me devinyl later.

You can see I have already done the lower surface of the elevator (it's upside-down on the table).

And, of course, since I forgot to add RTV to the right elevator (still trying to figure out a way to get some RTV in there), I wrote a little reminder on the inside of the left elevator.

Hopefully I'll see this as I pull out the last of the blue vinyl just before assembly.

Next, devinyl along the traced lines and then deburr and scuff.

Left elevator skin interior after devinyling, deburring, and scuffing.

Next up, I deburred and scuffed the remaining stiffeners. (I don’t have any pictures, but after this, they got dimpled and then primed.)

Because the upper surface doesn't have the trim reinforcement plate, there are 4 (instead of 3) of the short stiffeners.

Next up, devinyl and deburr the outside of the skin.

Skin devinyling.

A small tip here. I decided that at the aft end of the elevator, i would leave a little blue vinyl instead of connecting the upper and lower surface bare spots. This way, If I need to rest the elevator on its trailing edge, I won't be damaging the finish on the trailing edge.

Because it was late, I couldn’t use the c-frame.

Instead, I grabbed the hand squeezers and dimpled anything I could reach.

Just for kicks, I held up the trim reinforcement plate (and cover, still covered in blue vinyl) which will be riveted underneath the skin to the right.

Here are the other sides of the upper stiffeners getting primed.

I toook these inside for a good washing with Dawn before drying them, wiping with MEK, drying some more, and then shooting with primer.

I had a few more minutes, so I started match-drilling the skeleton. Here is one of the spar reinforcement plates being drilled to the spar.

I used my 12" #30 bit due to cleco-clearance issues.

Finally, before heading in, I shot a coat of primer on the other side of the upper left elevator stiffeners.

Nighty-night.

Prev | Next


Started Left Elevator

May 24, 2010

Prev | Next

Well, it’s monday. And even though I have a couple things remaining on the right elevator, I am going to follow the flow of the directions and move on to the left elevator before coming back to finish both of them.

In addition to the items they want you to do to both at the same time (roll leading edges, install rod-end bearings, etc.), I’ll have to come back to do three things on the right elevator:

  1. Fix a few over-driven rivets (and a couple that bent over that I didn’t catch at the time.)
  2. Figure out how to add RTV to the trailing edges after the fact (anyone have any ideas?)
  3. Trim down the counterbalance. I elected not to do this on purpose.

Anyway, on to the left elevator. Here’s the obligatory changing-of-the-plans shot.

On to the left elevator (and trim tab).

As I only have about a half an hour tonight, my plan was to just cover the basics. First, lay out all of the left elevator parts.

It doesn't look like a lot of work...

Devinyl the skeleton parts.

This picture is almost identical to the one before it, except for the missing blue vinyl on the skeleton parts.

Then, on to real work…kind of. The manual wants me to attach the hinge reinforcing plates to the spar, then move to the outer ribs.

Here you can see the two outer ribs fluted. I haven't straightened out the rib flanges yet, will get to that soon.

Blah blah blah, assemble the skeleton. For now, I didn’t do any match-drilling. I do that hole-by-hole as I take the thing apart.

This one will be more interesting due to the trim spar.

Finally, I found one more of the stiffener angles. I got that devinyled and then cut from hole to hole to form some of the smaller stiffeners.

More small stiffeners. These go between the main spar and the trim spar (ahead of the trim tab).

With that stuff done, I headed inside and caught someone with their hands in the cookie (doggie-treat) jar.

That bottom shelf has the doggie-treats on it. (We have really patient dogs. /sarcasm off)

Lucky you, I got some video.

Anyway, a short half hour of left elevator prep.
Prev | Next


Right Elevator Stiffener Riveting

April 18, 2010

Prev | Next

A few days ago I got a little time in on the project. I’ll see if I can remember what happened. 3 hours, 116 rivets…2 of them drilled out and reset. Here we go. First thing, in preparation for stiffener riveting was to get the skin devinyled. Here’s my devinyling table, wooden stick (won’t dissapate heat) and permanent marker.

Ready to use the soldering iron to devinyl.

After devinyling the inside of the right elevator skin.

For some reason I like devinyling. Don't ask me why.

Here’s the outside of the skin after devinyling. This actually takes a long time to do.

I just devinyled the stiffener holes. I'll devinyl the rest after drilling to the skeleton.

At some point last weekend (can’t remember which day), I was sent to Home Depot (maybe Lowe’s…it was a busy day) to grab some gardening supplies. I took the opportunity to grab some indoor/outdoor carpet for the workbenches.

Here's what I call my toolbench with a new carpet surface.

You should be able to see the “workbench”‘ with carpet on it in future pictures. Anyway, I grabbed the skin and did some deburring (interior and exterior) and some scuffing (interior only, for priming).

Scuffed strip on the left, non-scuffed on the right.

After a few more minutes, I dimpled the skin (no pictures, sorry), and then decided they were ready for priming.

Where is that self-etching primer?

i got the picture order backwards, so you’ll see the skin primed later, but here I am getting ready (or just finishing) stiffener edge prep. I usually use my Permagit block to knock down any ridges, edge deburring tool (pictured below)  to chamfer both edges, and then a scotchbrite pad to smooth everything out.

Right elevator stiffeners and my edge deburring tool.

Here’s the picture of my primed skin.

It looks sloppy now, but wait until I get the vinyl off. Then the primed lines will look nice.

After the stiffener edge prep, the stiffeners got taken inside to be washed with dawn detergent.

Here are half of the stiffeners, being cleansed of their oily fingerprints and aluminum dust.

I decided to take a picture of how much detergent I use. Nothing really important, just camera-happy, I guess.

Dirty stiffeners need to be cleansed of their aluminum dust and fingerprints.

After cleaning, they go back outside for priming.

Boo-yeah, primed stiffeners.

While those were drying (and then flipped and sprayed on the other side), I placed rivets in the dimpled holes and taped them in place.

Rivets just asking to be beaten into submission.

I started to backrivet, and everything was going very smoothly.

Beautiful shop heads.

More beautiful shop heads.

God, I love backriveting.

But anyway, I got through all 116 rivets, then flipped everything over and saw these!

Ahh! Worst rivet ever!

This one is not so bad...

I figured out why this happened, and it falls squarely on me.

While I was dimpling, I didn’t pull the other half of the skin back well enough, so the skin side that was being dimpled was not sitting parallel to the faces of the dimple dies. One side of the die dented each of the last stiffener rivet holes on one side. The rivet in the second to last picture was flush against the backriveting plate, but the skin was dented, or above the backriveting plate.

I’m going to drill out all of the bad rivets on the trailing edge (of course, the worse of the bunch is on the top of the elevator, right where all of you are going to come look at my elevators), and then  try to smooth out the skin by backriveting it with a flush set from the inside out.

It might ruin the skins, which will be expensive. I’ll be sure to take some pictures of the process. Maybe it will save one of you some time and frustration…

Prev | Next


Rudder Skin Prep, Skeleton Riveting

March 20, 2010

Prev | Next

In between some yardwork, watching the sprinklers, and cleaning up the house, I made some good progress on the airplane.

First thing, I found a stiffener rivet that was sitting a little proud. (Drilled rivet #1 today.)

Off with your head!

Silly me, though, I didn’t get any pictures of it after it was reset. I was being lazy with the camera today. Sorry.

Next up, skin deburring and dimpling.

The holes on the right are the tip rib #40 holes. The ones on the left have been drilled to #30.

After deburring, scuffing and dimpling, we are ready for priming.

The top of the right rudder skin after deburring, scuffing and dimpling.

Then, more deburring, scuffing and dimpling.

I didn't forget the hole on the bottom of the picture. This hole is match-drilled with the rudder tip and then dimpled to #30.

After cleaning, I shot a little primer on the skin.

Primed right rudder skin.

I had a very specific order here. First, deburr, scuff, dimple and prime the top, forward edge, and bottom edge. Then, while the primer is drying, devinyl the aft edge (vinyl used as masking for the primer), deburr, scuff and dimple the aft edge. This edge doesn’t get primed, as we’ll use the fuel tank sealing instructions with Pro-seal to glue the trailing edges together.

After scuffing the aft edge, I started pulling off the blue vinyl from the interior of the skins.

This just looks so nice.

Another shot of me devinyling.

Then, I spent a couple minutes making the slot at the bottom of the skin a little bigger. One of the flanges from the control horn fits in here, and during initial assembly, there was some interference.

Notch enlarged.

And the left skin, primed.

Got the left skin primed and ready for devinyling.

Ame thing on this skin, while the primer was drying, I devinyled the trailing edge, scuffed, and dimpled.

Scuffed and dimpled the trailing edge.

Here’s the left skin after devinyling. I’ll store this skin until final riveting. Now, back to the skeleton.

Shot 1 of 2 of the prepped left rudder skin.

Shot 2 of 2 of the prepped left rudder skin.

In the middle of the day, I ran out of primer and scotchbrite pads, so I ran out for both.

Napa 7220 Self Etching Primer.

Maroon scotchbrite pads.

They didn’t have any maroon on the shelf, but they had some grey. I asked the guy out front, and he went to the back and grabbed 3 unpackaged pieces. Usually, there are $5 or $6 for the three. He gave them to me for a couple dollars, which was nice.

I like them cut in about 2" x 2" squares. Good to go until the end of the tail kit, I'm guessing.

I had some trouble with dimpling the last three holes in the rudder bottom rib. I drilled and countersunk a hole in a spare piece of steel I had, then realized it was too far from the edge to work. Awesome. Here’s a shot of my second attempt.

The new hole is on the bottom right. After countersinking, I used a rivet and my flush set to dimple the rib. Not perfect, but it'll work.

Then, I moved on to some riveting.

This is the spar and one of the spar reinforcements.

While I was moving everything around getting it ready for riveting, I broke my first tool. Now, it was about $0.50 from Harbor Freight, but I was still upset.

RIP cheap plastic clamp. (I'm lying. I actually gut the orange part off the other side and threw the clamp into a box somewhere. I'm sure it will come in handy at some point, even if it doesn't have the orange pads.)

Rivets were looking good, until the one to the right of the nutplate. Doh!

Which one of these is not like the other?

After a successful drill out (#2 of the day), I finished setting the rest of the spar reinforcements and snapped these two pictures.

Middle spar reinforcement.

Upper spar reinforcement.

That’s 16 set so far.

Then I mocked up the R-405PD Rudder Horn, R-710 Horn Brace, R-917 Shim, R-902 Spar, and R-904 Bottom Rib. Some people need to use blind rivets in some of these holes, but I figured I could do it with all solid rivets.

This is what I need to end up with after riveting.

I figured out that if I take off the R-904 bottom rib, I can reach in from above (bottom right of the picture) and get the horn brace to rudder horn rivets here, then slide the forward flange of the bottom rib under the rudder horn and get those from the lightening hole. Here I am setting the horn brace to rudder horn rivets.

I think this is going to work out well.

Another shot from further away.

Here’s all four of those set (set nicely, if I may add).

Horn brace to rudder horn rivets.

20 rivets set so far. Then I moved on to the R-606PP Reinforcement plate to R-902 Spar to R-917 Shim to R-405PD Rudder horn rivets. These need to be AN470AD4-7 rivets, which are LONG. I did have to drill one of them out. That’s #3 for the day. Boo.

This is an AN470AD4-7 rivet after drilling out. This is a long rivet.

But, I managed to reset it okay and get the others in with no trouble.

R-606PP to R-902 to R-917 to R-405PD rivets.

23 set. I scratched the R-405PD horn a little, so I scotchbrited it out, and shot some primer in there.

Some primer to cover the scratch.

Next, I slid the flange of the bottom rib under the rudder horn and lined up the holes. Now I need to drop some rivets in here.

Ready for riveting.

First, I set the horn brace to bottom rib rivets.

26 rivets set so far. These are looking good.

26 set. Finally, I set three more which are reinforcement plate to spar rivets.

These are above the bottom rib, so they are only reinforcement plate to spar rivets. Easy.

I started to rivet the complicated stuff together and LOOK WHAT I DID!

I think this is hilarious. Think I should drill it out?

This happened because I was bucking from above and shooting from below. The gun jumped around cause I was supporting it’s weight instead of letting gravity help me. That’s a no-no.

It was pretty easy to drill out (#4 for the day), here’s an inside shot; back to square one.

Ready to try again.

After setting the first two, a picture.

These look good.

And after much consternation (including using my double offset set as a bucking bar), I got the two outside rivets bucked.

Finally done with riveting for the day.

30 rivets set, 4 drilled out. Lastly, I matchrdrilled the E-614-020 to R-912 rib. This was a piece of pie.

Rudder counterbalance matchrilled to the counterbalance rib. Also, there's the hardware that will be used to fasten these two together.

4.5 hours today. Not bad for a Saturday afternoon.

Prev | Next