Finished Right Lower Skin Wingwalk Ribs

August 28, 2012

Prev | Next

Not much excitement today, just a few more rivets on the lower inboard right wing skin.

I was riveting solo today, so not many pictures either.

Here’s one of a couple shop heads. Not sure why I even took this picture. Maybe to show you that I was using some black felt to protect from dropping the bucking bar.

Boring picture, anyone?

After reaching in, under, and around the wingwalk ribs, I got all the rivets set.

And, I’m prepped for some duel riveting. Maybe tomorrow?

0.5 hour. 32 rivets. Not bad.

Prev | Next


More Right Lower Inboard Skin Riveting

August 15, 2012

Prev | Next

Today, while waiting for the DirecTV guy to show up (insert long story here about how I took the whole afternoon off to cover his time (12-4pm) and then he didn’t show up until 5:30pm), I ended up taking some time out for the airplane.

Taylor and I riveted six rivets on the inboard edge the last time he was over. It turns out, I really needed to bend the forward edge of the skin “up” in the picture to reach the aft row of rivets.

So, I drilled out three of the rivets, and was able to reach in from just below the main spar (bottom of these pictures) to buck the top row of rivets.

After setting the top (aft? oh man, we’re going to have trouble communicating with our different frames of reference) row of rivets, I worked down one rivet at a time for the two middle wing-walk ribs. (The inboard or left rib can be squeezed at the end, and the outboard wing-walk rib can be bucked by reaching from outboard after the wingwalk ribs are done.

Here’s the top row riveted.

To help me know where I was, I colored each rivet black with a magic marker after setting it.

After an hour, I made it about halfway down the rib.

From here on, I won’t be able to peel the skin back from the bottom anymore, but I should be able to reach in through the inboard rib, where the lightening holes are now big enough for my huge biceps.

1.0 hour, 33 rivets. 3 (originally perfect) rivets drilled out due to lack of planning. Boo.

Prev | Next


Outboard Right Tank Rib Sealed

June 21, 2011

Prev | Next

Me: “Alright, baby. I’m going to go try to build us a good airplane.”

(a few minutes pass…the the girlfriend peeks her head out the door.)

GF: “What do you mean you’re going to TRY to build us a good airplane. You’re going to take me thousands of feet in the air…”

Me: “MILES into the air!” (I interjected, just being a smartass.)

GF: “…and you’re going to TRY!?”

Me: “Okay, okay. I’ll build you a good airplane.”

Well, I guess I better concentrate then, shouldn’t I. First thing tonight, I wanted to work a little on the inboard rib assembly.

Because I don’t have a 9/16″ drill bit (and neither does Northern Tool and Equipment, Lowe’s, or Home Depot), I broke out the Unibit and taped off the 9/16″ level.

I know I can’t punch all the way through the three pieces near the nose of the inboard rib, but if I at least start the three, I can disassemble, then get the last layer by itself.

I love this unibit. I need to use it more.

After chucking it into the drill press and working a little magic, I ended up with this.

This hole was 1/2", and you can see that I was able to get through the first two layers and start into the third with the 9/16."

Apparently I didn’t take a picture of the finished product, so this will have to do.

I quickly mocked up the flop tube just to see where I stand.

This is upright.

This is inverted. Looks like I'll have good fuel flow while upside down.

$10 says my mom reads this and adds a comment: “INVERTED!?”

Here's the other side, and my amazing edge distances. Booyeah.

Okay, I was planning on sealing rib #4 tonight, but I think I heard snoring from upstairs, so I better stick with something less noisy.

How about the end rib? Well. Van’s says to do all the interior ribs, then the inboard rib, then…well, they don’t really say when to do the outboard rib. The only reason I wouldn’t be able to do this now would be something about the vent line, but I can feed that in from the inboard side and then bend the tip up while it’s in place.

Let’s get to it!

First thing, since the outboard side screws into the joint plate on the leading edge, I carefully applied electrical tape where I didn’t want any sealant.

Hard to see here, I know.

Then, I buttered up the rib and 50% clecoed it in place. There are far more holes in the inboard and outboard ribs than the interior ribs.

Also, I drilled, deburred, cleaned, and sealed the T-410(?) reinforcement plate to the outboard rib. You can see the three #30 clecos here.

After some squeezing (no rivets drilled out, but one sitting a little proud…not going to mess with it), I pulled off the electrical tape and snapped this pic.

Uh oh.

I didn’t realize that I’d have to shoot and buck the three #30 rivets for the reinforcement plate. I’ll have to do that tomorrow.

Anyway, here is a gratuitous fillet shot of the interior side of the outboard rib.

I’m not happy with the fillet at the very front, but instead of mixing another batch of sealant tonight, I’ll redo it when I shoot those three remaining rivets tomorrow.

Other that the fillet up front, I am happy with the rest of it.

The lower skin. (I really hope this “no-MEK” thing pays off with no leaks.)

No leaks! (I think the not-100%-perfect rivet is like the tenth one down.) No one will ever notice.

And the upper skin. NO LEAKS!

NO LEAKS, PLEASE!

43 squeezed rivets.

I think tonight was about 30 minutes on the inboard rib, then 1 hour to seal the outboard rib.

I thought I was getting faster at these ribs. I guess not.

Prev | Next


Right Tank Work

February 26, 2011

Prev | Next

Oh man, I had a great day today.

I’ve been kind of slowly approaching the tanks on my project. I don’t have a lot of apprehension about tank sealant, but I want to close out a few things in other places before I venture too much further.

Nevertheless, I made some big parts (at one point I had a whole wing!), but of course, by the end of the night everything was disassembled. Having the tank assembled allowed me to do most of the prep work I needed to do.

At this point, if I want to, I could go back and finish the leading edge lights on the right leading edge and start actually putting the leading edge together permanently.

Of course, I could always go back and catch the left wing up to the right. But that would be BORING. (I’ll probably keep myself entertained with the leading edge and then go back to the left wing before setting up for tank sealing.

On to the pictures!

First thing, I bolted all of my right z-brackets to the main spar.

The girlfriend was napping, so instead of riveting the inboard nutplates to the spar, I just used some spar An365 nuts.

My best tool today was the 3/8″ power drive socket that came from a gift my girlfriend’s dad gave me.

I can’t imagine having done these by hand. 2 minutes versus 20 minutes, maybe?

I don't have a picture of the whole set, but it is a really nice Dewalt driver set.

Okay, with the z-brakets bolted to the spar, it’s now time to get the baffle in place with the tank skin.

Here's the baffle.

Then, I had an epiphany. A lot of people cleco the skin to the baffle, but then don’t really have a good way to clamp the tank assembly in place to accurately drill the inboard and outboard z-brackets. Some people try to clamp it really well, others will pad the tank assembly and try to use tie-down straps around the whole wing.

I read (and re-read) the instructions, and came across a step that simply says

Drill the spar attachment screw holes and the W-423 screw holes to final size using a #19 drill.

Well, I couldn’t find a reason not to do that now, so I grabbed my recently ordered #19 bits and got to work.

Here it is.

Then, I decided that I should just go ahead and dimple the holes. Can’t find a reason not to.

(Although now that I’m re-reading the manual, I see a statement in there that says to dimple the tank skins using a c-frame and a hammer. Oh well, I think the dimples look good.)

Here's s a dimple for a #8 screw.

And with a AN509-8R8 screw.

After that little test, I went ahead and finished the rest of the spar attach holes.

These should let me really solidify the tank in it's final position for all drilling. No messing around with tie-downs for me!

I cheated a little and didn’t assemble the middle ribs. I figured the two end ribs would be sufficient.

Things are looking big now. This is the top side.

And the bottom side.

Here’s a closeup of the #8 screws helping me align the tank.

This worked great.

There were a few places where things didn’t line up perfectly, but this difference (tank on the left, leading edge skin on the right) is less than 1/64″. I’ve way zoomed in on this next picture. I would call this basically perfect. Some careful edge finishing on the leading edge will line up these seams nicely.

I can’t even figure out how I would improve this if I wanted to, which I don’t.

Lining up pretty good. For reference, that is a 1/8" hole, and I think that step is about 1/10 of the hole. Multiplication tells me it's about 1/80." There's no way any of you will ever notice this on my plane.

Near the leading edge, the gap looks amazing. Remember, this is my macro setting on the camera. Those are all 1/8″ holes.

Great (lack of) gappage.

At the leading edge, I couldn’t figure out why I had a little step here. Again, this is really small, and I’m totally happy with it.

This small step is hardly noticeable.

So other builders will drill the inboard and outboard z-brackets (which requires removing the leading edge) then you have to remove the skin to get to the other z-bracket holes, then you have to re-install both the leading edge and the tank skin to drill the tank-to-leading-edge #19 holes.

Why not do them now? Everything is rock solid and perfectly aligned.

I first matchdrilled the #40 hole into the flange behind the prepunched holes, then I enlarged the hole to #21, then finally #19.

After that was all done, I moved on to the inboard z-bracket. Like everyone else, here’s a picture of me drilling the z-bracket holes.

I had to use the flash here because this side of the tank was in a little big of a shadow. (I bent the bit a little while drilling to make sure the hole was straight.

After drilling and adding a cleco (9 times), I had the inboard side done.

Wuhoo!

Then, I apparently took another picture of the whole wing because I was so excited.

It's so big (TWSS).

Then, I struggled for about 10 minutes trying to really gently pull the leading edge off without disrupting the tank alignment.

Turns out, the joint plate and leading edge inboard rib fit so well, the friction kept me from sliding it out.

I had to remove the inboard rib (and joint plate) from the leading edge to get it to come off.

Of course, Jack and Ginger are playing in the background.

Then, the same drilling drill (ha) on the outboard side of the tank.

One done.

Nine done.

Alright, let’s get the rest of these z-brackets drilled.

After removing the skin, I saw (bracket) metal underneath all of the baffle prepunched holes. That means I didn't reverse any of the brackets.

With my drill stop attached to my #40 bit, I drilled the 25 remaining holes.

It's nice to be at this point, I've been reading about this whole process on everyone else's build sites forever.

After pulling the ribs and baffle back off, I saw holes in all of my z-brackets.

Holes were right where they were supposed to be.

Don’t believe me? Here’s an example.

Notice how the holes are slightly off-center? This was exactly what I was expecting. See the “checkoway method” explanation on my previous post (about 1/3 the way down).

It feels good to see these holes exactly where I thought they would be.

Then, I deburred the holes I just drilled in the right z-brackets.

Z-bracket holes deburred.

That was about 3 hours worth of work. Great day, and the tank alignment was great.

Prev | Next


Riveted the Right Rear Spar to the Main Ribs

January 23, 2011

Prev | Next

Well, today was a crappy day. I had mucho problems with riveting the right rear spar to the main ribs.

I’ll walk you through what happened.

I started with the inboard side of the spar. The plans call for an AN470AD4-8 rivet. As you can see below, this is a little for a good shop head.

...AD4-8.

Here's an ...AD4-9 rivet. This looks better.

After some gymnastics with my good squeezer, which only has a 4″ no-hole yoke on it, I realized that I needed the holed yoke, and therefore needed to use my economy squeezer. Bummer.

(Back in the empennage, I stopped squeezing AD4 rivets altogether because I kept messing them up; the economy squeezer just didn’t have enough oompf.)

Anyway, I managed the wingwalk rivets with the smaller squeezer. Here’s 9 rivets squeezed.

I couldn't reach the top-most rivet in 3 of the 4 wingwalk ribs. (The other open hole in each of the rib attach points needs to wait for the flap brace.)

I moved my way outboard from there, two rivets in each rib.

Halfway there, I bent over both of the rivets in the aileron pushtube doubler area, and drilled both of those rivets out. Then, the aileron gap seal switches “open” rivets (compared to the flap brace) so of course I set a two rivets there that had to be drilled out.

When I got to the end, I noticed things weren’t lining up very well.

Duh. Forgot to dimple the aft side of the outboard rib.

That's better.

I still couldn’t reach the one rivet (shown on the left here), but I got the other 3 set properly.

The apparent gap between the two flanges isn't really a gap, its just the shadow.

Let me bring you back to the very first rivet I set. The camera is upside down here (so the part is right side up).

The upper, leftmost rivet bent over (it was the first one I set with the economy squeezer). After drilling out, the hole was englarged.

With only slightly enlarged holes, sometimes you can just squeeze another rivet (a little longer this time) and it will expand to fill the hole nicely.

This is after setting another rivet.

This one did not properly expand, and by the time the shop head was formed, it kind of formed in the hole.

Hmm. I know this is a critical piece, so I’m going to have to call Van’s and ask them what the best course of action here is.

I’m hoping I can step up to a AN470AD5-9 rivets, but I’ll need to drill the rivet and hole out to 5/32″ and I’m worried about edge-distance in the up direction.

We’ll see what the guys at Van’s have to say.

January 31st update: Ken S at Van’s wrote back.

A 5 rivet should work ok. If you can fill the hole with the original rivet, that’s ok too –even with
a slightly undersize head. Just be sure that the rivet engages the entire circumference of the
hole.

Alright. I’ll have to add AN470AD5- rivets to my next order from Van’s or Aircraft Spruce. In the meantime, I’m going to keep working on other stuff.

U-G-L-Y, you don't have no alibi, you ugly! {clap, clap} You ugly!

1.5 hours and 28 stupid rivets set (my arms are tired from the economy squeezer); 8 of those drilled out.

I’m going to have to buy a new yoke ($$$) and probably do some surgery on the offending rivet in the last picture.

I’m stopping this post and starting another one (click next below) because I moved on to the skins. I really needed to end on a good note today, and the skins actually did the trick.

Prev | Next


Riveted Half of Main Ribs to Right Main Spar

January 9, 2011

Prev | Next

Well, I needed a break from all of that rib preparation, so I took the seven ribs I had done for the inboard half of the right wing and got started riveting them to the main rib (Most people start with the main rib, because you can bend the ribs a little out of the way of the rivet gun while you shoot and buck.)

Here are the first two rivets in place, ready for shooting.

Per the general builder consensus, you should start with the 3rd rib. (3rd, 2nd, and 1st rib flanges all point inboard, so having the 2nd and 1st in the way would not be fun. If you start with the third, you can easily reach the forward flange.)

The right spar here is upside down.

After the first five rivets…

(That mark above the 2nd from the top is a tape mark.)

Whoa, that bottom rivet head doesn't look to good.

Let’s get a little closer…

Crap. This was the first one, too. Bummer.

After drilling out and re-setting, the rivet is now great. (I scratched the primer off the flange a little. I'll clean that up with a scotchbrite and re-shoot it with primer.)

Of course, it wasn’t until the second rib that I remembered my tape trick to keep from marring the manufactured heads too much.

This works great to keep everything looking nice.

See, this head looks a lot cleaner after shooting.

Here's two done.

Shop heads...

Three ribs down.

More shop heads.

Then, I did the 4th, 6th, then 5th, and finally, the 7th.

The first 7 ribs attached to the right main spar.

1.0 very fun and rewarding hour. It’s nice to see something big take  shape for the last time in the garage.

5 rivets times 7 ribs equals 35 rivets, two of which were drilled out and replaced. (The first rivet, and the last rivet. Boo.)

Prev | Next

Now, back to rib prep.


Primed 3 More Main Ribs

January 7, 2011

Prev | Next

Warning: Boring post alert!!

I prepped and primed 3 more ribs tonight. I had prepped R1 yesterday (I numbered R or L then from 1 to 14 starting at the inboard rib). Today, I got ribs R2-R4 done. So…

I HAVE ALL OF THE RIGHT WINGWALK AREA RIBS DONE, WUHOO!!!

(There are still 24 more main ribs to do, then 12 more leading edge ribs and probably 12 more tank ribs.)

[sigh]

R2, R3, and R4 just after being shot with some self-etching primer.

Anyway, yesterday’s rib took me an hour.

Today’s 3 ribs took me an hour.

(At this overall rate…4 ribs in two hours, I’ve got 10 hours of rib prep left. At the rate of 3 ribs per hour, I have 6.6 hours left.)

At least I’m getting faster. (I’m not sure how many more ribs I can do in an hour, I was pretty efficient yesterday.)

Prev | Next


Leading Edge Rib-to-Spar Drilling

January 2, 2011

Prev | Next

Well, after a quick run to Lowe’s to pick up a few more pieces of shoe molding for the family room (see my first floor wood floors page and today’s update here), I finished the family room and then headed out to the garage for an awesome two hours worth of building.

Why awesome?

First of all, I picked up these awesome tools for the project. I needed some good 3″ clamps for the spars (where they will attach to the wing stands) and a couple of plumb bobs to help measure twist. Also, I’ve been using my plastic triangle from 7th grade geometry as a square…it’s about time I got a real square.

Tools! Tools! Tools!

Then, I got out the jigsaw with a medium metal cutting blade and cut a couple 5″ pieces of 1.5″ angle. I attached these angles to the outboard ribs, which will allow the ribs to be attached to the wing stands.

I used 1/4" bolts instead of 3/16". I hope I don't die. (Also, don't pay attention to my edge distances...)

Here’s a good shot of what I’m trying to accomplish. The skins will overhang (to the right in this picture) the spar by about an inch from the last set of holes in the spar. I used the 1.5″ angle so I have adequate spacing (don’t have to notch my support angle to accommodate the skins).

This will work great.

Okay, next up, rib preparation. Here are 10 of the 12 leading edge ribs (these 10 have the prepunched holes).

Leading edge ribs.

After spending about an hour deburring edges with the scotchbrite wheel, straightening the flanges to 90° and then fluting between holes to make sure the holes are straight, I numbered the ribs for each of the wings and then got to match-drilling.

The only difficult parts here are that a couple of the W-709 ribs have holes where they don’t need them and don’t have holes where they do need them. The picture below illustrates.

Ignore the row of holes that has a cleco in it already; these are the main rib attach holes. See how the three middle holes leading edge rib lines up nicely with the prepunched holes in the spar? Those are easy to matchdrill to final size.

The outer two holes on the rib get "abandoned" while the two outer holes in the spar are used to backdrill new holes into the rib.

Here, I am using the holes in the spar to drill the new holes in the rib.

Matchdrilling using the spar.

I threw a couple clecos into the new holes. Now there are 5 attach holes, and 2 abandoned holes (you can see them on the outside).

There are 4 total leading edge ribs that get this treatment. It's easy to tell which ones need it as you assemble the leading edge.

Then, I spent another half hour making sure all of the rib-to-main-spar holes were drilled. Now, they are ready for disassembly, deburring, prep for priming, priming, and assembly.

Oh wait. I still have to drill all the rib to rear-spar holes. I’ll do that tomorrow.

Before shutting down for the night, I snapped a picture of the two wings in the stands.

It's awesome to be at a point where I can see two big wings in the garage.

A half hour of attaching the outboard ribs to the wing stands, then 1 hour straightening and fluting rib flanges, then another half hour drilling ribs to the main spar.

I’m waiting on a 2-inch scotchbrite wheel from Cleveland Tools, so tomorrow I’ll drill all the main ribs to the rear spar and then I’ll find something else to do.

2.0 hours of big skeleton work.

Oh, and we shot this video the other day of the pups howling at a fire engine. I won’t ever not find this hilarious.

Prev | Next


Fluting and Straightening Left Wing Ribs

January 1, 2011

Prev | Next

Well, today was kind of boring. Between installing the toilet back into the powder room and sitting on my butt watching football, I managed to motivate enough to go do some fluting and flange-straightening on the left wing ribs.

I didn’t hang the outboard rib yet (still have to attach a 5″ piece of angle to help support the outboard edge), but here are the first 4 (of 14) ribs done.

I'm really liking this stand.

7 of 14 ribs done and hung.

All done.

Next up is matchdrilling the main ribs, then getting the leading edge ribs prepped, assembled on the spars, and matchdrilled. Then (because I’m working a little out of order), I’ll take all the ribs off and prep them for priming before starting to rivet the skeleton together.

A boring, but important hour of work today.

Prev | Next


Devinyled Right Tank

November 28, 2010

Prev | Next

Well, after spending 10 or so hours in and out of the (very cold) garage finishing the wood floors today, I felt like working on the airplane, but I felt like being WARM, so I thought some devinyling was in order.

I grabbed the next big part in the airplane parts room, and got to work on the kitchen table (sorry girlfriend!).

Because of all the rivet and screw holes and all the cris-crossing patterns, it took me an hour for this whole skin (not the usual 30 minutes per wing skin…those were easy).

Also, I know that the instructions say to just pull out all the vinyl from the insides of the tank, but I figure I’ll let the vinyl act as tape lines for the proseal I’ll be using to seal the ribs to the skin on the inside.

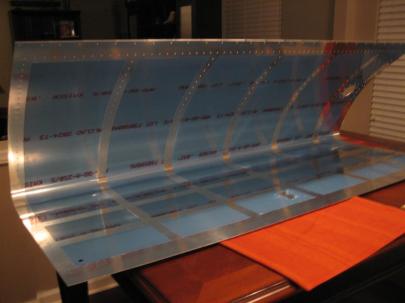
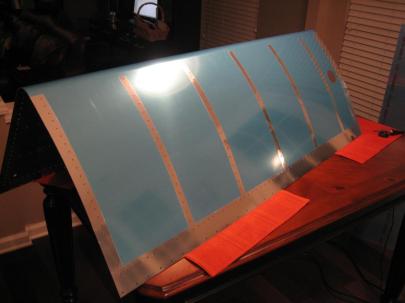
Here's the inside of the right tank after devinyling.

The top side.

And the bottom.

1.0 hour of devinyling fun tonight.

Prev | Next