I did a thing.

February 7, 2018

Prev | Next

(walks up…taps microphone…)

Hello? Are you there?

Remember me? I was building an RV-7 a few years ago.

Well, I’m back!!!

To make a very long story very short, back in 2013, I sold the RV-7 kit to a gentleman in North Carolina after reaching the conclusion that at my (then) current build rate, I would likely need a four-seater (RV-10?).

Well, after a smooth transaction, the family and I made 3 cross-country moves chasing fun Flight Test jobs around the country and finally settling somewhere in the midwest.

Standing in my large garage (ahem….airplane factory), I started dreaming about building again. On the exact same day, the gentlemen who bought my kit happened to post a FS: RV-7 thread on VAF. I didn’t really want to start a used kit, so I was thinking of a new set of preview plans, but I thought I’d investigate anyway.

Whoa, that’s my kit!

So, after a few more emails, and after figuring out that he hadn’t worked significantly on the kit, the wife (yes, girlfriend turned into fiance turned into wife) gave the nod and I purchased the kit back.

After months of getting the house sorted out, I flew out to North Carolina, rented a truck, and drove the kit back across the country over two very long days.

Side note: the RV-7 now has 0.1 air time. There was a hidden set of railroad tracks in Kentucky that caught be by surprise. I’m sure the truck was 8 feet in the air. (In reality, I’m sure it was only light on the wheels, but it was enough for me to stop, go in back, and inspect the kit.)

I was surprisingly sparse with the pictures, but I did take a few.

One of the truck with RV-7 kit inside:

16 foot truck somewhere in NC

One of the tiny storage unit I THOUGHT would hold the wings, but without the wings, because they DIDN’T FIT:

a 5×10 storage unit is about 3″ short of being able to hold RV-7 wings.

And poorly-taken picture of the wings in the garage.

Future aircraft factory…

Also, someone else reserved my N-number when I wasn’t looking.

  1. Immediate actions:
    1) Rename the build site.
    2) Convince a VAF moderator to change my username.
    3) Recommence building.

Prev | Next


SCBC in Salisbury, NC 2012 Edition

August 5, 2012

Prev | Next

Just like two years ago, I woke up early this morning and headed down, via car :-( , to the South Carolina Breakfast Club (SCBC) in Salisbury, NC.

Lots of airplanes, and a few RVs scattered here and there. have fun.

Prev | Next


Checklist and POH

November 8, 2011

Prev | Next

So I realize that I’m a little ahead of the game when it comes to checklists and POH, but I’ve been hot and heavy into them at work for my job, and I decided to try my hand at the RV-7 version.

They are obviously preliminary, but I wanted them to look nice, because I’m considering selling them. Not for the content (which would come from the builder/pilots), but for all the fancy formatting that I’m really perfectionist about.

Let me know what you think of these, and if you think anyone would buy a custom checklist/POH.

The finished POH. (Pages are half sheets; 8.5" by5.5")

A closeup of the tabs.

Sample of Section 4, Normal Procedures

Sample of Section 8, Airplane Handling, Service, and Maintenance. (I know I spelled Maintenance wrong, and yes, it says section 11. I told you it was preliminary.

Keep in mind with the checklists that these are painfully detailed. These describe all tasks. I could certainly make a condensed version with just the highlights.

The three checklists.

A closeup of the emergency checklist

I teach ALARMS to all my students in case of an engine failure while airborne.

A closeup of the passenger brief.

Let me know what you think!

Prev | Next


Château Morrisette

October 22, 2011

Prev | Next

Well, even though I haven’t been building over the last couple weeks, we have been having fun.

Today (which was actually before the post that just came out, sorry I know I got the posts backwards), the girlfriend and I hopped in the truck and started north.

A few years ago, we heard of a local (kind of) winery called Château Morrisette (yeah, I had to look that little “a” up…you type that thing by holding the alt key down and pushing 0226, when you let go a little â shows up!) I love being a nerd.

Anyway, Château (it’s so fun!! ââ) Morrisette has a dog theme, and everyone knows how much we like dogs. We also saw on the news that the leaves here are just past peak, and today’s going to be 65° (that one’s Alt-0176) out, severe clear blue skies.

Let’s go!

Driving north.

Ooh Pilot Mountain.

I can't remember where in VA we were at this point, but it's so pretty.

I'm pretty sure this is the Blue Ridge Parkway now.

This truck was going SOOOO SLOOOOW. (And we were okay with it, no rush, beautiful day.)

This is about an hour away. So pretty. There was some glare inside the car, so these pictures actually turned out better than it looked in real life.

Nice foliage.

A little mill on the side of the road. On the way back, there were a ton of people milling around (pun intended) taking pictures, etc.

I need a piece of property up here.

The next five or so pictures were crap, so the next one you get is us walking up to the restaurant.

Nice place.

The usual sign picture. (Why do I always do that?)

Apparently I do it with menus, too.

And winelists!

After lunch, we walked through the parking lot to the winery. What a great view from the parking lot.

Here's the winery.

There wasn’t really much going on other than a thousand people trying to taste wine. And by “taste,” I mean “when do we get to move on to those sweet wines?”

Really?

[snob on] I love that the east coast has started making wines, and I’m all for wineries using locally productive (sometimes sweeter) grapes for wine, but if you cater to the local tastes (sweet, sweet, sweet), then the more global palette will think you only make sweet wines. The family next to us actually said “when do we get to move on to those sweet wines? I can’t drink that dry stuff.” [snob off]

Oops, I just called them out and they're in this picture. Sorry!

Stop taking pictures of signs, Andrew.

Our favorite? This Cabernet Franc.

That dog kind of looks like Jack.

Nice cork.

Umm picture of a parking lot?

Our dog's rule, too.

Then, we headed back, and we took a ton of random pictures.

Past the peak, my butt. It's gorgeous.

TREE! (Nice picture, girlfriend.)

Seriously, I want some property up here.

Nice fence, too.

That grass is greener than mine.

Sigh. So pretty.


HALF A TREE!

Rolling countryside.

More beautiful foliage.

Finally starting to come down out of the mountains.

At least there's no one behind me.

We stopped at a little lookout on the way down.

These next few photos are the best of the trip.

I can see for miles...

There's pilot mountain in the distance.

...and miles...

...and miles...

MY FUTURE HOUSE!

Still pilot mountain.

Okay, after all those pictures, this one is kind of boring.

Andrew, stop taking pictures and get back to building the airplane. Next time, you can fly there, (but not home…not until the next day).

Prev | Next


Sugar Valley Airport (31A) Grand Reopening

October 8, 2011

Prev | Next

Well, today was the grand re-opening of the Sugar Valley Airport (31A) recently purchased and refinished.

They’ve got a paved runway, a 1000′ grass strip adjacent to the paved runway, and an almost 3000′ long lake that can be used as a seaport.

Sweet.

Without too much more commentary, I’d like to move on to the pictures. There’s a whole bunch of them…videos at the end.

Just another picture.

Just another picture.

This was early in the day, just a few planes (there turned out to be 60 by the end of the day).

A few trikes on the hill.

Hey, I know that airplane.

An RV!

Wuhoo!

Someone I know...

Same here.

There were more airplanes on the ramp.

Just another picture.

A nice Cessna 140 for sale.

Just another picture.

Just another picture.

Just another picture.

Just another picture.

Just another picture.

Just another picture.

Just another picture.

Just another picture.

Just another picture.

Just another picture.

Just another picture.

Just another picture.

Just another picture.

Just another picture.

Just another picture.

Just another picture.

Just another picture.

Just another picture.

Just another picture.

Just another picture.

Just another picture.

Just another picture.

Just another picture.

Just another picture.

Just another picture.

Just another picture.

Just another picture.

Just another picture.

Just another picture.

Just another picture.

Just another picture.

Just another picture.

Just another picture.

Just another picture.

Just another picture.

Just another picture.

Just another picture.

Just another picture.

Just another picture.

Just another picture.

Just another picture.

Just another picture.

Just another picture.

Just another picture.

Just another picture.

Just another picture.

Just another picture.

Just another picture.

Just another picture.

Just another picture.

Just another picture.

Just another picture.

Just another picture.

Just another picture.

Just another picture.

Just another picture.

Just another picture.

Just another picture.

Just another picture.

Just another picture.

Just another picture.

Just another picture.

Just another picture.

Just another picture.

Just another picture.

Just another picture.

Just another picture.

Just another picture.

Just another picture.

Just another picture.

Just another picture.

Just another picture.

Just another picture.

Just another picture.

Just another picture.

Just another picture.

Just another picture.

Okay, also, throughout the day, I took some video.

Prev | Next


Emergency Retraction

July 26, 2011

Prev | Next

Well, apparently I was a little less than forthcoming yesterday on the amount of man-hours completed on the airplane yesterday.

There was a woman-hour (or at least a fraction of one).

See the interior scuffing on the wing walk skin?

That's all girlfriend.

Back to your regularly scheduled programming.

Prev | Next


New Progress Charts

July 17, 2011

Prev | Next

Well. After more closely examining the progress charts I’ve been keeping up on the right side of the page, I figured out that the time-domain charts that google uses (in google charts) is NOT REALLY TIME DOMAIN!!!!

WHAT!?

So after a little engineering magic, I’ve now calculated (based on my last ten entries and last 100 rivets set), my expected completion date, and converted a series of points from date to percentage of that number. Google CAN plot things based on a normal non-time based x-axis, so now you can see the real shape of my progress in both regimes.

(Before, you were seeing how many hours or rivets for each additional entry. Now, you are seeing them in a time-domain represented by percent of expected completion.)

I’m assuming 2000 hours and 16,000 rivets. As I learn more (or blow through those numbers), I’ll update the targets and the charts should auto-update.

Also, as I speed up or slow down, the algorithms should auto-update the slopes of the lines. See how the rivets projection is pretty steep? That’s cause I set more than 100 rivets in the last 24 hours (post coming soon). While you won’t see the end date change (it would be depressing to see the absolute date), you will see the blue ticks climb the line.

It’s like watching grass grow.

Now. On to the pretty pictures.

Hours complete/remaining.

Rivets set/remaining.

I love being this nerdy.

Prev | Next


Someone Needs a New Home

February 23, 2011

Prev | Next

Well, long story short, my girlfriend’s father found this little guy in his pickup truck after a visit to the store.

(I’ll refrain from getting angry at someone who could just leave a puppy like that….)

Anyway, we went to go get him and are going to make sure he has a nice place to stay (and some good friends) until we can find him a good home.

He looks like a black lab mix (actually, he looks just like Jack did when he was a puppy…weebed feet and all, like a good lab). Black coat, white chest, and white toes.

Take a look, and let me know if you know of someone who would make a good home.

Aww, he's so little.

He can run, though.

Outside, trying to figure out this whole "marking" thing.

So cute.

AWWW!

I can't just keep putting "awww."

Yes I can. Aww!

Jack's interested.

Just a little guy.

Jack: Can I come up on the couch?

Please!?

Yes!

We're almost touching noses!

More aww!

Like father and son.

At least they are both UNC fans.

Aww.

Now for the videos!


Prev | Next


Roll Your Own In-Ear Headset

February 4, 2011

Prev | Next

Well, after some thought, and inspiration from watching the VAF thread on cheap in-ear headset alternatives, I decided to sacrifice my cheap backup headset (and about $15 from Radio Shack) and try my hand at this in-ear headset thing.

My mom got me these really nice in-ear headphones for my birthday last year (thanks, Mom!), and I’m going to design this thing around those.

I’ve done a ton of research, but still feel a little uneducated. After finishing, I feel much better.

I started at Cozy1200.com, then moved on to wikipedia to teach myself about TRS connectors, audio-taper potentiometers, and then audio output transformers.

Okay, now that you are an electronics expert, read on.

Here’s everything I got from Radio Shack. Since I’m sacrificing an existing headset, I didn’t need the jacks, plugs, and microphones from aircraft spruce or anything.
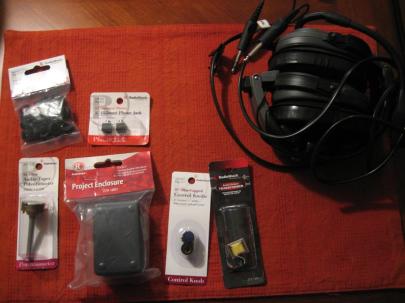
Christmas in February. Total cost ~$15.

Upper left is assorted grommets – $2

Right from there, two stereo 1/8″ panel-mount jacks – $3

Lower left is a 5K Ohm audio-taper potentiometer – $3

Then a 3″x2″x1″ project enclosure (perfect size) – $2.50

Then two 1/4″ knobs (for the potentiometer) – $2

Then an audio output transformer – $3
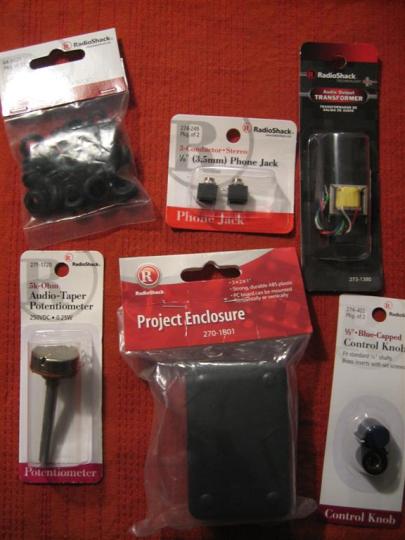
A little closer shot so you can see things more clearly.
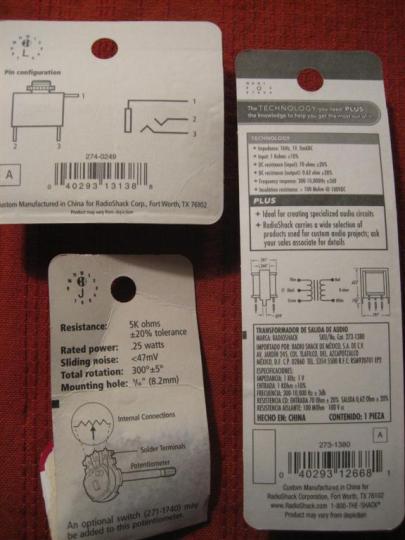
The back of some of the packaging. None of this information was helpful.

Okay, let’s get to sacrificing!

I peeled off the ear cups of my old headset, pulled back some foam, and saw a couple screws.
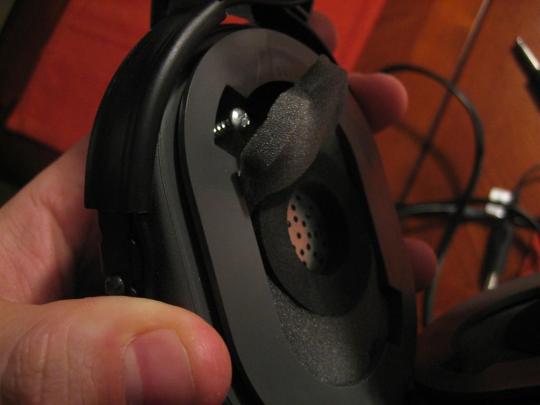
I was trying to make this non-permanent in case the project didn't work out, so I'm trying to be really careful.
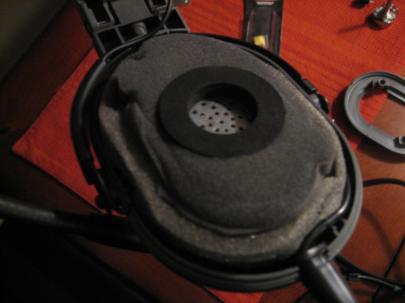
Plastic cover off.
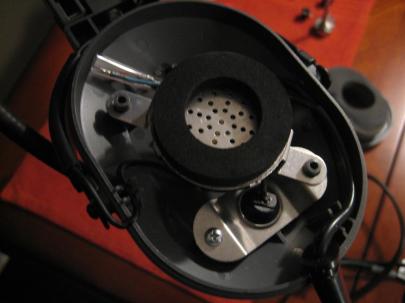
Pulled out the foam.
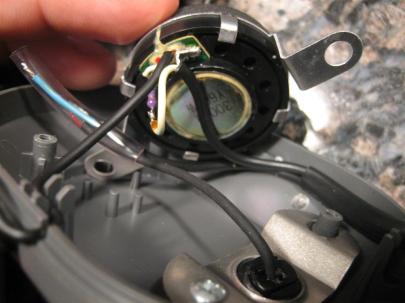
Then lifted the speaker.

The source electrons are coming in from the cord on the right. One conductor pair connects to the micrhone wires and goes back to the bottom right, which is an exit for the mic boom. The other pair goes through a resistor on the speaker and then on to the speaker in the other ear cup.

Since I am using my nice audio headphones, I don’t need to worry about the speaker stuff.

I carefully marked the microphone wires and heated up the soldering iron to start taking stuff apart.

After getting the wires disconnected, I unscrewed the retaining plate (lower right corner of the previous picture) and took apart the little plastic ball that holds the boom in place.
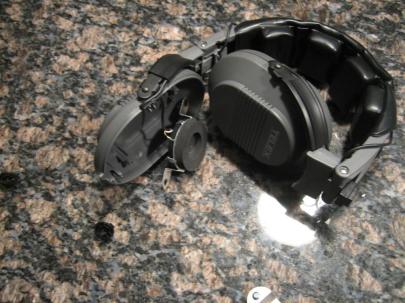
Headset with no more connections.

Sweet. Now I have what I need, the mic, boom, and cords that go to the proper aviation style jacks.
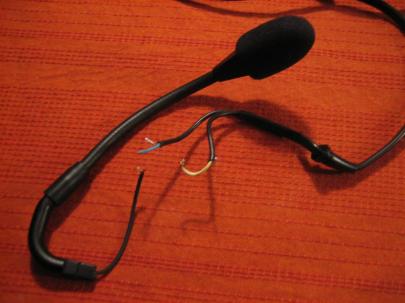
Green plus shield is for mic, yellow plus shield is for speakers.

I put the headset back together so I could still use it for noise attenuation.

I had this grand plan to not even touch the mic wire. I’d just let it run straight through the project enclosure.

I stripped a little covering off of the wiring run and tried to figure out which wire to cut.
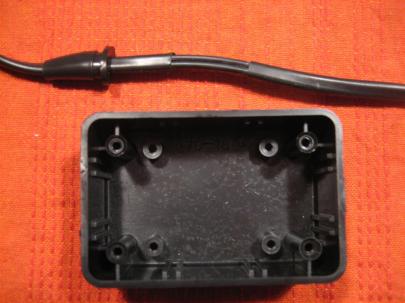
This is going to work great.

Then, I proceeded to find the mic wire, run my finger down to my now stripped wire run, and…

CUT THE WRONG WIRE!!!!!

Ugh.

So, I went ahead and cut both.
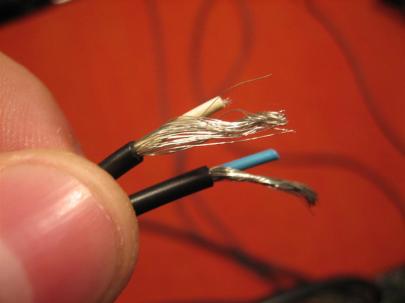
Here's what they look like up close.

Before I get too far with wiring, I need to figure out how this potentiometer works.

First, I hooked up my multimeter across the two outer terminals, and it read 4.65 KΩ no matter what the position of the pot.

Then, I hooked up my multimeter across the left and center terminals, and it read 0.00 KΩ when turned counter clockwise and 4.65 KΩ when turned counter clockwise. (I want a lot of resistance (no signal) when it’s turned counterclockwise).

Sure enough, when I hooked it up to the right and center terminals…
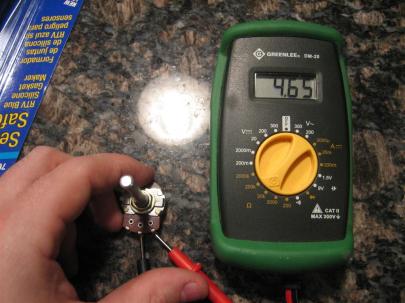
...4.65 KΩ when turned counter clockwise...
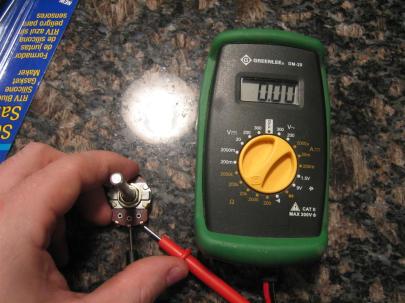
...and 0.00 KΩ when turned clockwise.

Now, let’s attach the knob.
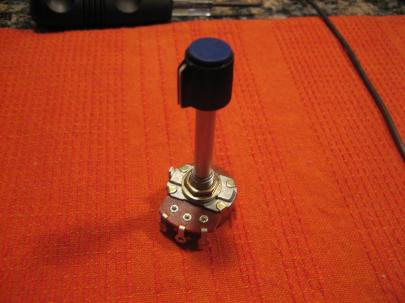
Umm... down in front?

I took it out to the garage and did a little metal removal.

Then, back inside to drill a few carefully place holes in the project enclosure.
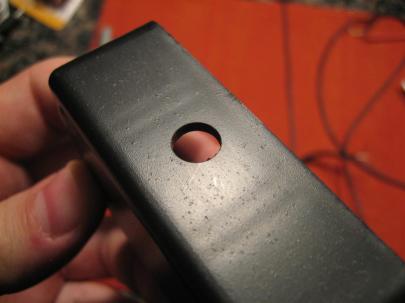
It's a hole!

Okay, I’ve thought carefully how I want this laied out. I’m going to lay this thing on it’s edge to the left of my left thigh when flying.

So, the volume knob is on top, the wires going to the plane jacks can go forward (or aft, because the knob turn direction is constant no matter which way the box is rotated), and the microphone and headphone jack will be on the other side.

Clear as mud?
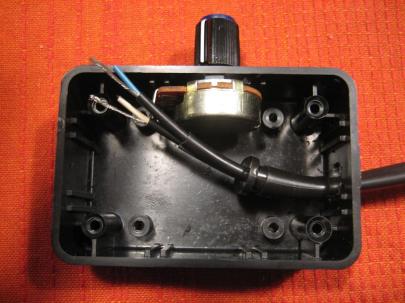
There's the knob on the potentiometer. (It barely fit).

Then, I pulled out some of the other parts. Here’s my stereo 1/8″ (phone) jack that works with most headphone plugs.

Note: My original headset is mono, so instead of pulling apart the plugs to make it stereo, I’m going to make a mono version to make sure this all works out okay. If it works well, I may try again, this time in stereo (with some music inputs, perhaps?).
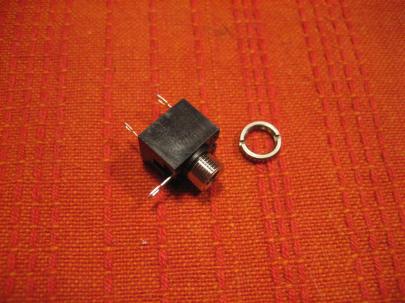
Stereo jack.

Okay, then I moved on to this really weird critter, the audio output transformer.

Without going into too much detail, there is a primary side which connects to the high impedance part of your circuit, and a secondary side, which connects to the low impedance side.

I looked at my proposed audio panel (GMA 240) and it’s output is rated at 150Ω impedance. I looked up my Klipsch headphones, and they are 18Ω impedance. I looked at my trusty David Clark headset (which seems to work great in every airplane) and it is 300Ω per speaker, or (since they are wired in parallel), 150Ω total impedance.

So I need to bump the 150Ω down to 18Ω.

“But Andrew”, you say, worriedly. “You bought a 1000Ω to 8Ω audio output transformer!!!!”

Yes, but (from my quick conversations with some of our avionics guys) the transformer is really a ratio thing.

Let’s say I just plugged my headphones into the jack. Since they are such low impedance, the audio coming from the panel would overdrive my headphones (because it’s putting enough power out for a higher impedance speaker). I’d turn the radio down so far for a correct volume that the guy (or girl) in the other seat wouldn’t be able to hear anything.

Really, it’s more important that the headphones are matched impedance, within reason of the audio output.

Anyway, if I bump down the 150Ω  by a ratio of 1000/8, it would be something like  1.2Ω. That’s no good.

Based on the back of the transformer packaging, I tested the Primary side (the one with green, black, and blue wires) of the transformer for DC resistance. It was supposed to be 70Ω.

When I tested the Green and Blue, it was 70Ω. When I tested the black and blue, it was 35Ω. Yes! I think I read something about this! I’ll just use black and blue and theoretically, I’ll get 150*(8/500) or 2.4Ω. Not exactly 18Ω, but better than overdriving the headphones.
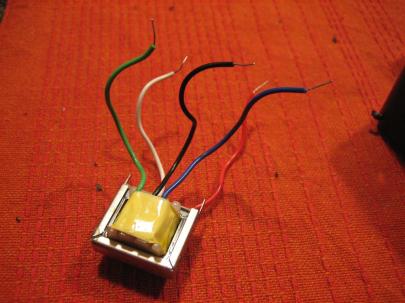
Audio output transformer, primary (1000Ω) side up.

Okay, let’s run some more wires so I can start putting this bad boy together!
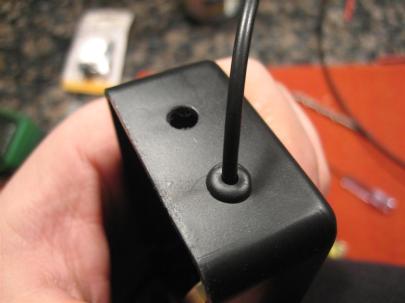
A couple of 1/4" holes for some grommets (that's the mic wire coming out) and the headphone jack.

Then, I soldered the microphone wires back together just like they were in the old headset cup.
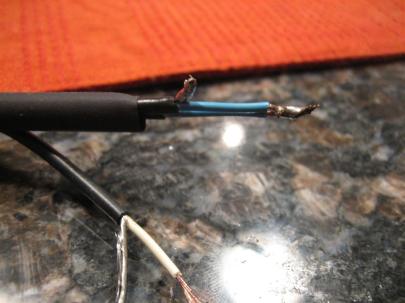
Not pretty soldering, but it will do.

Then, I hooked up the white wire from the secondary (8Ω) side of the transformer to the poteniometer.

And a little heatshrink (which has some solder on it...oops) for vibration resistance.

Then, I turned my stereo jack into a mono jack. (Remember from your wikipedia reading that tip is left, ring is right, and sleeve is ground.)
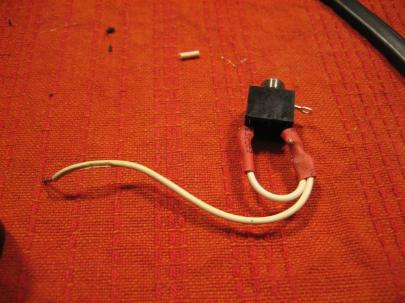
Sweet.

Then I hooked up the other wire of the secondary side of the transformer to the jack.
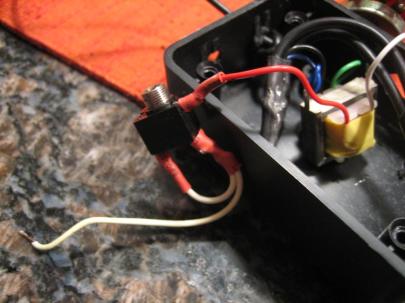
I'm getting close.

Then, the left/right side of the jack to the center connector of the potentiometer.
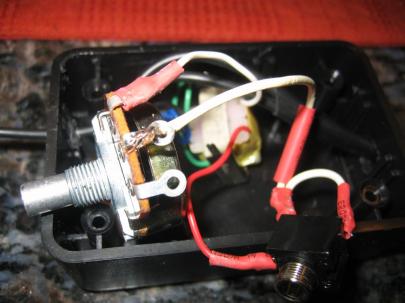
It's starting to get a little messy.

Then, very delicately mount everything and push everything into the box.
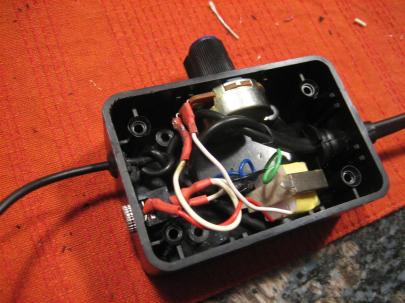
I think It's going to fit!!!

WUHOOO!
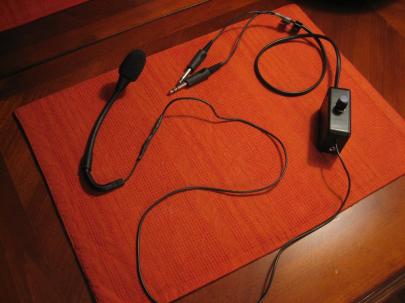
This is sweet. I can't believe I made this!

So, the existing mic from the old headset will somehow me mounted to my head (people have used heatshrink-covered piano wire, etc.), then that wire will go down, through my control box and into my audio panel through the old jacks.

My nice earbuds will plug into my control box, then go through the potentiometer (for volume) and the transformer (for impedance matching) and then to the audio panel.

As a test, I plugged my David Clarks into my home stereo system and set it to a reasonable volume. Then, I pulled in my new earbuds into my DIY headset box, then into the stereo (having turned down the volume on the box) and then slowly started raising the volume without touching the stereo system volume. When I got close to full volume, the volumes MATCHED!

WUHOOOOO!

I’m going to trust that the microphone works just like it did before, since all I did was unsolder and resolder. Now that I know the volumes match, I’m pretty sure this thing is going to work.

Tomorrow at work I’ll plug them in and see how it works.

Someone’s going to need to give me a ride in their airplane so I can compare the David Clarks with the new headset. (I’m also curious to see if my Klipsch earbuds are going to be as noise-attenuating as they are normally.

Another great night! (Doesn’t count as build time, though, since it’s not RV specific.)

Prev | Next


HondaJet Model 420 First Flight

December 21, 2010

Prev | Next

I suppose you want to know why I haven’t been working on the airplane very much recently.

Well, yesterday, we had the first flight of our first test airplane. You can find the pictures, and a link to the story at the two following links, but let’s just move ahead to the (officially released) pictures, shall we?

Pictures (video coming soon):  http://hondajet.honda.com/news/landing.aspx

Press Release: http://hondajet.honda.com/news/article.aspx?ArticleType=pressrelease&CatType=news_detail_97.xml

Prev | Next