EAA 1426 Fly-in Drive-in

April 10, 2010

Prev | Next

So I’m writing this almost a week later, but I’ll try to capture my experience last Saturday.

I woke up Friday afternoon set on having some contact with airplanes, so with a quick search of the EAA calendar, I had a fly-in-drive-in to attend. One of my buddies who owns a C182 was busy and said he wouldn’t make it, so it looked like I would be driving.

Here's 7am in NC looking around my garage corner. Not too bad, although the fence needs painting. Maybe next year.

A half an hour (and Chik-Fil-A biscuit) later, heading north on 77 toward Pilot Mountain.

Look closely at the vehicle in front of me. Crap, a State Trooper. no speeding today.

Another shot of pilot mountain.

Once in mountains, there are a couple nice vistas looking back toward the south and southeast.

77 looking south on the way up the mountains.

Once I pulled into  the airport (Twin County, HLX), I met a couple people standing on the ramp and up pulls a beige 182 with a 3-bladed prop. Wait a minute, my buddy Jon has a beige C182 with a 3-bladed prop.

That plane looks familiar.

I wonder who is going to get out.

It's Jon!

(Had to get a picture of him standing straight up.)

Anyway, while I’m a member at EAA 1114, their meeting isn’t until next weekend, and the EAA 1426 chapter fly-in promised pancakes. After some talking with Jon, we stumbled across this piece of machinery.

I’m going to try to capture the jokes about it. I take credit for none of them.

UFO (Unidentified Frying Object.)

So the joke goes that there was a retired Air Force officer who, as part of chapter 1426’s winter activity list, designed and constructed this beast to contend with some of the other pancake cookers out there.

Someone made a pretty funny joke about it being a disc-shaped metal object seen near the airport, and that it was a UFO (Unidentified Frying Object.) I actually spilled a little coffee out my nose at this.

Somebody then pointed out that it must be an advanced design project from the Air Force.

The the Air Force guy piped up and said…

"Nope, it's leaking oil. Must be from the Navy."

Much giggling ensued. No offense to the Navy, or any armed services branch.

Anyway, I got a couple action shots. The cooking surface is a 3/8″ aluminum disc (not aviation grade, the health department won’t approve that as a cooking surface because of some anti-corrosion additives or something). I was interested in that, but couldn’t find any more details. Anyway, th disc spins about 1 RPM, which, with 4 burners (note the manifold in the lower part of the next picture) at 90° from eachother, yields <counting>…18…19…20 pancakes every 3 minutes.

Two times around on the first side, then flip and one more time around.

Action shot! (That's a nice spatula, too.)

Look at how perfectly they are cooked.

Anyway,  I had to get a picture in front of it. Here I am, for only the second time in the blog. Sorry I didn’t comb my hair.

Who, other than me, would say, "Hey Jon, take a picture of me with the pancake cooker!"

Then, they showed me a partially completed RV-7 kit. They inherited it from someone, and are thinking about selling it. (I think they are more interested in completing it within the chapter, but they were interested me in at least taking a look.) If anyone reading this wants the contact info for them, let me know, I can put you in touch.

RV-7 horizontal and elevators.

An aquajet (ride for kids).

The wings.

More wing pictures.

Even more.

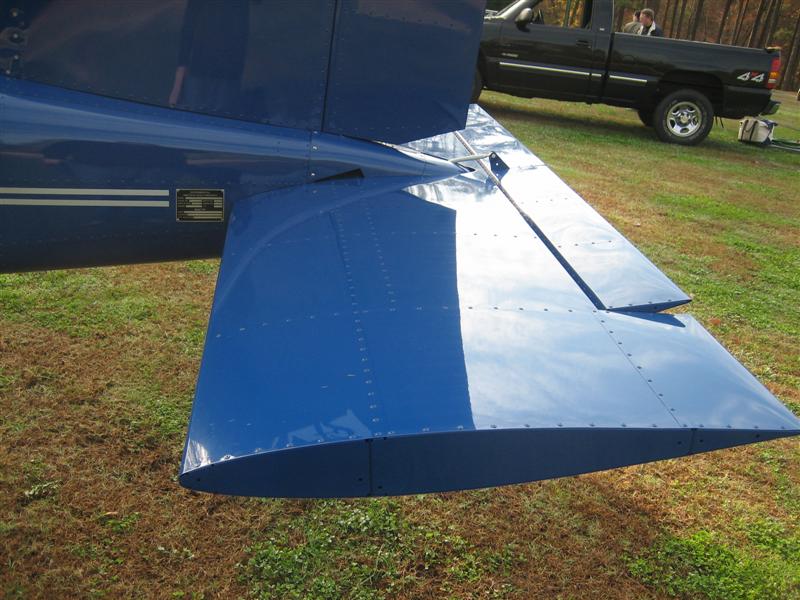
The vertical, rudder, flaps and ailerons.

These look like the older style wingtips to me.

Oops, forgot to rotate the picture.

Then we walked back to the main hangar, and I grabbed some pictures of the various projects there.

One of two helicopter projects in work.

This is "one of the first non-straight-tal 172s." Even though I used to work for Cessna (I was on the jet side of things), I can't remember what date that would have been early 60s?

I don't remember what I was trying to take a picture of here. Maybe the hangar doors and a 172...and half a ladder. Here are some hangar doors and a 172...and half a ladder!

Ooh, a King Air.

Looking back outside. The pancake cooker is in front of the helicopter being prepped for paint.

Here's the inside of that 172. No priming. No corrosion. Hmm.

A closeup of one of the helicopters.

Inside for breakfast, I got a picture of the sausage and egg chef and the EAA banner they hang up for meetings.

I'm hungry.

One of the very nice ladies there helping with breakfast came to Oshkosh in 2008 and got a picture in front of the Honda Aircraft Company’s HondaJet (HA-420). That’s our proof of concept aircraft.

A picture of a picture of the Model 420 HondaJet.

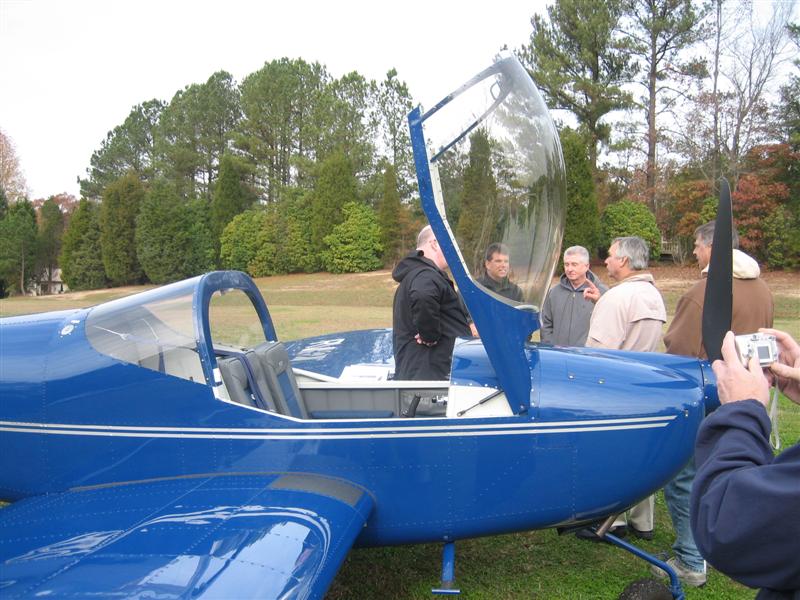
Then, Jon had to head out, so we grabbed a couple pictures in front of his plane.

We're bad at the whole lighting thing. Maybe we should try the back of the aircraft.
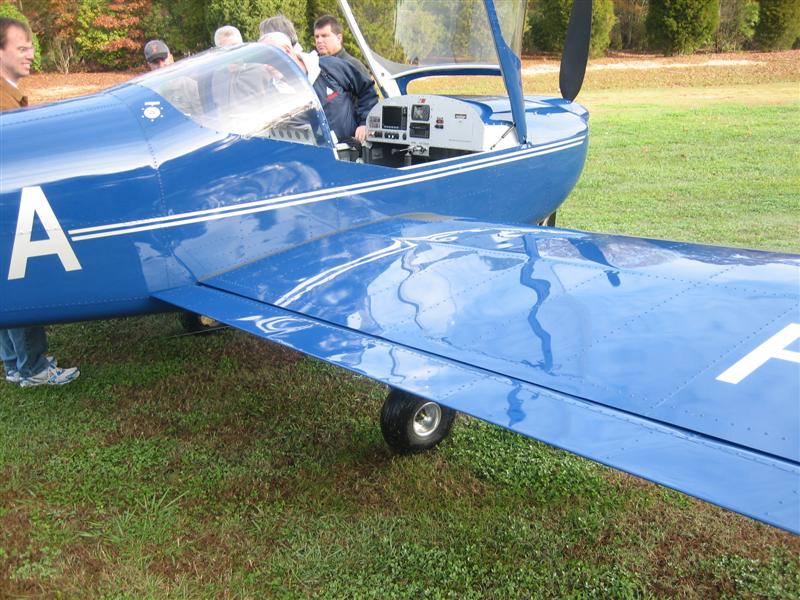
Much better. Jon told me it was okay for you guys to see his tail number. If you say so, Jon.

Then, I snapped some pictures of Jon’s departure.

Vroom.

Vroom.

Vroom.

Vroom.

Vroom.

Quiet vroom.

Then…I left, too. (How anti-climactic.)

On the way home.

That’s all. Now back to work on the airplane!

Prev | Next


Saw RV-12 at EAA 1114

November 21, 2009

Prev | Next

A couple things for the last few weeks. Per my last post, I’ve been increasingly interested in polishing. I think it is a a great look. Even though it is a ton of work, and everyone will flock to the airplane with their dirty little fingers, I think it would be an amazing look for the RV-7.

Also, I’ve set a date for the ordering of the empennage kit. Dec 12, 2009. We’ll see how that goes, but everything seems to be falling in place.

Today, I managed to scoot over to Cary, NC and check out the east coast RV-12 demonstrator (the “blue ship”). Wow, it was beautiful. Mitch (Vans’ east coast representative) was a really nice guy, and explained a lot of things about the RV-12. A couple things of note:

  • 555 hours from first kit to first flight
  • 65 hours for both wings to be completed.
  • “100 or so” holes to be drilled (almost all match-drilled)
  • Most of the holes on the kit are prepunched to final size (no drilling, deburring, dimpling)

Prev | Next


Built Another Workbench

September 20, 2009

Prev | Next

I was bored this weekend, and thinking more about shop layout. I am very happy so far with the first EAA workbench I built, but I want another one against the wall in my garage, to have some space for a bench grinder, bandsaw, and drill press.  As you can see from the pictures, I added 2 additional shelves (for a total of three). The top two are spaced at 6 inches (5.25 after adding 3/4″ plywood/MDF) and the bottom one was fitted so the 2×4 crossbrace is on the floor (even with the bottom of the main support leg, a couple inches off the floor after adding casters.)

See the nice workbench in the background? That's the new one.

See the nice workbench in the background? That's the new one.

Here's a closeup. Notice the two extra shelves? That should be nice to store some airplane parts. Also, take note of the $20 swivel stool purchased from Northern Tool. I couldn't resist. Sorry. Also, please forgive the top shelf. I ran out of MDF, so I had to put the scrap pieces there for the sake of the picture. Again, please accept my apologies.

Here's a closeup. Notice the two extra shelves? That should be nice to store some airplane parts. Also, take note of the $20 swivel stool purchased from Northern Tool. I couldn't resist. Sorry. Also, please forgive the top shelf. I ran out of MDF, so I had to put the scrap pieces there for the sake of the picture. Again, please accept my apologies.

Prev | Next


EAA Workbench Completed

August 30, 2009

Prev | Next

After some planning about space and layout in the garage, I decided to dive into the construction of a workbench. I’ve heard (and seen on some builder’s sites) some of the EAA 1000 Workbenches, and I thought that would be a good first workbench. I’ll use that one for awhile before building a second one, hopefully with some improvements.

UPDATE: I built a second one. See the other post for pictures of the second one.

EAA Chapter 1000 Standard workbench plans.
EAA Chapter 1000 Standard workbench instructions.

Here’s a couple before pictures of my garage.

Workbench Construction 008

I love the lighting. There was a single incandescent bulb in the gargage before. Also, I lined the garage doors with some double sided bubble foil I bought off eBay. I would say adding that decreased the temperature in my garage in the middle of the summer by 10 degrees. Good investment.

Workbench Construction 009

I also installed pegboard along the entire NW wall and on the half of the SE wall that wasn't finished. The tools are just thrown up on the wall for now; I promise to get organized before I purchase the empennage kit.

Workbench Construction 010

Some shelves I built early after moving in for more space. Look closely, and you can see my cornhole boards supporting some old laptop speakers. When hooked up to my iPhone, they are loud enough to hear through my hearing protection (which I use religiously with power tools).

Workbench Construction 011

Smaller shelves on the SE wall (and more pegboard). Good for tools.

Workbench Construction 013

Here's the top of the workbench (you build from the top down). Instead of 5 feet (60"), I decided to do 6 feet (72"). I added another rib (airplane talk!) which makes the spacing 14.1" on center (Instead of the ~15" mentioned in the EAA plans).

Workbench Construction 015

The legs and leg doublers got cut and mocked up. And no, I am not working barefoot.

Workbench Construction 016

Then I built the lower shelf unit (using scrap wood for spacing).

Workbench Construction 017

It's actually starting to look like a workbench.

Workbench Construction 018

After adding the other leg doublers, I fastened some 200 lb locking casters on the bottom. I stuck to the plans on height (33") because I knew the casters would add a few inches. My sawhorses were built to 36", and I am happy with that height. The finished work bench is pretty close to 36".

Workbench Construction 021

Flipped and looking like a workbench.

Then I cut some Medium Density Fiberboard (MDF) for the benchtop, overhanging each side by about 3". I've been told to do this so I can clamp airplane parts to the bench more easily. Figuring I'd be replacing the top a few times during the project, I secured it down with some countersunk screws. Hopefully I'll get the vise bolted down in the next few days.

Then I cut some Medium Density Fiberboard (MDF) for the benchtop, overhanging each side by about 3". I've been told to do this so I can clamp airplane parts to the bench more easily. Figuring I'd be replacing the top a few times during the project, I secured it down with some countersunk screws. Hopefully I'll get the vise bolted down in the next few days.

Is this where I say, “Ta Daaaa…”?

Prev | Next