Prev | Next
I am a lucky guy. I live about an hour away from George and Becki Orndorff of GeoBeck, Inc. See their website at fly-gbi.com. Last night, after a wonderful day of flying a Cessna 310H to Gilliam McConnell and having lunch at the Pik-N-Pig, I drove down to see George and Becki and purchase a practice kit. After graciously forgiving me for bothering them on a Sunday evening, George showed me their RV-7A (N289GB). It was immaculate. I asked George about a few things, the answers to most of which were expected. Example: Why shouldn’t I build? (“You should!”) Do you love it? (“Absolutely!”) Everyone I ask has nothing but wonderful things to say about their RV. Sounds like I need to go ahead start!
Two of his answers were more interesting. I asked him about tip-up versus slider, noting that everyone seems to like what they have. His simple response: “I’ve built both, and the slider is better. I won’t build another tip-up.” I was sold, but I pushed to find out why. Basically, he explained that the slider was more sturdy, cooler (both hero-pilot style and temperature style) and easier to build. Easier to build? That’s contrary to what I’ve heard, but George is obviously trustworthy in the RV expertise area, so I’ll take is word for it.
The other answer was to “What modifications should I do to the RV-7?”
He told me to put the RV-8 rudder on the RV-7 (instead of the RV-7/9, larger “uglier” rudder). I haven’t seen pictures side-by-side (to determine if I agree with the ugly part), but George said the larger rudder on the 7/9 is for spin recovery. I’ll need to think about this some more. I am not too concerned about spin recovery (he said it only improved the recovery from 1.5 turns to 1 turn), so I think the choice will come down to aesthetics, and the fact that the trailing edge of the 8 rudder is bent, while the 7/9 rudder is double-flush riveted.
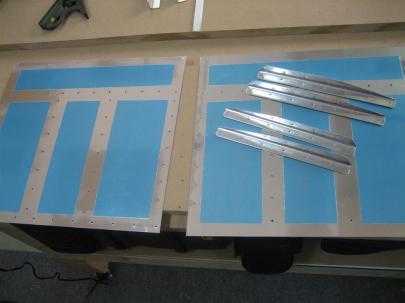
Anyway, I got home with the kit, and had to join the girlfriend for dinner, so all I did was unpack the kit, and lay it out nicely so I can take pictures tomorrow before I get started.
Most importantly, the kit is a Van’s kit (some other builders were wondering what the difference was), but also comes with GBI’s sheet metal tools DVD. $55, which, with some subtraction skills, puts the DVD at $20. I watched the DVD last night, it runs about 60 minutes, and was really helpful with introducing me to some of the tools and techniques I am going to become intimately familiar with over the course of the project. He also walks through the actual construction of the practice kit. It’s worth the $20. I also bought the pre-punched empennage kit videos. Those should come in handy soon enough.
Prev | Next


 Posted by Andrew


